

I start by pulling everything out of my shed because organizing requires visibility. I measure my walls, ceiling, and floor first; there’s nothing worse than buying shelves that won’t fit through the door.
Then, I sort items by category and discard anything I haven’t used in a year. I install heavy-duty shelving with pegboards for small tools. Wall hooks manage long-handled gear, a fold-down workbench saves floor space, and ceiling racks store seasonal bins that I label clearly. I schedule monthly cleanouts now since my previous system of remembering where things go was ineffective last spring. Having a structured approach helps maintain organization.
Clear Out Your Shed Completely
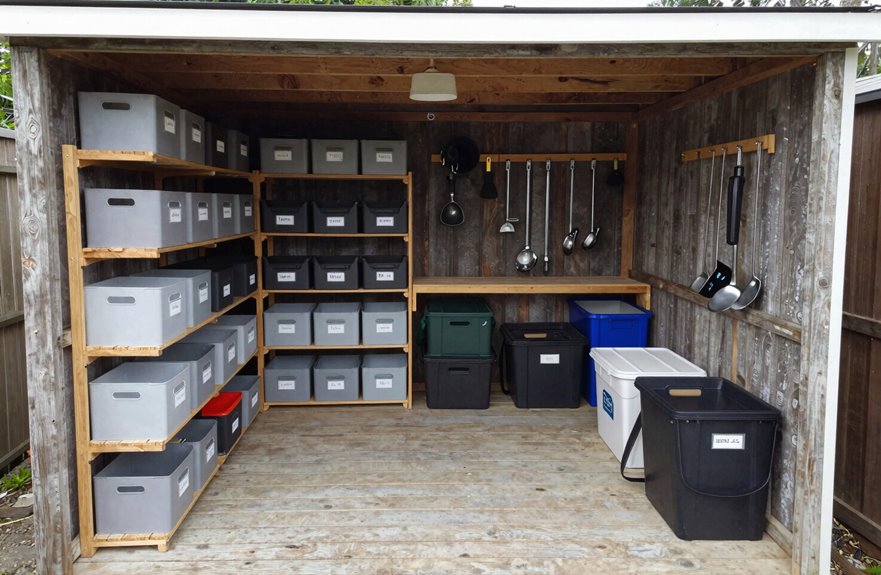
Sometimes I open my shed door and immediately want to close it again. We’ve all been there. Real shed organization starts with a blank slate. I pull everything out, yes, everything, and face the chaos head-on.
Decluttering isn’t glamorous. I ask myself when I last used each item. Over a year? It’s gone. I donate, recycle, and move on. What remains gets sorted into clear groups: garden tools here, power tools there, seasonal items in another pile.
Decluttering isn’t glamorous, but it’s necessary. If I haven’t used it in over a year, it’s gone.
Next, I sweep, wipe, and inspect for pests or damage. There’s no point in installing storage solutions on a shaky foundation.
I’m ready to plan. Vertical storage will maximize space. Labeling and zoning will help maintain order. I’ve learned from experience that skipping this step means I’ll be reorganizing again next spring.

KEEP LONG-HANDLED TOOLS UPRIGHT AND EASY TO REACH. This vertical resin storage shed or tall outdoor storage cabinet fits long-handled tools, patio umbrellas, and gardening supplies, so yard gear stays organized and off the ground.

KEEP LONG-HANDLED TOOLS UPRIGHT AND EASY TO REACH. This vertical resin storage shed or tall outdoor storage cabinet fits long-handled tools, patio umbrellas, and gardening supplies, so yard gear stays organized and off the ground.

Dimensions & Size: Exterior measures 25 5/8" x 18 7/8" x 69 3/8", with interior shelf dimensions of 17.65" width x 13.31" depth, providing ample storage space for various items.
Size Up Your Storage: Measure Walls, Ceiling, and Floor
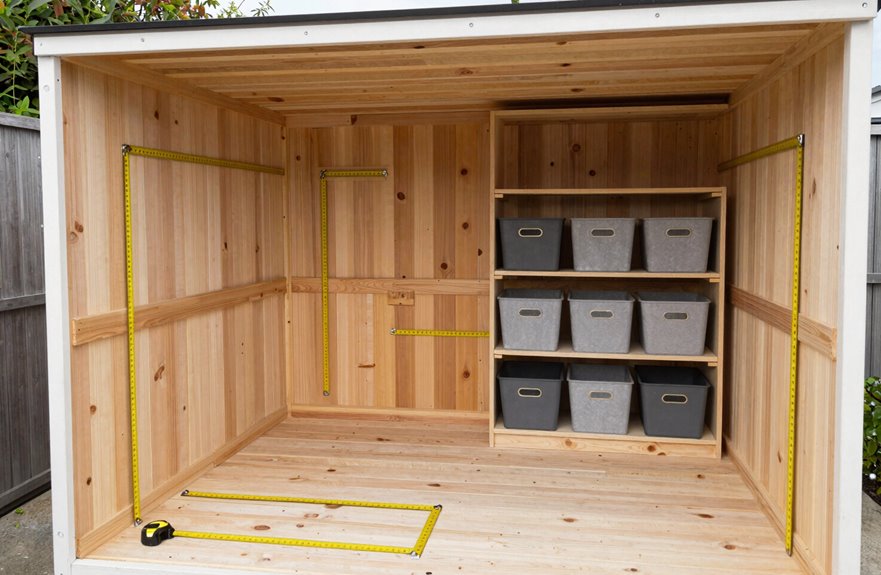
I grab my tape measure and start with the walls, because I learned the hard way that eyeballing it leads to shelves that don’t fit; I still remember the three-inch gap I left last summer. Next, I check the ceiling height to see if I can fit a loft for those bulky holiday decorations I’ve been tripping over. Finally, I map the floor space, noting where the door swings and how much weight these old boards can actually handle before I buy a single bracket.

METAL NAILBOARD: Our peg board panels are made of high quality steel with a powder coated finish that is strong, scratch resistant and easy to clean. Each small pegboard has a weight capacity of up to 50 lbs. This is a favorite product for tool organizers, DIY enthusiasts, store owners and office workers.

All Metal Material: Our garden tool organizer, both backboard and hooks are made of iron, which makes it more durable and solid.And its load-bearing capacity far exceeds other usual ABS material tool hooks. It is deal for various tools like shovel, rakes, bikes, broom, mop, trust that what you get is what you see,any dissatisfaction please contact our customer service team

EXTREMELY STURDILY MATERIAL: The garage hooks is made of premium heavy-duty solid steel and the plate are reinforced with three layers, providing superior load capacity, the utility hooks are great for ladders, sports equipment, lawn trimmers, gardening equipment and other bulky items!
Measure Wall Dimensions First
Where do you even start when your shed looks like a tornado hit a hardware store? I grab my tape measure and dive into shed measurements before buying a single bin.
I picture this:
- My tape stretched along warped plywood, catching on splinters.
- Sharpie marks bleeding into damp corners where spiders camp out.
- Me muttering as I remeasure the same wall twice because I forgot to write it down.
Wall dimensions come first in my perimeter planning. I record every interior surface, noting doors and windows that will disrupt my shelf layout. Assessing obstructions prevents me from mounting brackets where vents are located. My layout scaling starts roughly; I sketch squares on graph paper, erase, and start over. I’ve learned that proper layout scaling avoids the disappointment of a new rack that won’t fit through the door.
Assess Ceiling Height Options
Once I’ve mapped out my walls, I look up to assess the overhead space. Most sheds provide six to eight feet of ceiling height, but I always check multiple spots wall-to-wall to determine the true maximum clearance. My last shed had a ceiling that sloped, which affected the usable height.
Taller ceilings allow for lofts or hanging racks for seasonal gear. However, I won’t mount anything until I’ve calculated the actual headroom. Subtract the height of your tallest bulky items, light fixtures, and ventilation needs from the total. You need at least six feet of clearance above workbenches and doorways unless you want to constantly duck when reaching for a rake. Plan wisely and utilize vertical space effectively.
Map Floor Space Availability
How much room do you have to work with down there? Guessing can lead to bruised shins and regret, so grab your tape measure.
My shed floor plan started with three essentials:
- Length and width of every wall, since my “eyeball it” method failed spectacularly.
- Door swing clearance; I once blocked mine completely with a shelf I couldn’t return.
- Ceiling height minus overhead beams, as vertical storage only works if items actually fit.
I map floor space carefully now. Storage zoning keeps my tools separate from holiday decorations, preventing clutter. I leave clear walkways of at least two feet because tripping over a rake disrupts organization.
Sort and Declutter Your Shed
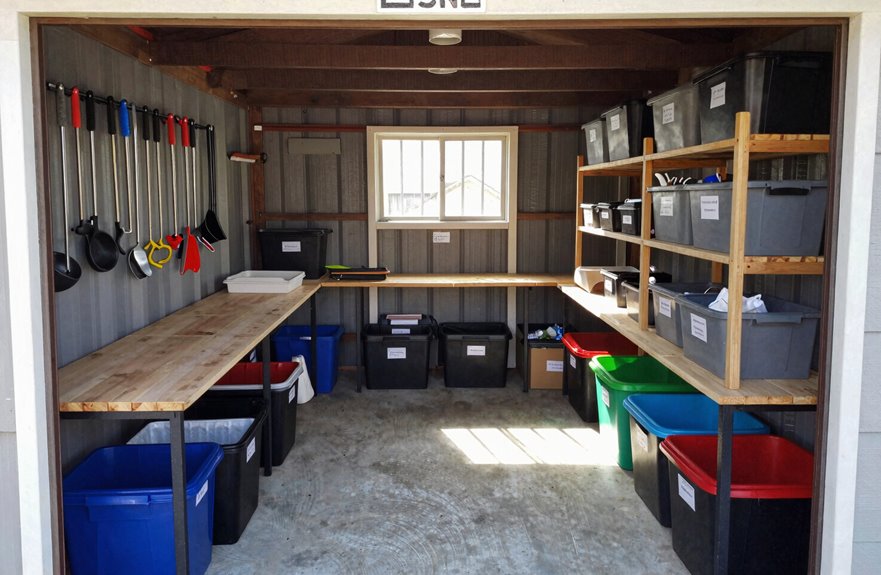
I start by hauling everything out of my shed, including that mystery box I haven’t opened since 2019, so I can see exactly what I’m working with and sweep away the cobwebs that appeared since last year. Once I have it all in the yard, I sort everything into piles: shovels with shovels, extension cords with extension cords, and three identical half-empty bags of potting soil together. I evaluate what I actually use. If I haven’t touched that rusty hand saw in eighteen months, it’s not vintage; it’s just taking up two square feet that could be used for something functional.

MULTIPLE STORAGE OPTIONS: Features 5 slots and 6 hooks supporting up to 7.5 pounds per slot, perfect for organizing various cleaning tools efficiently

【High-Quality Material】Our garden tool storage hooks are made of heavy-duty steel metal material with a non-slip rubber coating. They securely hold items in place, protecting their surfaces from scratches or damage, and preventing the garage hooks from slipping or rusting.
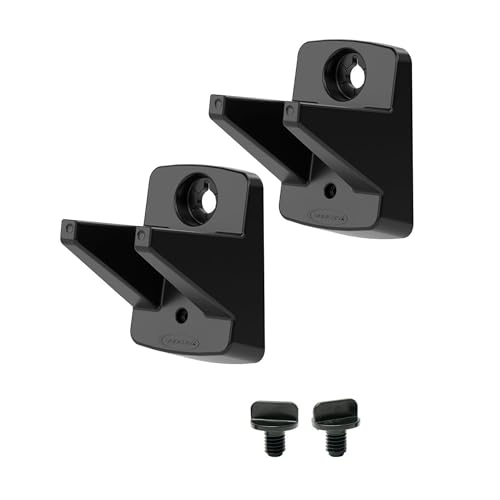
Versatile Tool Organizer: Compact wall-mounted hook system stores long-handled tools like mops, brooms, or rakes for easier access and cleaner spaces
Empty Everything Out
The first step to reclaiming your shed is pulling everything out—every last rake, half-empty paint can, and mystery box you’ve been avoiding for three years. It may seem easier to leave that organized chaos alone, but you can’t build a real storage solution on top of a mess.
When you empty out completely, you’ll finally see what you’re working with. I discovered:
- A family of spiders had claimed my corner shelf
- Three identical hammers I definitely didn’t need
- A 2007 calendar I apparently couldn’t part with
This is your opportunity to declutter. That broken weed whacker? Gone. The rusted bucket with no bottom? Bye. Shed organization starts with admitting what you’ll never fix. I kept promising myself I’d repair things I never touched. Don’t make the same mistake.
Group Similar Items
Once everything’s spread across your lawn like a yard sale nobody asked for, you’ll need a system or you’ll just shove it all back in.
I start organizing by category. Garden tools huddle together. Power tools form their own pile. Seasonal decorations get their corner. It’s oddly satisfying to see everything grouped together.
Decluttering happens naturally here. I spot three identical trowels and a weed whacker that died in 2019. If I haven’t touched it in a year, it’s probably not my future.
I grab a notebook for inventory. “Two rakes, one broken.” This guides my storage bins later—16-gallon totes for bulky items and smaller 5-gallon ones for hand tools.
Shed optimization begins with knowing what you’ve actually got. I have skipped this step before, and it won’t happen again.
Remove Unnecessary Clutter
Why drag everything out just to put it back? I learned this the hard way. Decluttering transforms shed organization from chaos to clarity. I pull everything onto the lawn and sort ruthlessly.
- Three rusty rakes I’ll never use
- A broken birdbath I meant to fix last spring
- Boxes of “maybe someday” projects gathering dust
My rule is simple: if it hasn’t been touched in a year, it goes. I donate, recycle, or trash without hesitation. This inventory reveals the storage solutions I actually need. My space planning improves dramatically when I see the real square footage—about 120 square feet of pure possibility. I document everything to budget for sturdy shelving and clear bins. No more guessing. The result is a shed that functions effectively and efficiently.
Choose Heavy-Duty Shelving for Tools and Equipment
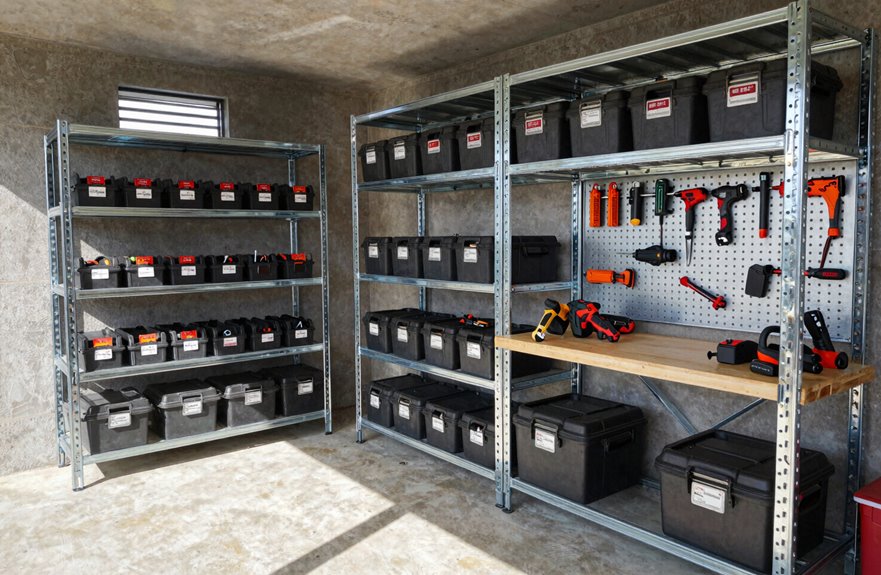
When I first loaded my shed shelves with gear, I didn’t think twice about what they’d hold until a shelf sagged under my circular saw. That disaster taught me that proper shed organization starts with heavy-duty shelving built from 2x4s and plywood, backed with scrap wood for extra support. I anchor mine into wall studs with strong screws, avoiding any wobbliness. Level shelves with solid bracing are essential, especially if you’re storing power tools or automotive gear. I’ve replicated this setup throughout my shed for consistency. For smaller items, I pair these sturdy shelves with labeled bins in front. Your future self will appreciate an effective tool storage solution.

USA BASED & FAMILY OWNED - Our patent pending handy connectable garage ceiling storage racks design was invented by father and son tradesmen looking for a handy way to unlock more storage. The rails allow you to connect as many together as you can fit in your garage, shed, or workshop space.

900 lbs Tested, 450 lbs Rated Weight Capacity: Our overhead garage storage rack undergoes rigorous double load testing (900 lbs) to ensure unmatched safety and durability, supporting up to 450 lbs for your tools and equipment.

Expand Ceiling Space— The garage overhead storage rack allows you to move storage bins from the floor to the ceiling, stacking them neatly on the rack so you can easily access items while keeping your storage area tidy and organized
Install Pegboards for Small Tools and Hardware
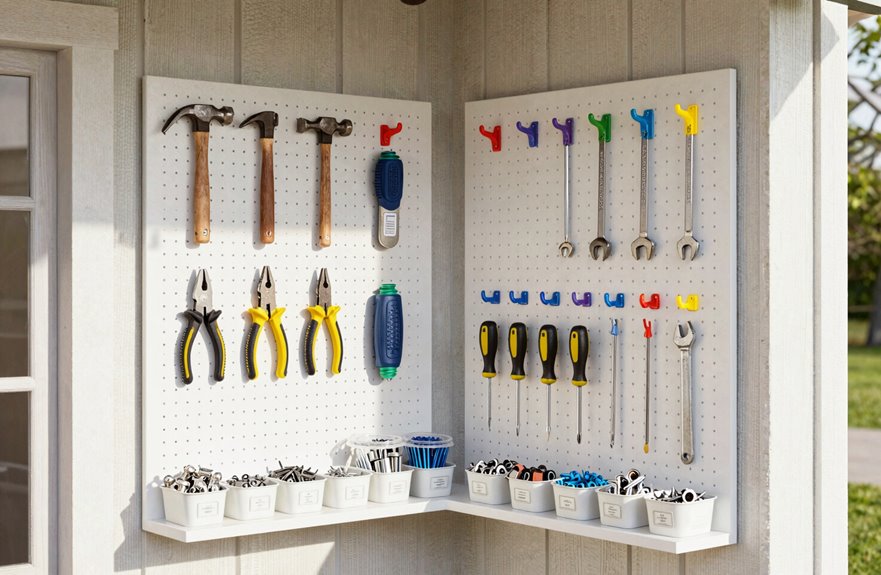
I often lose my favorite Phillips head screwdriver when I need it most, usually right before I’m halfway through a project and covered in sawdust. This is why I’m installing pegboard panels in my shed; three 24-inch sections will be mounted directly to the studs.
My vision for the wall includes:
- My hammer hanging front and center, a reminder of every thumb I’ve ever hit.
- Rows of hooks holding wrenches and small tools, creating a colorful display.
- Extra space up top for sanding blocks that I will likely forget I own.
I’m using pegboard hooks sized specifically for each piece of hardware, as I’ve learned that one-size-fits-all often leads to frustration. I plan to paint mine Hale Navy with window molding trim for a polished look. Proper installation is crucial; level mounting and secure fastening will prevent heavy tools from sagging. An open layout is far more efficient than digging through drawers.

Pay Your attention: For sheet rock wall or drywall, pls find the Supporting Strips to make sure the both brackets can screw into, if you Nailed the fold down wall mount desk table for small spaces in the middle position, it is the hollow wall and will not sturdy.

【DIY Your Room】Wall mounted shelving is a great way to add storage in your house without using up valuable floor space. In addition, its adds character to any room in need of an upgrade. Apply for bookshelf, collapsible RV shelves, coffee bar shelf, towel shelf, garage workstations or office workbenches..In reality, what you decide to create with your new wall shelf brackets is only limited by your imagination.
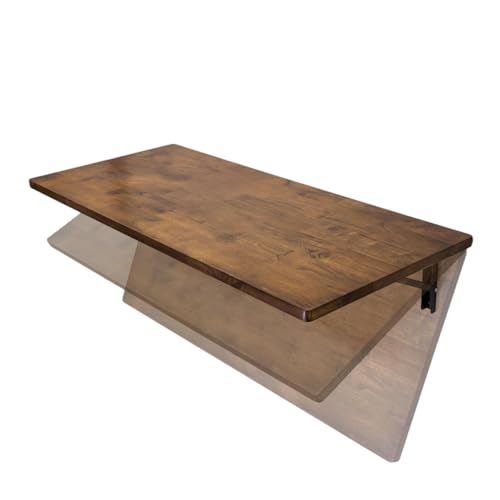
WALL-MOUNTED FOLDING WORKBENCH – Create a sturdy foldaway work surface for garage, workshop, laundry, RV, apartment or home office use. Built for buyers needing folding workbench, folding work bench, folding work table, foldable work table, foldable work bench, folding work bench table, fold down work bench, wall mounted folding work table and wall mounted workbench utility in one compact 40 x 18 in setup.
Organize Nails and Screws: Jars, Drawers, or Bins?
After spending twenty minutes last spring digging through a coffee can full of mixed hardware only to find I was out of the exact screws I needed, I became focused on sorting my fasteners.
I’ve tried three setups. Mason jars with spray-painted lids look charming on my shelf, and I feel a sense of pride when friends notice. The labels help, but really it’s the visibility that saves me; I can grab the right jar without second-guessing.
Drawers with dividers work for bulk items, and I have those too. For everyday reach, wall-mounted bins are the best option. I can check inventory at a glance now. No more digging through mixed bins like some chaotic raccoon. My future self appreciates this organization.

Durable Construction: Crafted from imported High-Density Polyethylene (HDPE) with blow-molded double-wall panels, this storage cabinet is far sturdier and more durable than wood alternatives. It can withstand various outdoor conditions, ensuring long-lasting use for your storage needs

Durable, Weatherproof Resin Construction: Built from heavy‑duty polypropylene resin reinforced with steel, this shed is fully weather‑resistant and UV‑protected, ensuring it won’t peel, rot, or rust.

Shelf Organizer: Adds extra storage inside Suncast Vertical Sheds to increase usable space for gear, tools, and bins
Use Clear Bins to Sort Supplies by Project
Sorting fasteners taught me a lesson: you can’t organize what you can’t see. That’s why I switched to clear bins for my shed storage, and it changed everything.
I group supplies by project—tiling, plumbing, painting—so each 12-gallon container holds what I need. No more digging through mystery boxes. The inventory visibility is immediate; I can spot my pipe wrench or trowel without popping a single lid.
Here’s what this looks like in practice:
- Morning light hits transparent sides, revealing contents instantly.
- Stacked bins create color-coded towers of organized potential.
- Grab-and-go portability means one trip to the driveway, not six.
Pairing clear bins with labeling on lids keeps project organization intact even when I’m not diligent about putting things back. A well-organized shed enhances efficiency and accessibility.
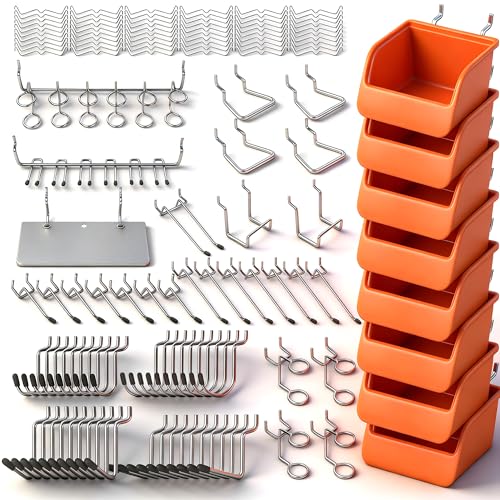
Product includes 15 different types of hooks and organizers, and is fully functional for a wide range of hanging applications.

Reclaim Your Garage Space: A cluttered garage doesn’t just take up space—it slows everything down. This garage tool organizer wall mount helps you reset that environment, lifting tools off the floor and turning unused wall space into a clean, functional setup that restores structure and flow to your garage

Organize Your Tools with Ease: This pegboard keeps tools neatly organized instead of loose on your workbench or crammed into a small toolbox. The perfect solution for tidying up your workspace and finding what you need quickly.
Hang Long-Handled Tools on Wall Hooks
Once I stopped tripping over my rake for the third time in one afternoon, I knew the floor had to go. Wall-mounted storage transformed my shed organization.
After the third rake tumble in one afternoon, floor storage had to go—wall-mounted hooks changed everything.
I installed sturdy wall hooks directly into studs. Heavy rakes, shovels, and leaf blowers need solid support. I spaced hooks vertically to prevent handle overlap. No more snagging when I grab my hoe in a hurry.
I mixed single-prong and double-prong hooks for different tool head shapes. Some tools hang straight; others angle just right. It may not be fancy, but it is functional.
I added simple tool labels above each hook, making it easy to spot my pitchfork. My long-handled tools remain visible, accessible, and off the ground where they belong.

HEAVY DUTY WALL MOUNTED TOOL RACK – BLACK COLOR – PACK OF 2 – Built from industrial grade steel with precision welded construction; this Garage Wall Organizer includes 2 sets of fixed one piece 36 inch racks, with total 72 inch width with 8 PVC coated hooks designed for secure tool storage; supports up to 500 lb total capacity for garage wall storage systems garage storage wall garage storage wall mount heavy duty tool organizer and wall-mounted tool organizers use without bending or flexing

Versatile Functionality: The garage organizer is equipped with six double-layer hooks and three rails. Every rail is engineered to fit the standard 16-inch on-center stud spacing, well suited for garages, sheds, and workshops in need of robust organization
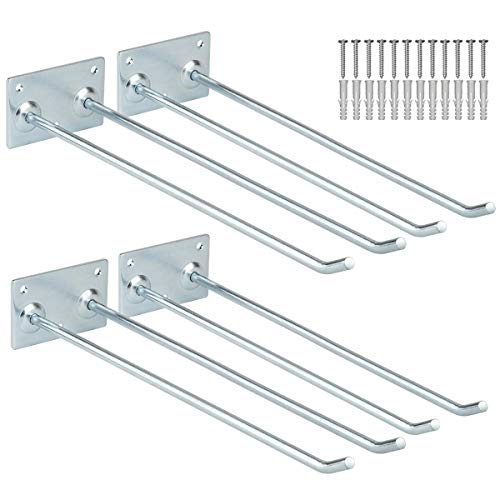
Multi Purpose: 12 inches wall mounted garage storage hooks for organization especially with folding chairs, ladders,hoses, cords, cables, brooms, racquet, rakes, shovels and long-handled garden tools.
Add a Fold-Down Workbench That Frees Floor Space
I learned the hard way that a bulky workbench turns your shed into an obstacle course, so I’m swapping mine for a fold-down model with locking casters and a 100-pound weight rating that tucks flat against the wall. You’ll want one with a lower shelf for your drill and fastener bins, plus wheels that fit through a standard 32-inch door frame, unlike the behemoth I bought last year. This setup provides a sturdy DIY project hub when needed and increases available floor space when it’s not in use.

MAXIMIZE YOUR VERTICAL SPACE: FULUPET 5-piece rail system creates 4 secure slots to get your storage bins off the floor and onto the ceiling. Ideal for reclaiming valuable parking space and decluttering your garage

Strong Load Bearing Capacity: Constructed from high-strength steel, our ceiling storage rack can bear up to 176 lbs, offering long-lasting durability and resistance to deformation, ensuring reliable support for heavy items over time

The garage storage system is expertly designed to manage space optimally. It can accommodate up to 4 bins on top, making it ideal for garages or sheds to keep things organized. (Please note, bins are not included.)
Space-Saving Work Surface
Where are you supposed to plane a board or fix a wobbly chair when your shed floor is packed with bikes, bins, and that lawnmower you think still works? I’ve experienced the struggle of tripping over garden hoses just to find a flat spot. That’s why I installed a fold-down workbench.
This space-saving solution mounts directly to your wall studs. When I’m done, it folds flat, conserving floor space.
Here’s what makes mine effective:
- A wall-mounted frame with hydraulic lift; it raises and lowers smoothly, even with heavy projects.
- A lower cubby holds my drill and sander, ready for use when the bench drops.
- Pegboard hooks and clear bin storage flanking both sides keep my tape measure and screws accessible.
It effectively expands my workshop without using additional floor space.
Mobility and Storage
How often have you needed to shuffle three bikes and a wheelbarrow just to reach your toolbox? I’ve been there, and it’s exhausting. That’s why I installed a fold-down workbench, which has significantly improved mobility and saved space in my cramped shed.
I chose one with adjustable height and a lower shelf for my drill and screws. When I’m done, I can fold it flat against the wall, gaining four extra feet of floor space. I can actually sweep without navigating an obstacle course.
I mounted mine frame-to-studs with heavy-duty hardware, learning from my first attempt that sagged under a modest project. The integrated pegboard hooks on the underside keep my most-used tools within reach even when stowed. Vertical storage is not only practical; it enhances organization.
DIY Project Hub
That cramped corner of your shed deserves better than becoming a graveyard for half-empty paint cans and mystery screws. I’m transforming mine into a proper DIY hub with a fold-down workbench that respects my limited floor space.
Here’s what I’m envisioning:
- A sturdy 36-inch bench dropping smoothly from the wall, ready for weekend projects.
- Tools nesting in cubby storage below, maximizing vertical space.
- Pegboard access within arm’s reach to keep everything organized.
I’ve learned shed organization requires mounting to studs, as my first attempt wobbled. Now I check door clearance twice. A one-person operation is crucial when juggling supplies solo. Good tool organization focuses on functionality, ensuring my workspace remains ready without taking up precious square footage.
Use Ceiling Space for Seasonal Storage
Why let all that empty air above your head go to waste? I installed ceiling storage last spring, and now my holiday lights and camping gear live in overhead bins instead of cluttering the floor. I use clear, labeled bins with tight lids so I can spot my winter decorations from below without climbing up each time. I learned the hard way to check those weight ratings before loading up. My first rack sagged until I redistributed the load evenly. I keep lighter seasonal items within easy reach and heavier items toward the center. A stable step ladder is nearby now; no more wobbling on chairs like I used to. You’ll appreciate how much more functional that space has become.

Pay Your attention: For sheet rock wall or drywall, pls find the Supporting Strips to make sure the both brackets can screw into, if you Nailed the fold down wall mount desk table for small spaces in the middle position, it is the hollow wall and will not sturdy.
【MULTI-PURPOSE APPLICATION】: The foldable design allows wall mounted brackets to fold parallel to the wall, maximize space savings, can allow more DIY space in your garage, kitchen, shop, stores, workshops, boats, motorhome, backyard, trailer, room, kitchen, balcony, bathroom, etc.

[Space-Saving & Multi-Purpose Design] This foldable wall-mounted table provides a convenient solution for small spaces, folding up for use and down for storage. Perfect for garages, laundry rooms, home offices, or kitchens, it also serves as a sewing table, family bar, or kitchen workstation.
Schedule Monthly Cleanouts to Stay Organized
My ceiling storage looked perfect last month until I couldn’t find my camping stove because I had shoved it in a bin without updating the label. We’ve all been there. That’s why I started monthly cleanouts, which have been a game changer for my organization.
Here’s what works for me:
- I block the first Saturday morning for decluttering, sweeping floors, checking labels, and tossing broken items.
- I keep a donation box by the door so I’m not tempted to save that cracked flower pot.
- I snap photos of my storage solutions before and after, as seeing progress is motivating.
I update my inventory checklist each time. It takes a maximum of ninety minutes. My organization remains effective, and I actually use what I own. You deserve a shed that functions efficiently for your needs.