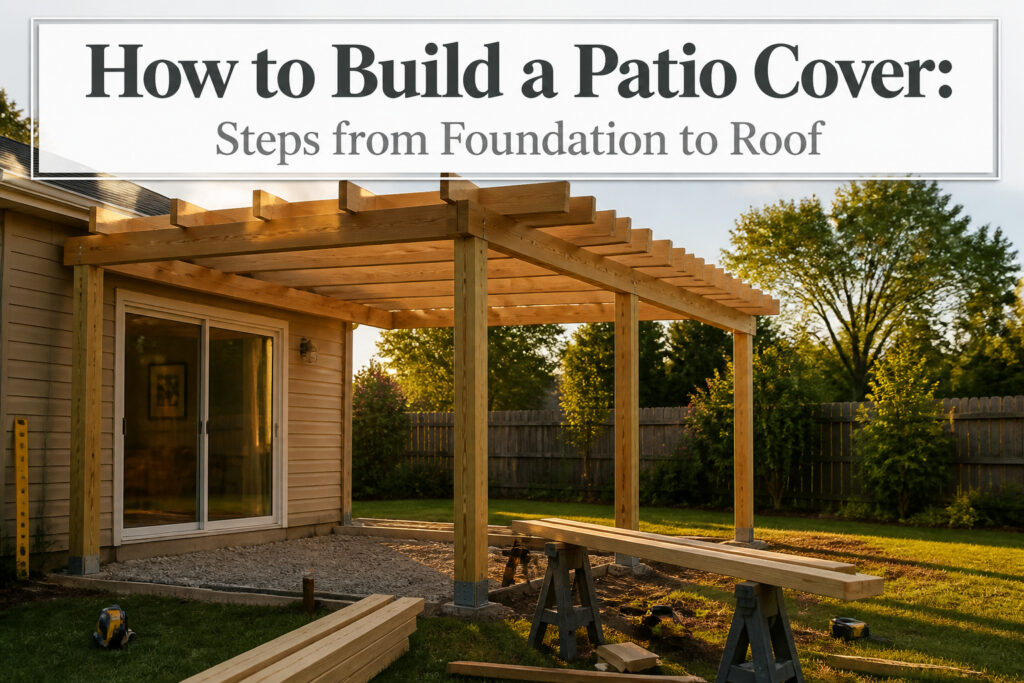
A finished patio cover runs about $1,350 to $1,800 in materials for a standard footprint, and most of that cost is decided before the first post goes in: whether you bury wood rated for ground contact or pour concrete footings with galvanized hardware.
The footing stage is where builds lean by year three, because three feet of depth is the minimum most codes allow, and guessing that number wrong means starting over.
1. Planning and Design
A 10′ x 20′ or 12′ x 12′ footprint covers most backyard seating setups without swallowing the whole yard.
Measure from the house to where you want the outer edge, then check height from ground to the underside of your eaves; that number sets your post length and whether the roof can slope for runoff.
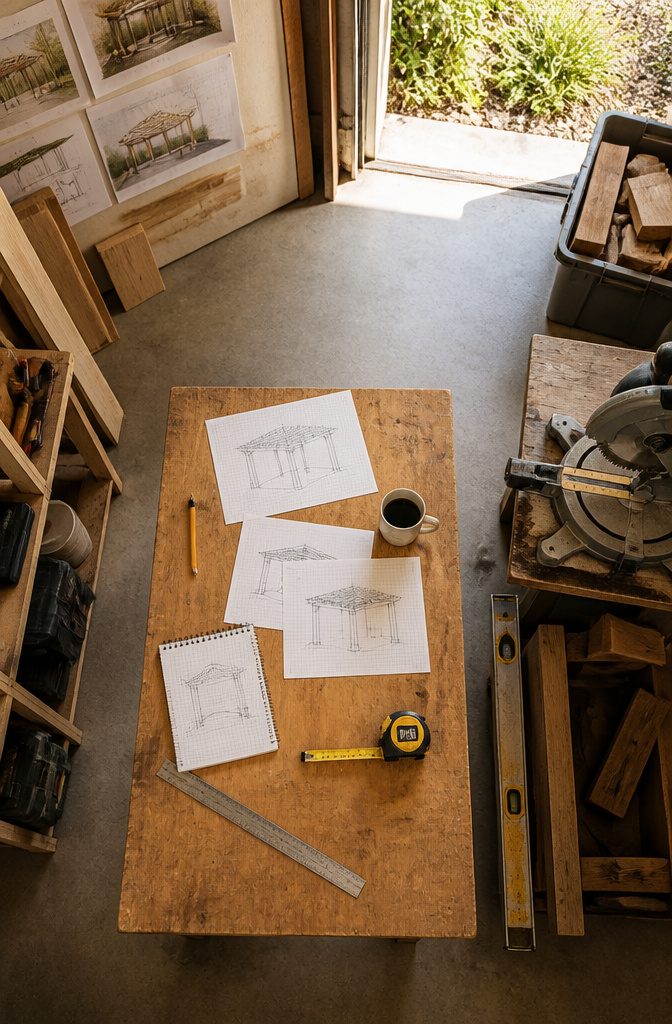
Sketch the house, patio, and cover on graph paper or in SketchUp so you see where posts land before you order anything.
Post placement matters because a post sitting in the middle of a walkway or blocking a window is expensive to fix after lumber arrives.
Local building codes decide your beam size, footing depth, and whether you need an engineered beam for spans over 24 feet.
The lumber yard can tell you what size members carry the load for your span and spacing, usually 2′ on center for rafters. Check permits before you start; most jurisdictions require one, and skipping it risks fines or forced removal.
If you plan to attach to the house roof, expose a section of fascia or soffit first to see if the rafter tails can handle half the cover’s weight.
When they cannot, a freestanding frame with its own posts and beam keeps the project alive without calling in a structural engineer.

BEAUTIFY YOUR PROPERTY WITHOUT taking on expensive repair work. The Simsolve solution saves you on cost while greatly enhancing the look of your railings. Simshoe deck post covers have a UNIQUE, PATENTED, SPLIT-STYLE DESIGN that BEAUTIFULLY & EASILY TRANSFORMS the base of your fence or railings WITH JUST A CLICK. No pulling out railings. NO DAMAGE. Just beautiful workmanship everyone will think has always been there.

Lets you install a light fixture, and light switches or outlets outside in your garden
2. Setting the Foundation
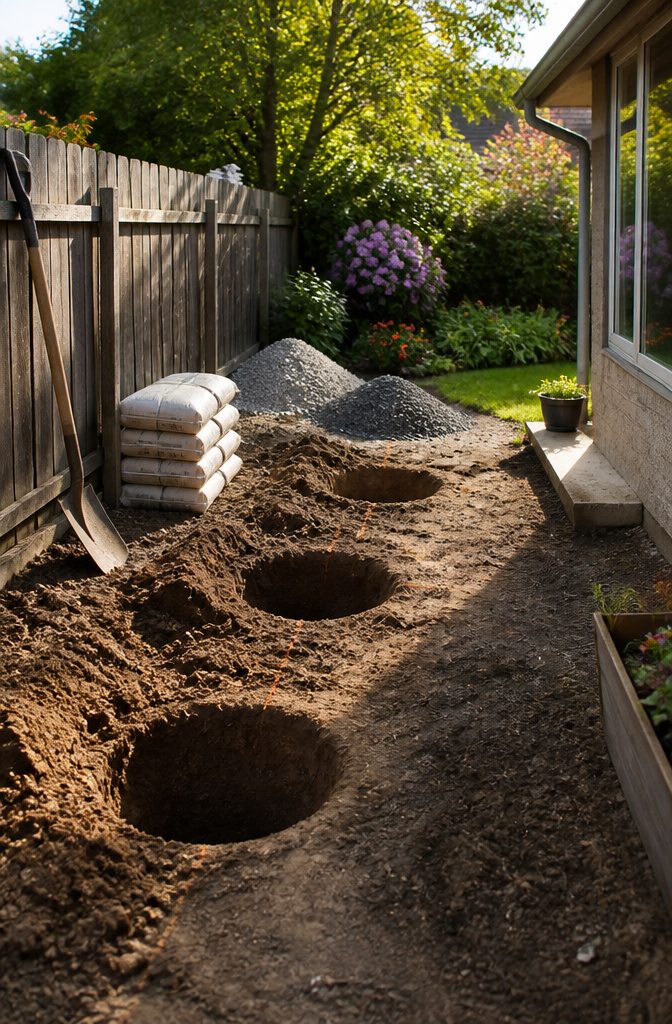
Concrete footings are what separate a patio cover that lasts from one that leans by year three.
Three to four feet is the usual depth, though your local code gets the final word on that number, and checking before the first shovel hits dirt saves a weekend of backtracking.
Two paths sit in front of you once the holes are open. Rot-resistant wood rated for Ground Contact, treatment spec .40 or better, can go straight into the hole with gravel packed around it to hold it plumb.
Most lumberyards stock .15 or .25 material, so asking for the right rating matters. The catch is living with treated chemicals in your outdoor space.
The other route is pouring concrete footings and setting the post on hardware like a Simpson Strong-Tie MPB44, 66, or 88, which keeps wood off the ground entirely and still resists lateral force.
Perma-Columns or pre-cast concrete buried in the footing do the same job without the wood worry.
Whichever support strategy you choose, having an engineer review the plans for approval or alternatives is worth the cost. The footing is not where to trust your eye over the code.

Rust-proof and sturdy: High-quality galvanized steel metal (thickness:0.12"/3mm) with high-temperature baked powder coating, easily withstands various harsh weather conditions.

【Construction】: Engineered as essential building hardware, these connector are made from galvanized metal with a rust-resistant finish to withstand harsh outdoor elements.

【No Roof Penetration — Keeps Your Roof Intact】This Bracket Mounts to The Wood Post Frame Without Drilling Through Asphalt Shingles, Metal Roofing, Tiles, or Flat Membrane. Your Existing Roof Stays Watertight — No Extra Sealing or Patching Required.
3. Installing Support Posts
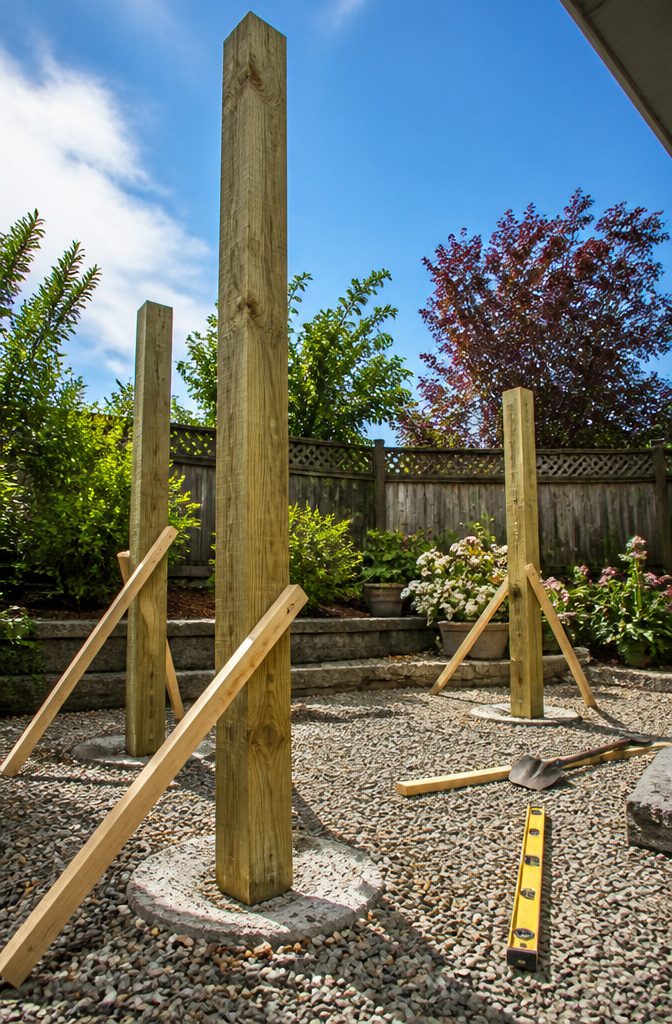
Pressure-treated 4x4s or 6x6s are the standard choices for patio cover posts, and the size matters more than most people expect going in.
A 4×4 can handle a modest span, but a 6×6 adds stiffness you will notice on anything wider than about ten feet or in any wind that makes the structure sway.
The real work is getting them plumb and level before anything else touches them.
I have read enough build logs to know this is where weekend timelines slip. One builder braced his 4×6 posts on pier pads, then spent the rest of the project fighting sway every time he climbed up to install roofing.
His hindsight was clear: bury posts at least three feet and the structure would have behaved itself from day one.
Concrete footing depth depends on your local code, with three to four feet common for frost protection. Set the post, check it with a level on two faces, and brace it while the concrete cures.
Do not rush this part. Another builder measured horizontally and diagonally to square his posts, and that extra ten minutes saved him the headache of a twisted frame when the roofing went on.
Galvanized post anchors or a Simpson Strong-Tie MPB base will hold wood off the ground if you want to avoid ground-contact rated lumber entirely. Either way, plumb and square here means everything after fits the way you drew it.

Versatile Applications: These foundation blocks are ideal for various projects, including decks, sheds, pathways, raised walkways, and other outdoor structures. Designed for easy installation, these pier pads offer solid footing for different building projects, providing robust deck support without the need for digging. This makes them a reliable solution for any home improvement or construction project requiring stable foundation blocks.

Fastest, easiest way to form concrete footings

Material of Concrete Post Base:The concrete fence post base is made of high-quality Q235B black powder-coated steel, offering waterproof and rust-resistant properties.
4. Attaching Beams
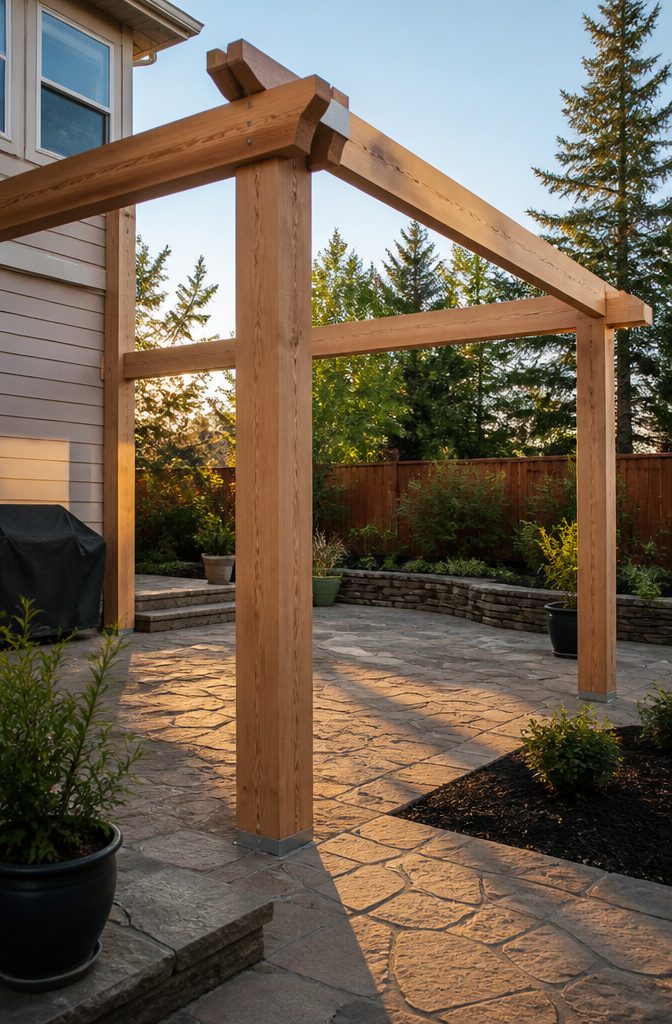
Horizontal beams bridge the posts and carry everything above them, so their height sets your roof pitch for good or bad.
I used a 4×6 beam on my first run and set it flush with the post tops without accounting for its full 5½-inch actual height.
That ate into the slope I had planned, and the water ran slower than it should have.
A 6×2 beam gives you a lower profile if you need to protect a shallow pitch, though it will not span as far without sagging.
Either way, cut the posts to leave the beam height above your finished headroom mark; on my redo, I measured up 6 inches from the 6-foot 8-inch clearance point and cut there, which let the beam sit where the math said it should.
Fasten with two 3/8-inch carriage bolts per end, drilling clear of your temporary screw holes so nothing conflicts.
Once the beam is level and bolted, the distance from its outer face back to the house should match at both ends; if it does not, one post has drifted and plumb needs checking before you move to the ledger.

Adjustable Roof Riser Brackets: Our pergola roof brackets accommodate dimensions of wooden columns of market-standard sizes like 4"x4" and 4"x6" (with actual dimensions of 3.5"x3.5" and 3.5"x5.5"). The base is angle adjustable from 0 -180 degrees, additionally, the adjustable U-shaped pergola roof riser allows for flexible orientation of the wooden post, offering adaptability to diverse installation requirements

Fits for true 2" x 2" inch square posts. The height is 0.88''. Please see the dimension carefully.

Adjustable Angle and Height: Our pergola roof riser brackets accommodate dimensions of all type of wooden columns of market-standard sizes like 4"x4" and 4"x6" (with actual dimensions of 3.5"x3.5" and 3.5"x5.5"), or even 2"x6" and 6"x6". The base is angle adjustable from 0 -180 degrees, additionally, the height is also adjustable from 8.6-12.6 in, which allows for flexible orientation of the wooden post, offering adaptability to diverse installation requirements
5. Installing Rafters
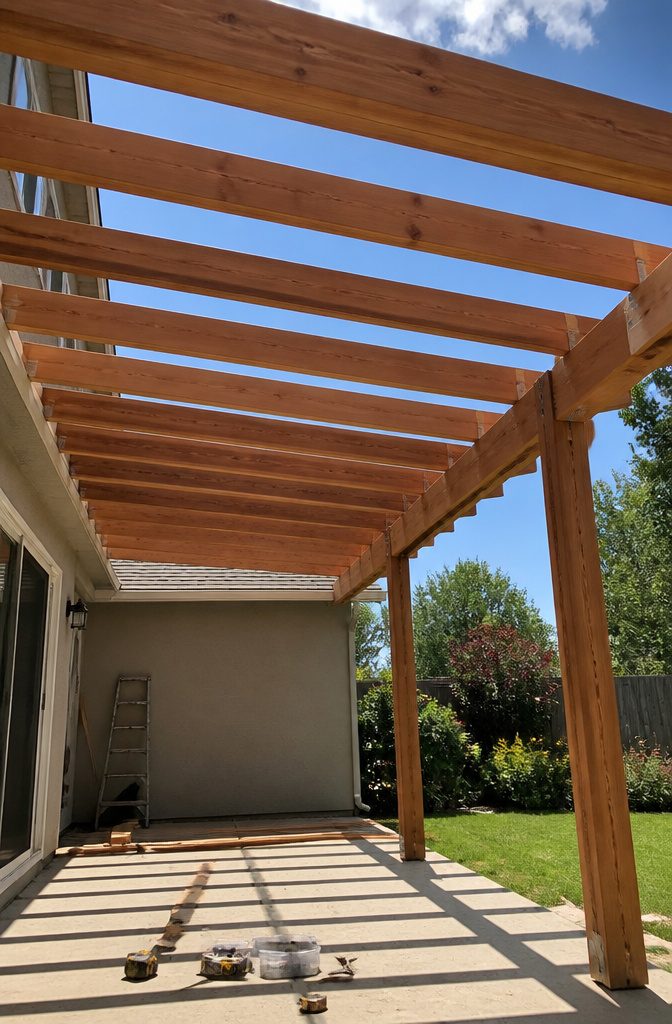
With the beams level and bolted, the rafters are what turn a frame into a roof. I laid mine out at 16 inches on center, a spacing that came from running my numbers through the American Wood Council span calculator.
At 24 inches apart, the 2x4s I planned to use would have carried more load than their span allowed once I factored in the dead load of two-layer plywood decking.
Tightening to 16 inches brought the design load back within range without jumping up to 2×6 lumber.
Western red cedar went up fast, light enough to muscle into place alone but still rated for exterior decay resistance.
I toenailed the first few and switched to hurricane clips once I noticed the toenails loosening slightly under their own weight before I got the opposite end secured.
The clips took an extra trip to the hardware store, but the rafters sat square afterward with no wobble.
Alignment matters more than speed here. A rafter even half an inch out of parallel throws every roofing panel off for the rest of the job.
I sighted down each one before fastening, checking that the tails lined up clean for the fascia board I’d add later.

【Size & 1-Pack】 Fits 1" x 1" SQUARE tube deck post with 3.5" x 3.5" bottom base mounting plate. Quantity: 1-Pack (Black) ▼ Color Options: Black, White. ▼ Pack Options: 1, 2, or 4.
FINISHED FENCE HOLE COVER: Give your fences a finished look with Weatherables Fence Post Hole Cover, made from white vinyl and designed to fit true 1.75in x 3.5in route holes to hide the hole from view for a finished and complete look.

FULL 6" LENGTH,11 GAUGE STEEL LANDSCAPE STAPLES - Pack of 50 heavy duty garden stakes, with 6" in length and 1" in width. Rugged metal landscape pins are made of 11 gauge (3.0mm) metal steel and applied premium hot-dip galvanizing, so our galvanized lawn stakes will not bend when used to outdoor landscaping or home projects.
6. Roofing Installation
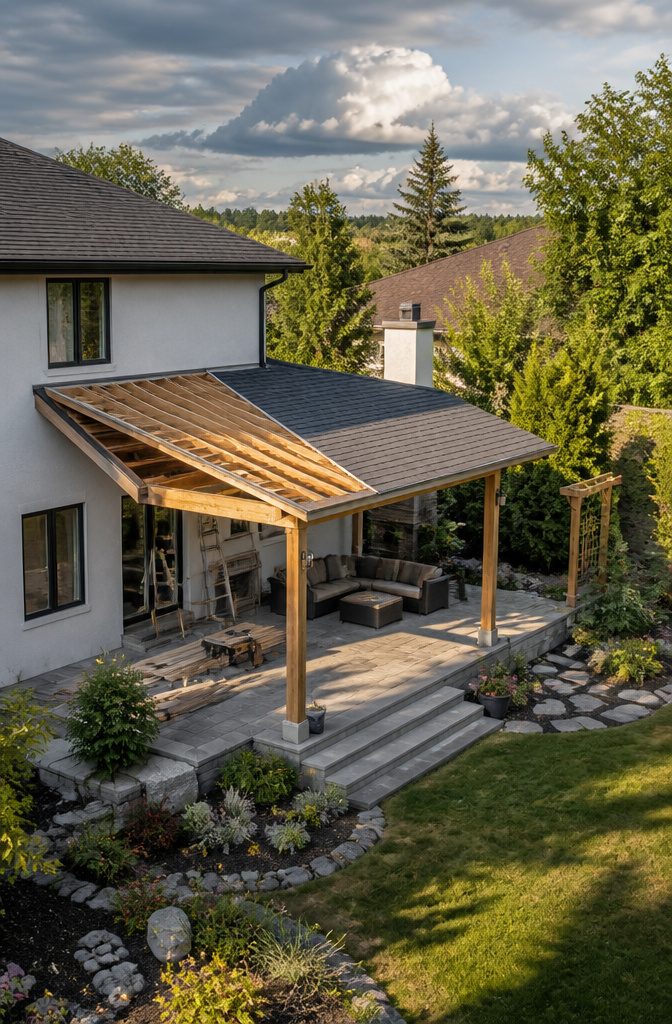
The roofing material you choose has to match the slope you actually built, not the slope you sketched on paper.
A minimum pitch of 2/12 works for most roofing, but metal panels need 3/12 or water will back up through the seams instead of shedding.
I learned this the hard way when I measured my run and rise after the rafters were already up.
My pitch came in just under 2/12, slightly below what the shingle manufacturer recommended. The roof never leaked in five years, but I spent every rainstorm listening for drips.
Asphalt shingles are the easy match for an existing house roof, and fiberglass shingles let you blend with whatever the main structure wears.
Metal panels weigh less and stress the frame less over decades, often running 50 years with minimal upkeep, though they look modern against a traditional house in a way that reads "addition" from the curb. Corrugated metal in particular announces itself.
If your pitch is borderline, taller roof risers at the attachment point buy you the extra slope without rebuilding rafters.
The manufacturer sets the real minimum, not the rule of thumb, and local snow load ratings push that number higher in heavy winter zones.
Check both before you order material, because returning opened bundles of shingles is a conversation no one enjoys.

Rust-proof and sturdy: High-quality galvanized steel metal (thickness:0.12"/3mm) with high-temperature baked powder coating, easily withstands various harsh weather conditions.

💪 Heavy-Duty Weatherproof Build: Crafted from premium galvanized carbon steel with a tough black powder coat, these 4x4 pergola brackets resist rust, corrosion, and scratches. Ideal for North American climates, they stand strong through rain, snow, and storms. The 0.098" (2.5±0.2mm) thick steel construction provides rock-solid support, ensuring your pergola, gazebo, or carport lasts for years with minimal maintenance.

【Rust-Proof and Sturdy】This roof riser brackets kit is made of high-quality galvanized steel metal with a high-temperature baked powder coating, easily withstanding various harsh weather conditions.
7. Finishing Touches
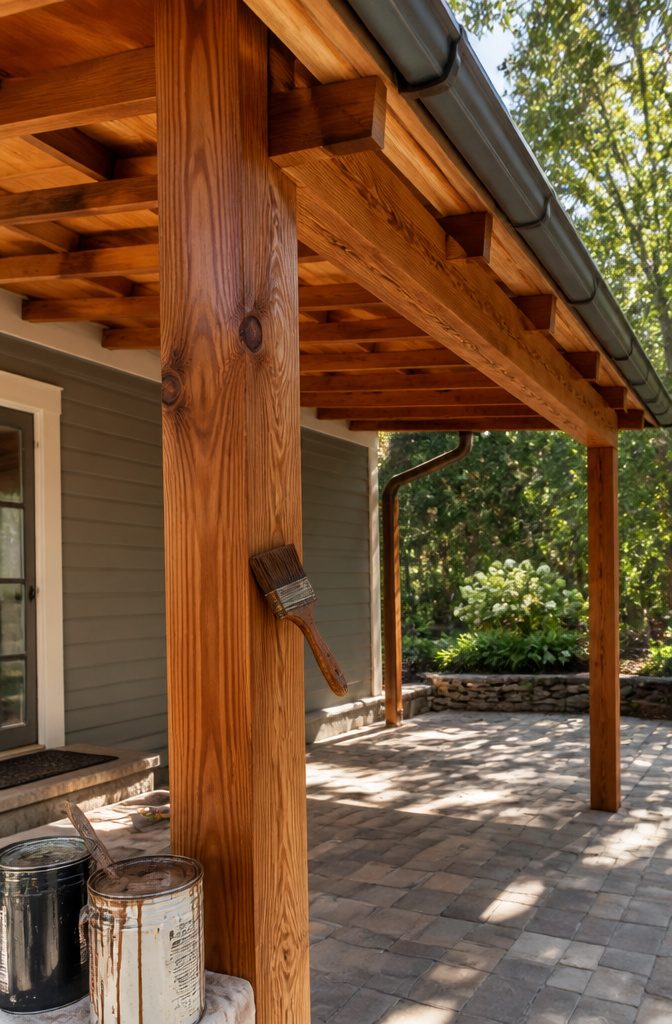
Sealing the wood is where a lot of weekend projects quietly fall apart. I skipped it once on a pergola I helped a friend finish, and two years later the posts were gray, cracked, and drinking water like a sponge.
Now I treat any exposed lumber the way you’d treat a deck: clean it, let it dry two full days, then brush on a penetrating oil or a solid-color stain.
Annual reapplication is the actual maintenance schedule, not the every-five-years hope most of us carry into the hardware store.
Drainage matters more than the decorative touches Pinterest pushes. A patio cover that drips at the edges or pools along the beam line will rot from the top down.
Slope the roof surface slightly, even on a flat-looking design, and run gutters if the water would otherwise sheet onto the patio floor.
Hanging baskets and string lights look nice in photos, but they matter less than keeping the structure dry underneath.
If the budget has fifty dollars left, spend it on extra sealant for the post bases, not on corbels or a faux-rustic finish.
The wood itself is the decoration; let it age evenly and you’ve already built something better than most of what shows up in a feed.

CONTRACTOR-GRADE: Made from high-carbon steel for superior durability and long-lasting performance.
IMPACT RESISTANT: Fabricated from steel for strength and resistance to bending, allowing them to be hammered into the toughest soils

2 Pack - 4x4 Zinc Plated Deck Post Concrete Anchors
Wood, Aluminum, and Metal Covers
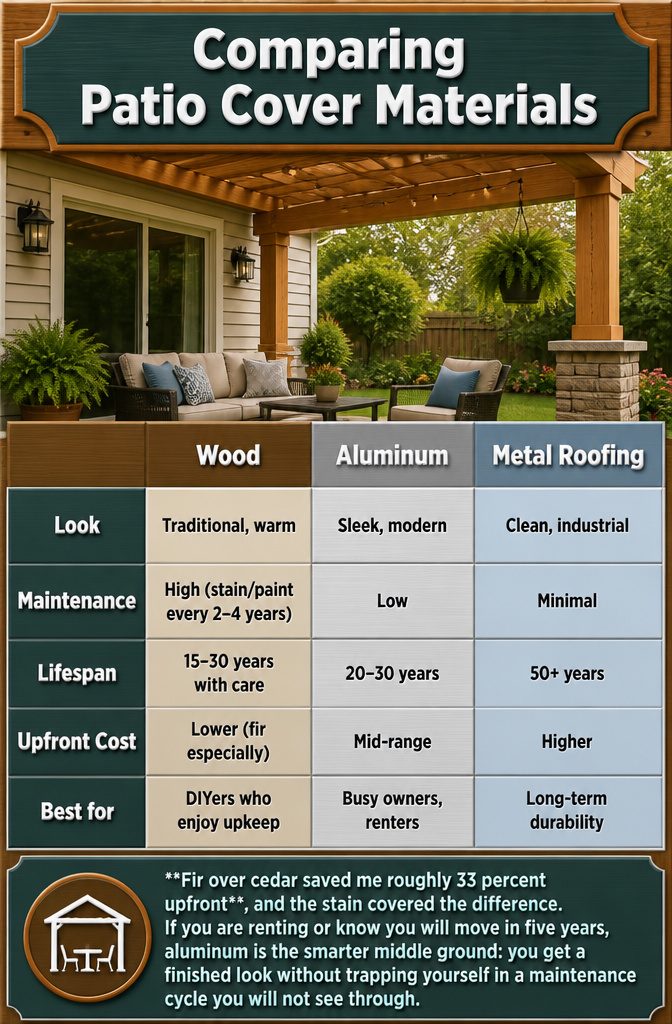
Wood still carries the day if you want a patio cover that looks like it grew out of the house, but that traditional look comes with a standing appointment every few years.
Fir runs about a third less than cedar, and a good stain can close the gap in looks, though I learned from a builder’s mistake that shaking the can instead of stirring it leaves the pigment sunk and the boards noticeably lighter.
Aluminum skips all of that. It does not rust, needs no repainting, and still comes in enough colors and styles that "low maintenance" does not have to mean "one look fits all."
Metal roofing, corrugated or otherwise, pushes even further on lifespan, often running 50 years or more with minimal upkeep, and the lighter load on the structure matters more than people think when they are anchoring to an existing frame.
| Wood | Aluminum | Metal Roofing | |
|---|---|---|---|
| Look | Traditional, warm | Sleek, modern | Clean, industrial |
| Maintenance | High (stain/paint every 2–4 years) | Low | Minimal |
| Lifespan | 15–30 years with care | 20–30 years | 50+ years |
| Upfront cost | Lower (fir especially) | Mid-range | Higher |
| Best for | DIYers who enjoy upkeep | Busy owners, renters planning to stay a while | Long-term durability in harsh weather |
Fir over cedar saved me roughly 33 percent upfront, and the stain covered the difference.
If you are renting or know you will move in five years, aluminum is the smarter middle ground: you get a finished look without trapping yourself in a maintenance cycle you will not see through.
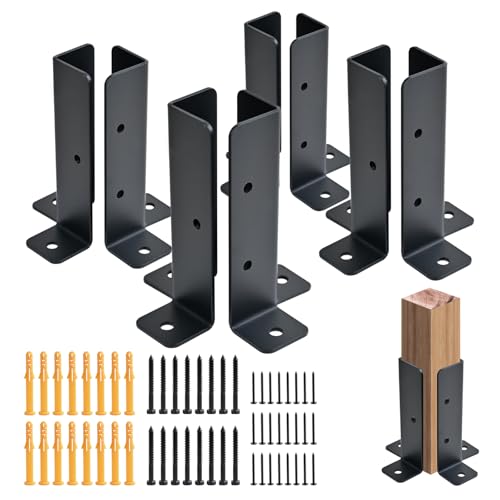
Adjustable Deck Post Anchor Base Brackets Size: 1.37in x 1.51in x 5in; Thickness: 2.8 mm, Hole diameter (2 types): φ0.25in (3 pcs),φ0.3in (2 pcs). Which accommodate different sizes of wooden columns, such as 1.5 "x1.5", 2 "x2", 2 "x4", 4 "x4" post, etc. Please check the size you need before purchasing

Easy to Install: Our pergola bracket kit comes with a roof riser bracket, M8 hexagonal screws*6, M6 hexagonal screws*8 and a wrench. There is no need for complicated installation process, suitable for roof, gazebo, pergola and other roof wooden beam supports

Adjustable Roof Riser Brackets: Our pergola roof brackets accommodate dimensions of wooden columns of market-standard sizes like 4"x4" and 4"x6" (with actual dimensions of 3.5"x3.5" and 3.5"x5.5"). The base is angle adjustable from 0 -180 degrees, additionally, the adjustable U-shaped pergola roof riser allows for flexible orientation of the wooden post, offering adaptability to diverse installation requirements
Attached or Freestanding
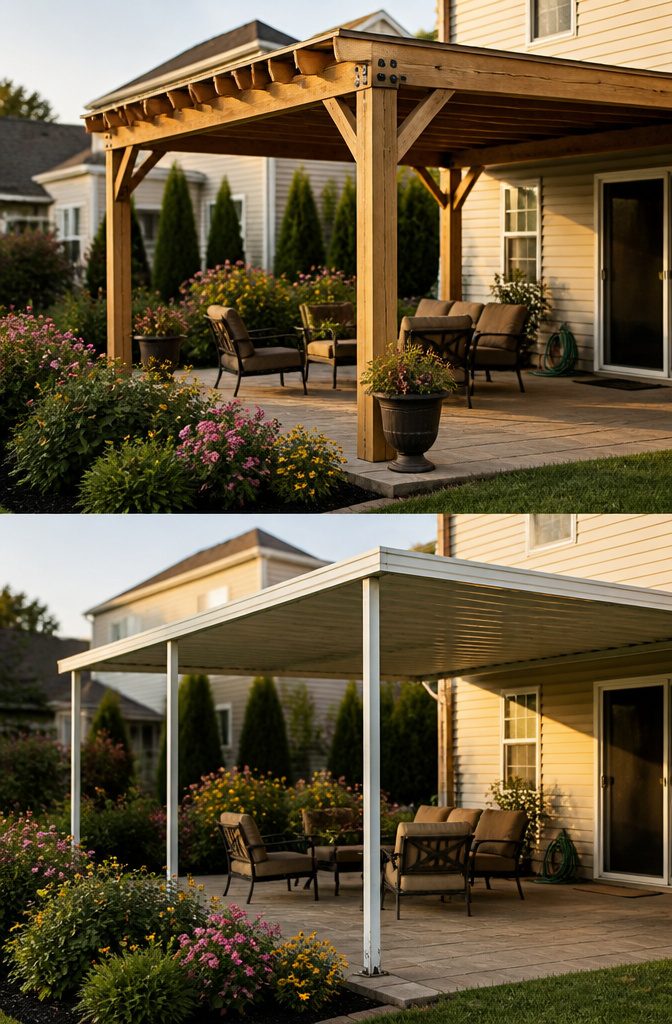
Attached patio covers lean on the house for support, which cuts material costs and keeps the footprint tight against smaller patios.
The trade is structural: the connection point has to manage roof loads and water runoff together, and that joint is where most attached builds run into trouble.
Freestanding covers carry everything through their own posts and footings, so they can sit anywhere the yard allows, but every beam and rafter has to be sized for the full span without help.
My own build went attached because the patio slab was already there and narrow, maybe twelve feet deep.
The ledger board went up fine, but the roof line on my house sat lower than I expected, and the slope I needed for drainage pushed the outer beam height almost to the limit of what the neighborhood code allowed.
That integration point, where the cover meets the siding and the existing roof, is the place that eats your weekend if you do not plan for how the water exits before you cut anything.
A freestanding frame would have cost more in lumber and concrete, but it would have spared me the three evenings spent reworking the flashing twice.

High Quality Material: The 4X4 post base is fabricated from high-quality Q235B steel. The precision welding process ensures durability and resistance to deformation. It is sprayed with a black powder coating, making it rust and corrosion resistant.

【Sturdy Stainless Steel Bracket】304 Stainless Steel for rust-resistant to go through the entire summer of heat and rain. Sturdy enough to support the bottom of your post.
【Sturdy Stainless Steel Bracket】304 Stainless Steel for rust-resistant to go through the entire summer of heat and rain. Sturdy enough to support the bottom of your post.
Pergola-Style Open Covers
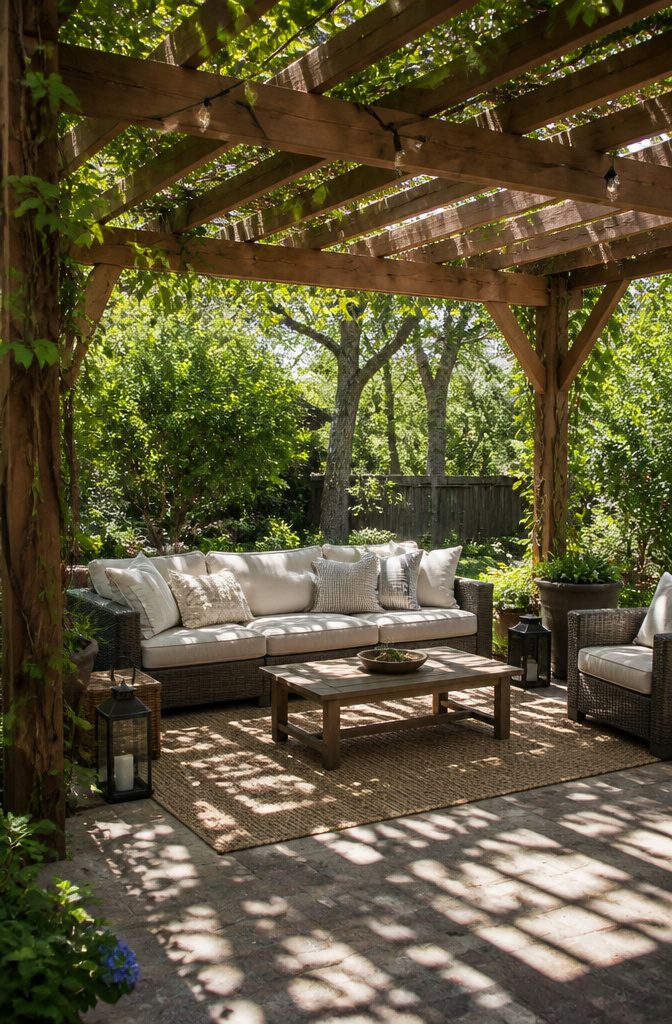
An open-air pergola sits at the lighter end of the patio cover spectrum. Beams or slats overhead filter sunlight instead of blocking it, and the whole structure stays simpler to frame up than anything with a solid roof.
Vines, string lights, or fabric panels can dress it up later, but the bones are just posts and cross-members with gaps between.
Permit thresholds often run looser for these. The International Residential Code Appendix H gives model provisions for patio covers, yet local adoption varies, and some jurisdictions set square-footage cutoffs that let smaller attached structures slide through without a permit.
A 200 square foot cap tied to exterior-wall support shows up in some areas, but the only reliable move is calling your local building department with dimensions, attachment style, and roof type in hand.
They will also flag setbacks and height limits that a statewide code does not touch.
I looked hard at this route. The airy feel suits weekends under dappled light, and the build itself trims down to something a single person can mostly handle.
What pushed me away was the weather protection gap. A pergola does not stop rain, and where I live, the question is not whether a sudden shower will hit mid-afternoon, but when.
For a project budgeted in the few-hundred to thousand-dollar range, I wanted one build that handled sun and drizzle both, not a structure I would later need to retrofit with a secondary solution.
The solid roof won on that count, even if the framing took longer and the permit conversation grew more involved.

Rust-proof and sturdy: Roof riser brackets constructed from High-quality galvanized steel metal with high-temperature baked powder coating, easily withstands various harsh weather conditions,designed for reliable performance in everyday outdoor and residential pergola applications.

Rust-proof and sturdy: Roof riser brackets constructed from High-quality galvanized steel metal with high-temperature baked powder coating, easily withstands various harsh weather conditions,designed for reliable performance in everyday outdoor and residential pergola applications

【Premium Materials】pergola roof riser brackets are made from durable galvanized steel with a black powder coated surface for corrosion and rust resistance and durability to keep the roof stable and safe. Also resistant to harsh weather and ensures good performance and long-lasting sturdiness even during storms.
Tools You Actually Need
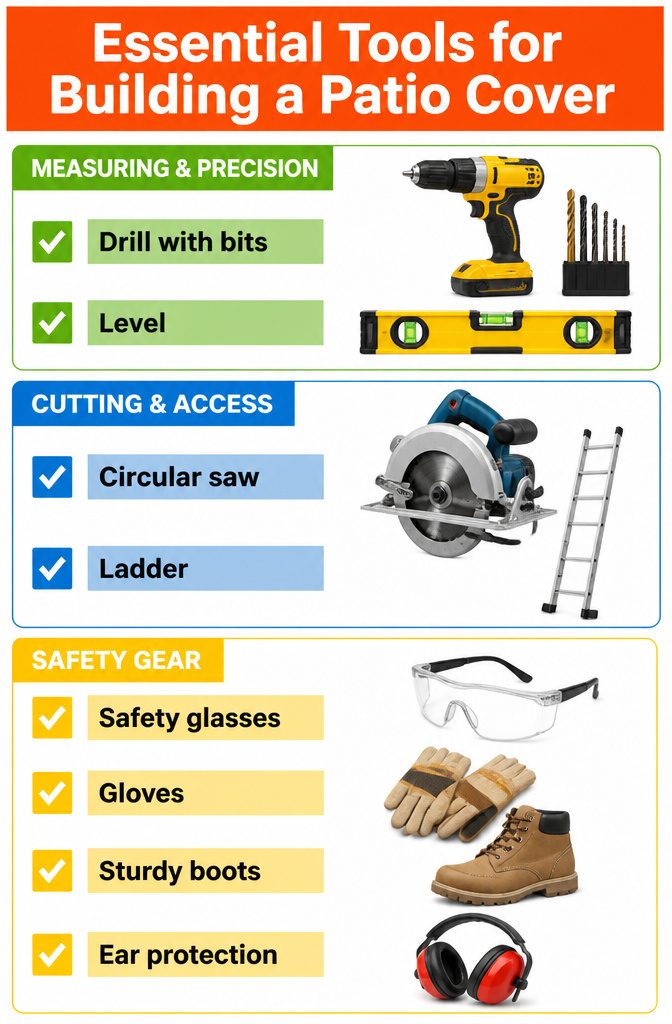
A drill with bits and a level stay busy from the first post to the last rafter. The level checks every vertical and every horizontal; without it, a patio cover lists in ways the eye catches instantly from the yard.
I borrowed both from a neighbor who had upgraded to a laser setup, which saved me maybe $80 and a trip to the rental desk.
For cutting, a circular saw handles metal parts, but a hand saw works fine for wood if you already own one.
I bought a mid-range circular saw for this project and have used it twice since on closet shelves, so the purchase paid out. What I should have rented instead was the ladder.
Mine wobbled on the flagstone, and a proper extension model from the hardware store would have run about $35 for the weekend. Never climb a damaged ladder; the rental yard checks them, my garage does not.
Safety gear sits in a different category. Safety glasses, gloves, and sturdy boots are non-negotiable, and ear protection matters more than most first-timers expect.
I already owned the glasses and gloves from a fence project two years back. The boots were new, but work boots outlast a single weekend.
What This Cost Me
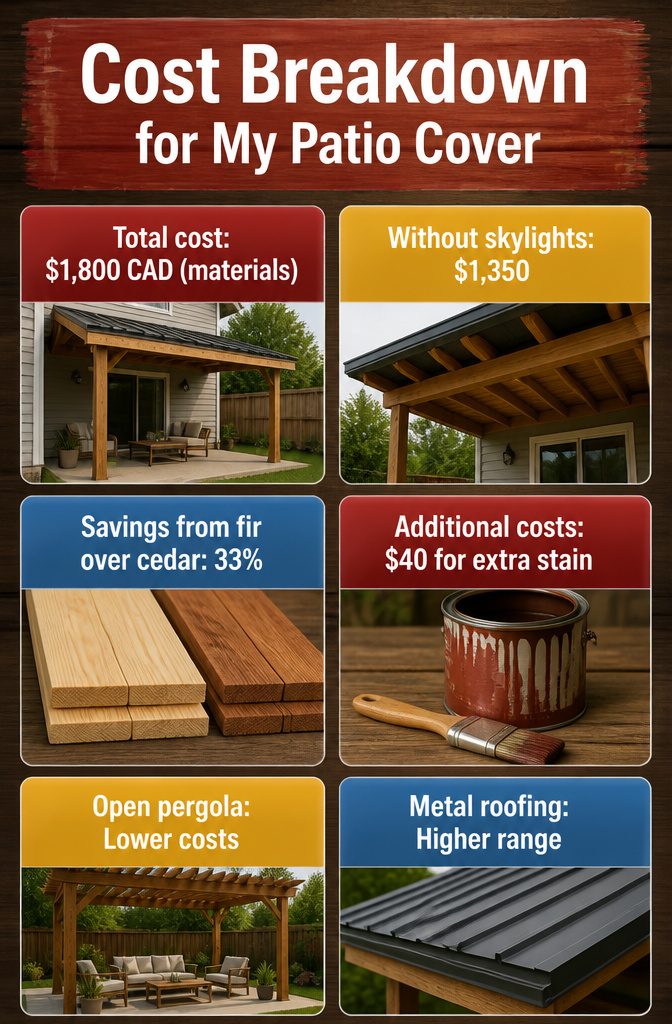
The lean-to I ended up building ran about $1,800 CAD for materials, or roughly $1,350 if you skip the skylights.
That figure comes from lumber, brackets, and roofing for a structure in the standard range; a 24-by-12-foot cover with engineered trusses and a finished ceiling would have pushed well past that.
I saved by choosing fir over cedar, accepting a third less in material cost and staining it to match.
The pigment settled hard in the can once, and the shake-not-stir mistake left a whole batch lighter; that cost me a second gallon, not a structural problem but $40 I did not need to spend.
Metal roofing with a concrete slab base sits at the higher end of patio cover ranges, while open pergola styles keep costs lower but leave you exposed.
Where I almost cut corners: skipping diagonal bracing to save on 4-by-4 lumber. Every source build I read that tried it ended up adding braces later, on the ladder, with the frame already loaded.
Permits and Building Codes
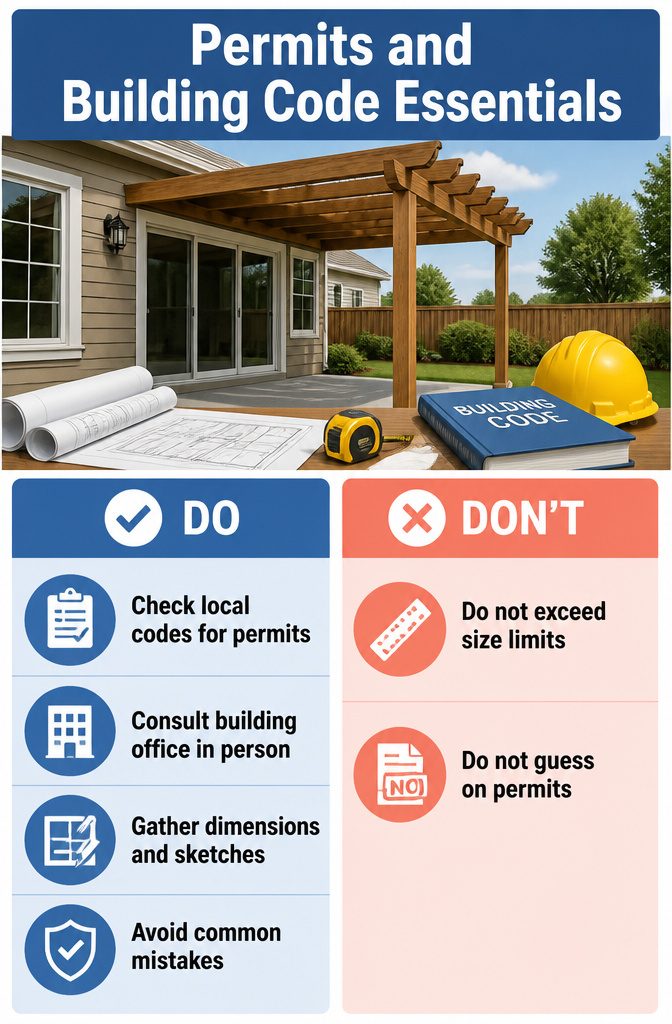
A weekend spent pulling a patio cover back down beats every other mistake on this list, because the city does not negotiate once a neighbor files a complaint.
Many jurisdictions allow patio covers under 200 square feet and attached to an exterior wall without any permit at all, but the exact cutoff shifts from one city to the next, and height limits or property-line setbacks can still apply even when square footage stays low.
The building office is where this actually gets decided, not a forum thread. Walk in with rough dimensions and a sketch of where the cover meets your house.
In Oregon, for instance, a 12-by-16-foot cover attached to an exterior wall clears the permit threshold, but your own code may use 120 square feet or require a setback review regardless of size.
The staff there can flag whether your beam choice or fastener pattern needs adjusting before inspection day, and that guidance costs nothing.
Fines and forced removal are the standard penalty for guessing wrong, and a permit pulled after the fact rarely saves the structure.
Frequently Asked Questions
Do I need a permit to build a patio cover?
Most jurisdictions require one, though many allow covers under 200 square feet attached to an exterior wall to skip the permit process entirely.
The exact cutoff shifts from city to city, and height limits or property-line setbacks can still apply even when square footage stays low.
Your local building department decides this, not a general rule; walk in with dimensions and a sketch before you order lumber.
What type of wood should I use for outdoor patio covers?
Pressure-treated lumber rated for Ground Contact, treatment spec .40 or better, handles the outdoor exposure; most lumberyards stock .15 or .25 material, so asking for the right rating matters.
Western red cedar and fir are common choices, with fir running about a third less in cost and staining to match cedar’s look. The article’s builder used fir, saved roughly 33 percent upfront, and sealed it annually to protect the investment.
How long does it take to build a DIY patio cover?
Most people finish in one weekend, though a bigger footprint or slower pace can push it to two.
The real timeline killer is usually the foundation; concrete footings need cure time, and getting posts plumb and square before anything else touches them is where weekend schedules slip.
Rushing that step means fighting sway and misalignment for the rest of the build.
What are the best materials for a patio cover?
Wood, aluminum, and metal roofing each suit different priorities.
Wood gives a traditional look but needs staining or painting every two to four years; aluminum skips maintenance entirely and comes in enough styles to avoid a generic appearance; metal roofing runs 50-plus years with minimal upkeep and loads the frame less over time.
The article’s builder spent about $1,350 on a fir-framed lean-to with skylights excluded, while metal roofing with a concrete slab base sits at the higher end of the range.