A grey accent wall or a sage green entryway costs the least and takes a weekend, while a residential mini-split and reclaimed wood sit at the other end, and the rest of the list lands somewhere between.
Your first filter is whether the rig is yours to alter: an attached deck, reclaimed wood on the walls, a built-in home office or a mini-split only makes sense on a rig you own.
Skip the mini-split unless you can pay an HVAC tech, and start with the inspection for water damage, mold and frame problems, since updated RV lighting won’t help a soft floor.
1. Pull-Out Cabinet Drawers
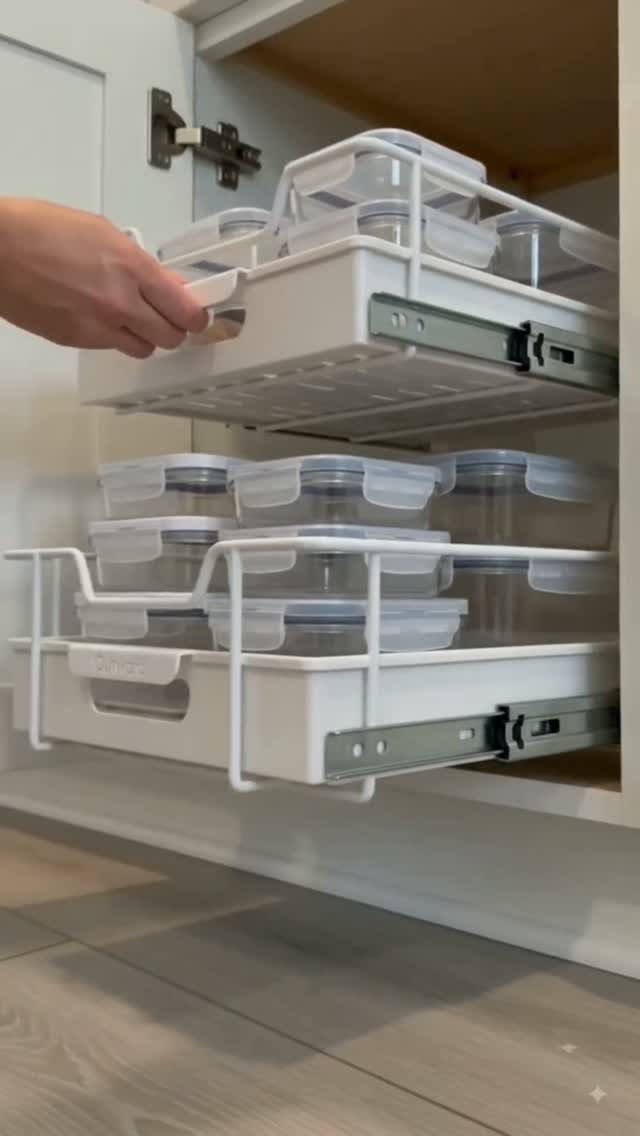
Pull-out drawers turn deep cabinets into usable space where everything stays visible and within reach. Standard RV cabinets force you to kneel and dig; a drawer lets you see the back row without unpacking the front.
Most RV cabinets accept retrofit drawer slides that mount to the existing frame.
Measure the cabinet depth and width, then pick slides rated for the weight of what you’re storing, whether that’s canned goods or appliances. The install takes about an hour per drawer with a drill and basic hardware.
Start with the cabinets you open most, typically the pantry and under-sink storage.
2. Add Vertical Shelves
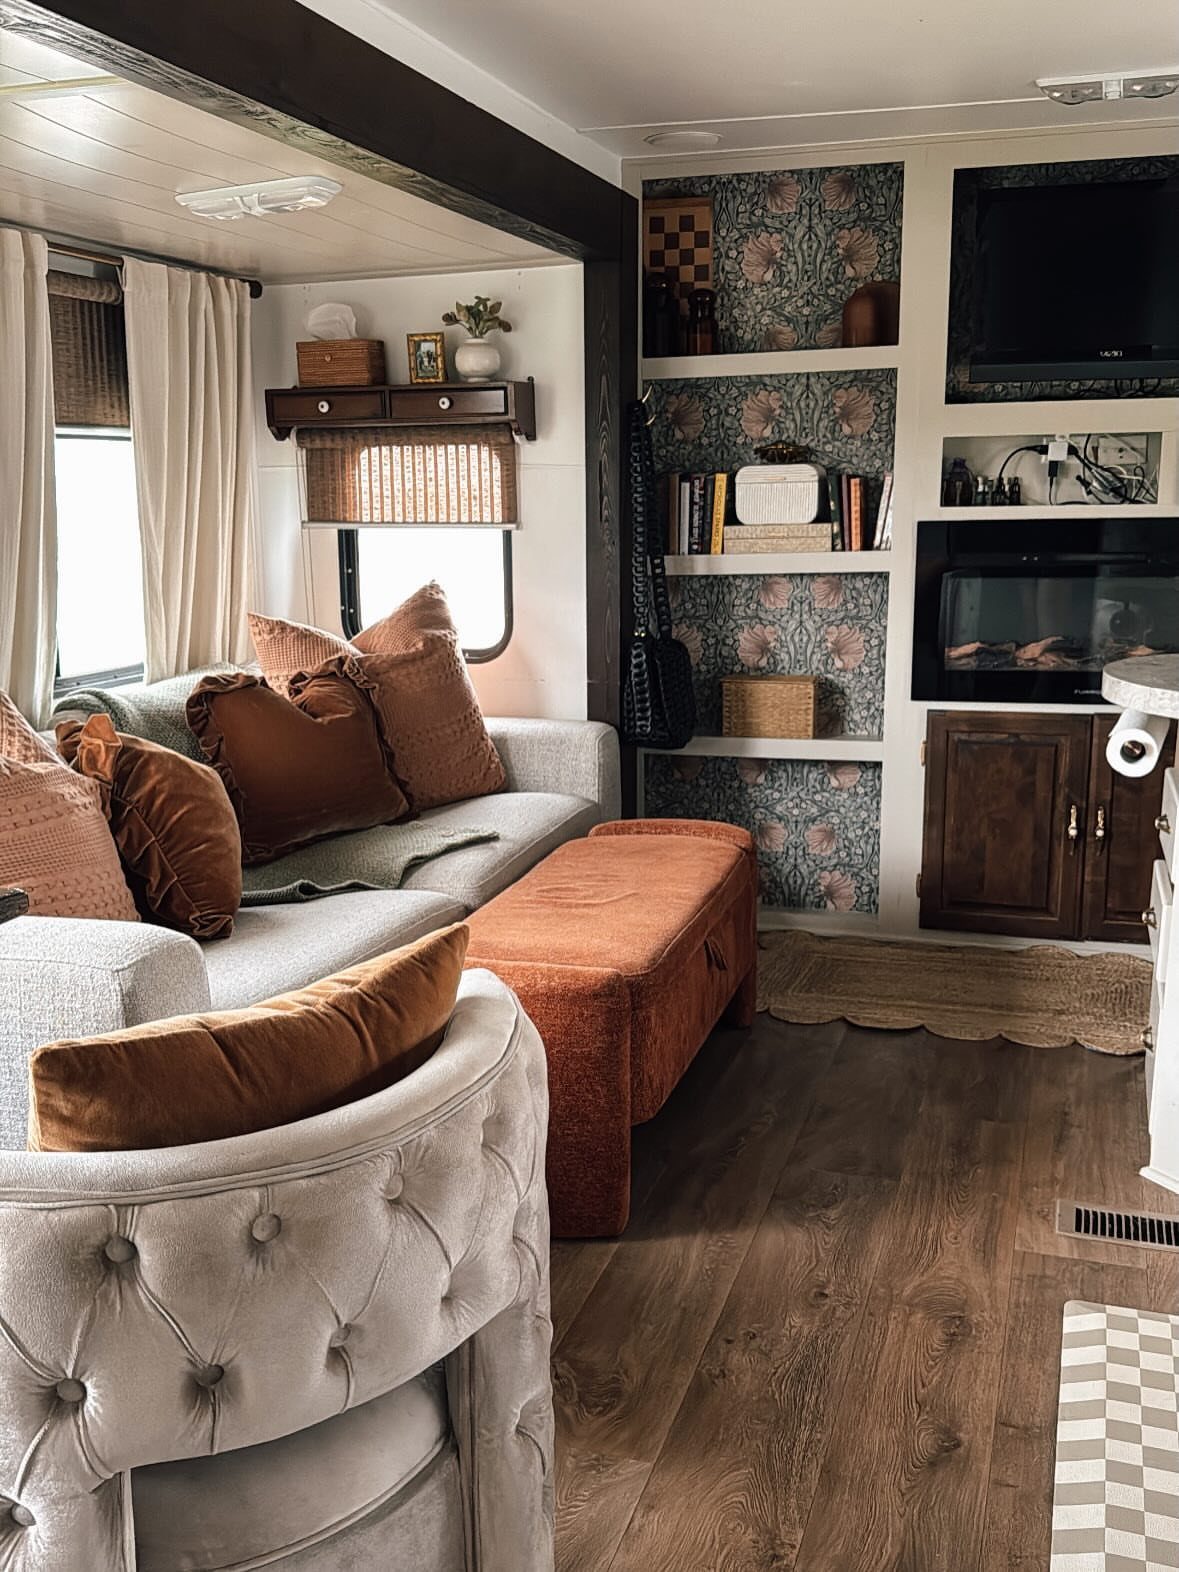
Vertical shelves claim wall space that fifth wheels rarely use well. Most layouts leave tall stretches between windows or beside slide-outs, and a narrow shelf unit fits there without blocking walkways or crowding furniture.
The unit here backs onto wallpaper, which frames each shelf and makes the whole thing feel built in rather than added later. You can skip the backing or use paint, beadboard, or peel-and-stick tile instead.
Depth matters more than height: a deep shelf lets books and decor tip when the RV moves, so secure the unit to studs with L-brackets at the top and base.
3. Update RV Lighting
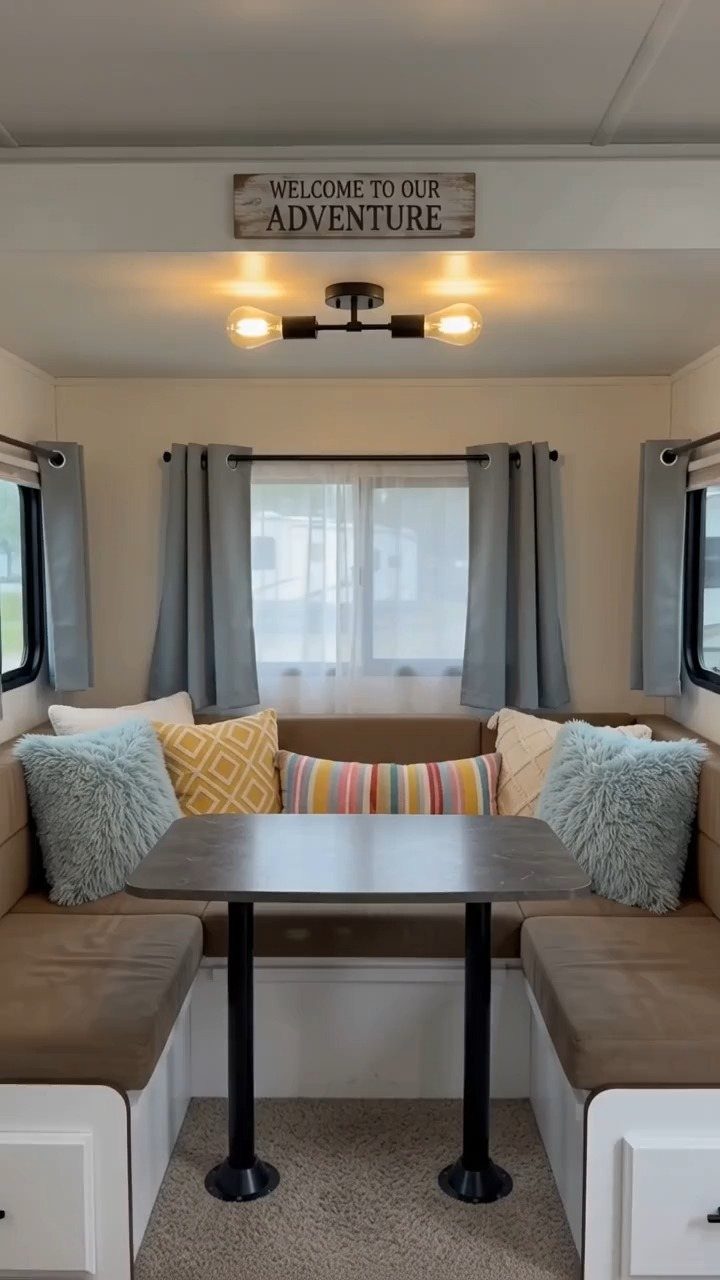
RV lighting often sits exactly where the factory put it, which means dim bulbs, dated shapes, and fixtures that pull more power than they need to. Swapping them changes how the space feels and cuts the load on your battery.
LED fixtures use a fraction of the wattage and last longer. Swapping a single-bulb plate for a 2-bulb fixture like the black one here spreads light across the dinette without glare.
Most RV ceiling fixtures mount to a standard junction box, so the swap is straightforward if you match the base size.
Pick warm white bulbs for living areas and cool white for task zones like the kitchen or office nook.
4. Compact Vanity
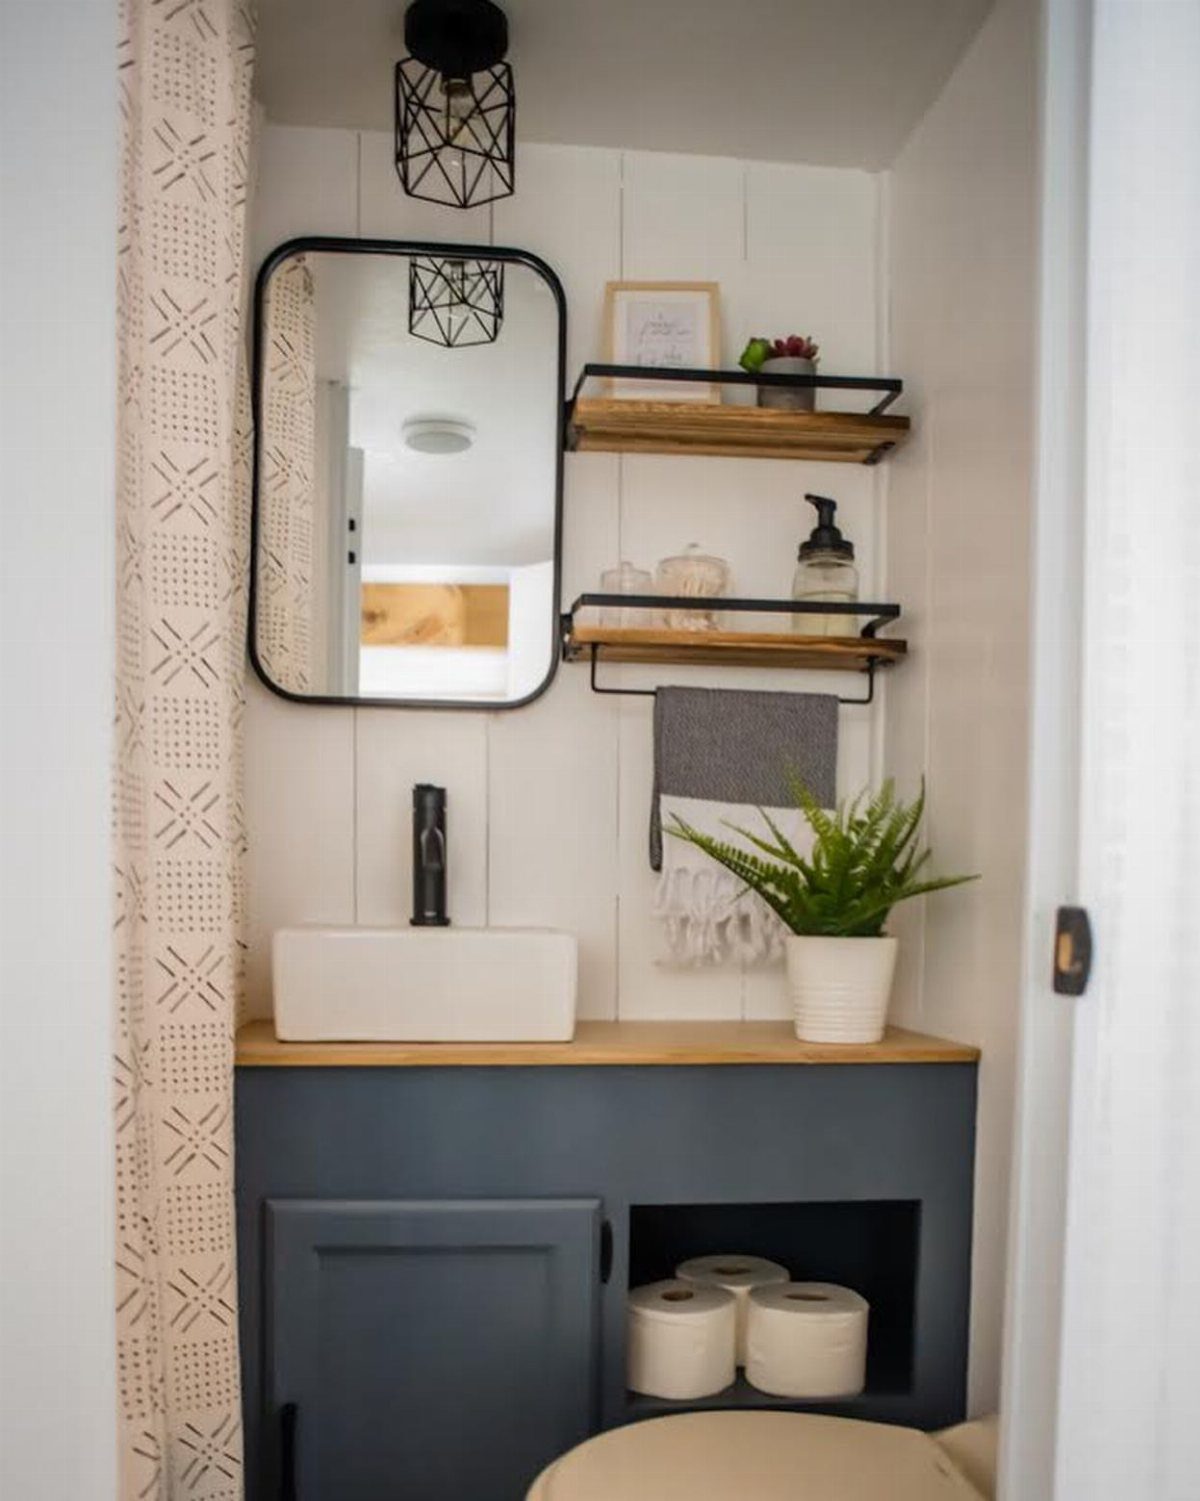
A small vanity can hold a surprising amount of personality when you swap the cabinet, countertop, and sink as a set.
The factory version usually locks you into beige laminate and an integrated bowl; replacing it opens up color, texture, and a layout that actually fits what you store.
This one pairs a blue cabinet base with a wood countertop and a white vessel sink.
Vessel sinks sit on top of the counter, so you save the space a drop-in bowl would take underneath, and the plumbing stays simple because the drain drops straight through.
Paint or replace the cabinet, cut a countertop to size, and mount the faucet and sink.
5. Framed Travel Photos
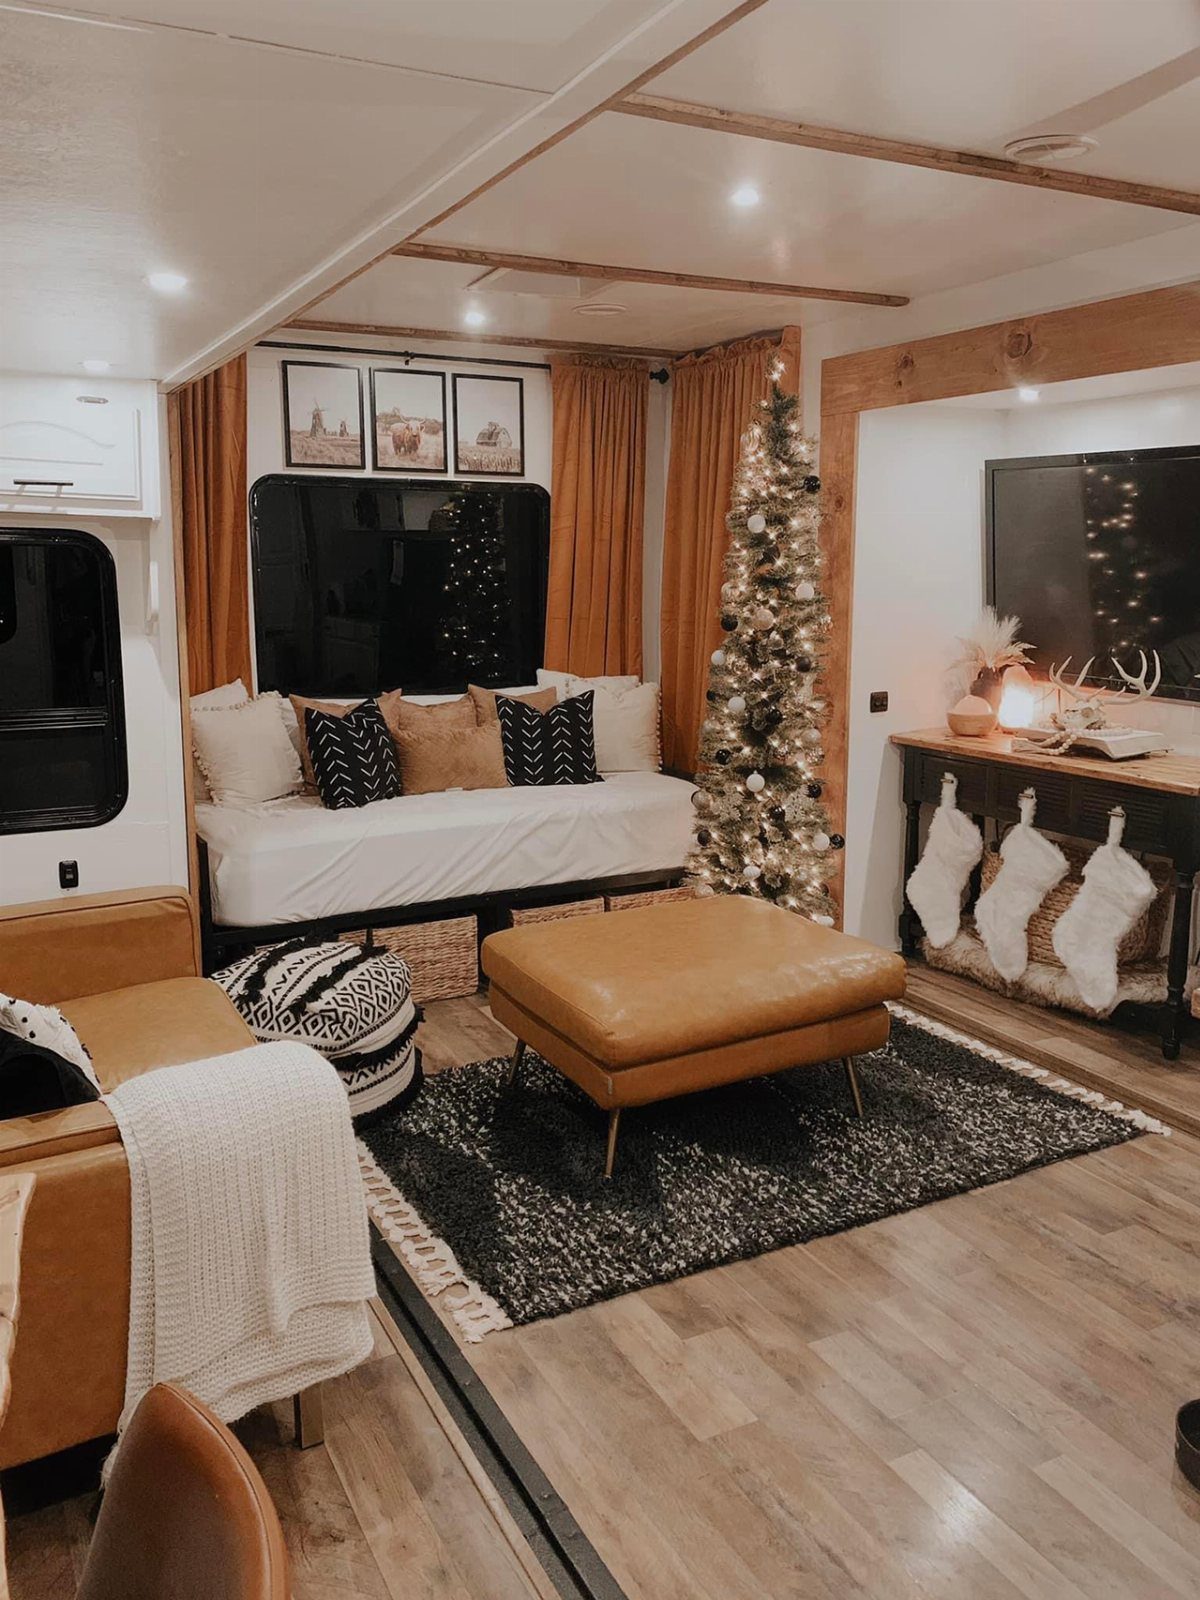
Framed travel photos fill wall space with places you’ve been, which makes more sense in an RV than generic art ever will.
The frames here hang above the sofa in a row of 3, all the same size and matting style so the images do the talking.
Print your favorite shots at a local photo lab or online and frame them in matching frames.
Hang them with adhesive strips rated for the frame weight, or use small nails if you don’t mind patching the holes later.
6. Add Reclaimed Wood
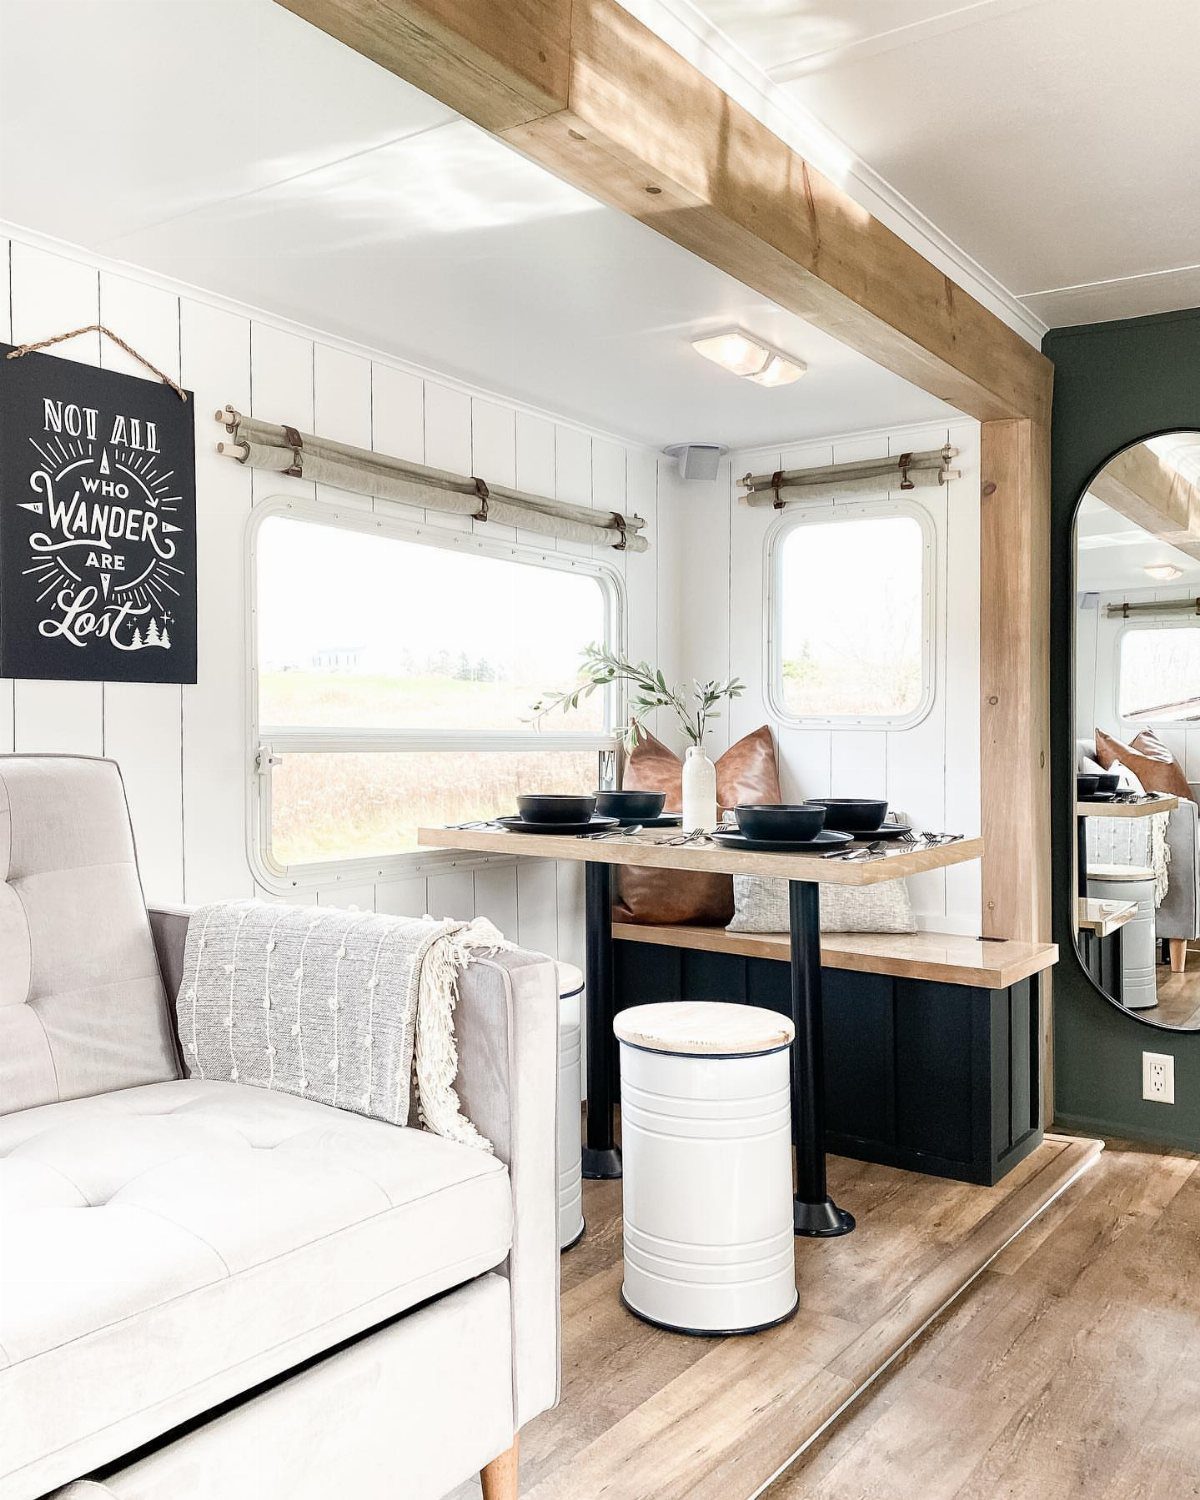
Reclaimed wood brings warmth and texture into interiors that skew white or neutral. A single beam across the ceiling adds farmhouse character without covering every surface or weighing down a small space.
Faux beams made from polyurethane weigh less and install with adhesive, but they look like foam up close. I’d spend the extra on real wood if the beam hangs low enough to be seen up close or touched.
Sand and seal the wood before you mount it, and attach it to ceiling joists with lag screws. One beam takes an afternoon and anchors the room.
7. Storage Bench Seating
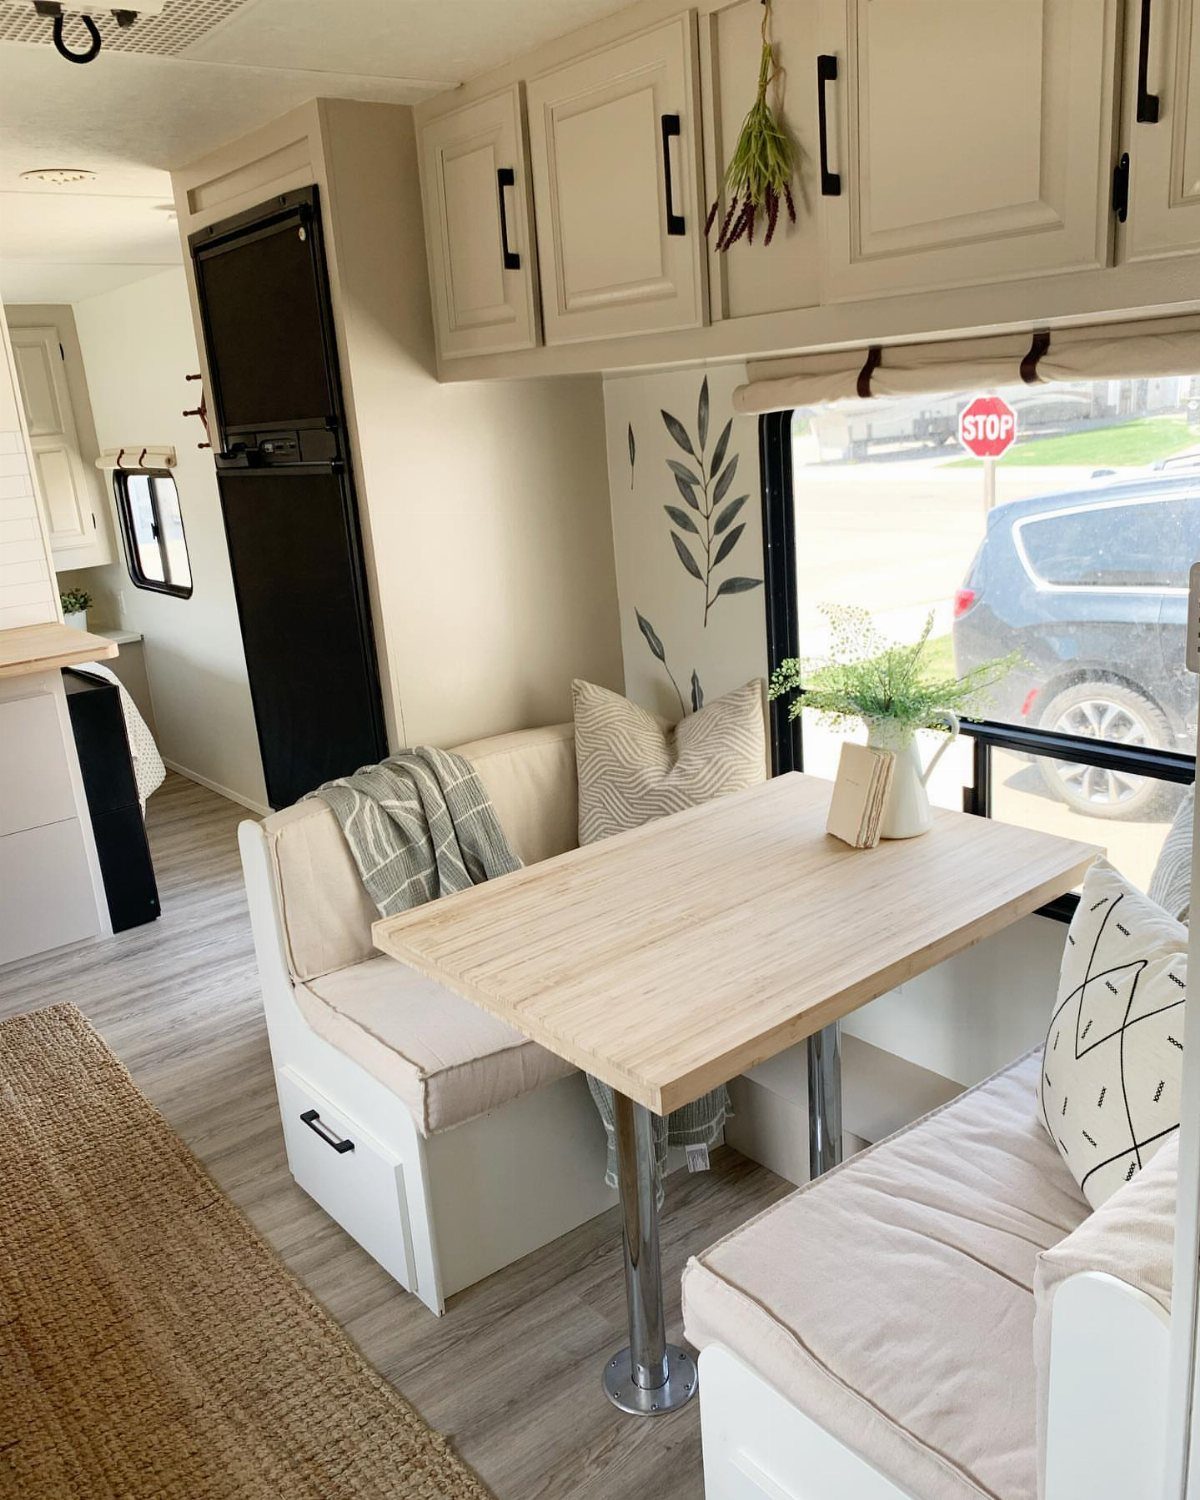
Storage benches replace the dinette seating with lift-top access to what’s underneath, turning dead space into bins for clothes, gear, or food you don’t need daily.
Most fifth-wheel dinettes bolt to the floor, so you unbolt the existing seats and build or buy benches that match the table height.
Cushions on top keep the seating comfortable. Hinged lids let you reach inside without moving the cushions every time, and soft-close hinges keep the lids from slamming on your fingers.
8. Create a Wine Rack
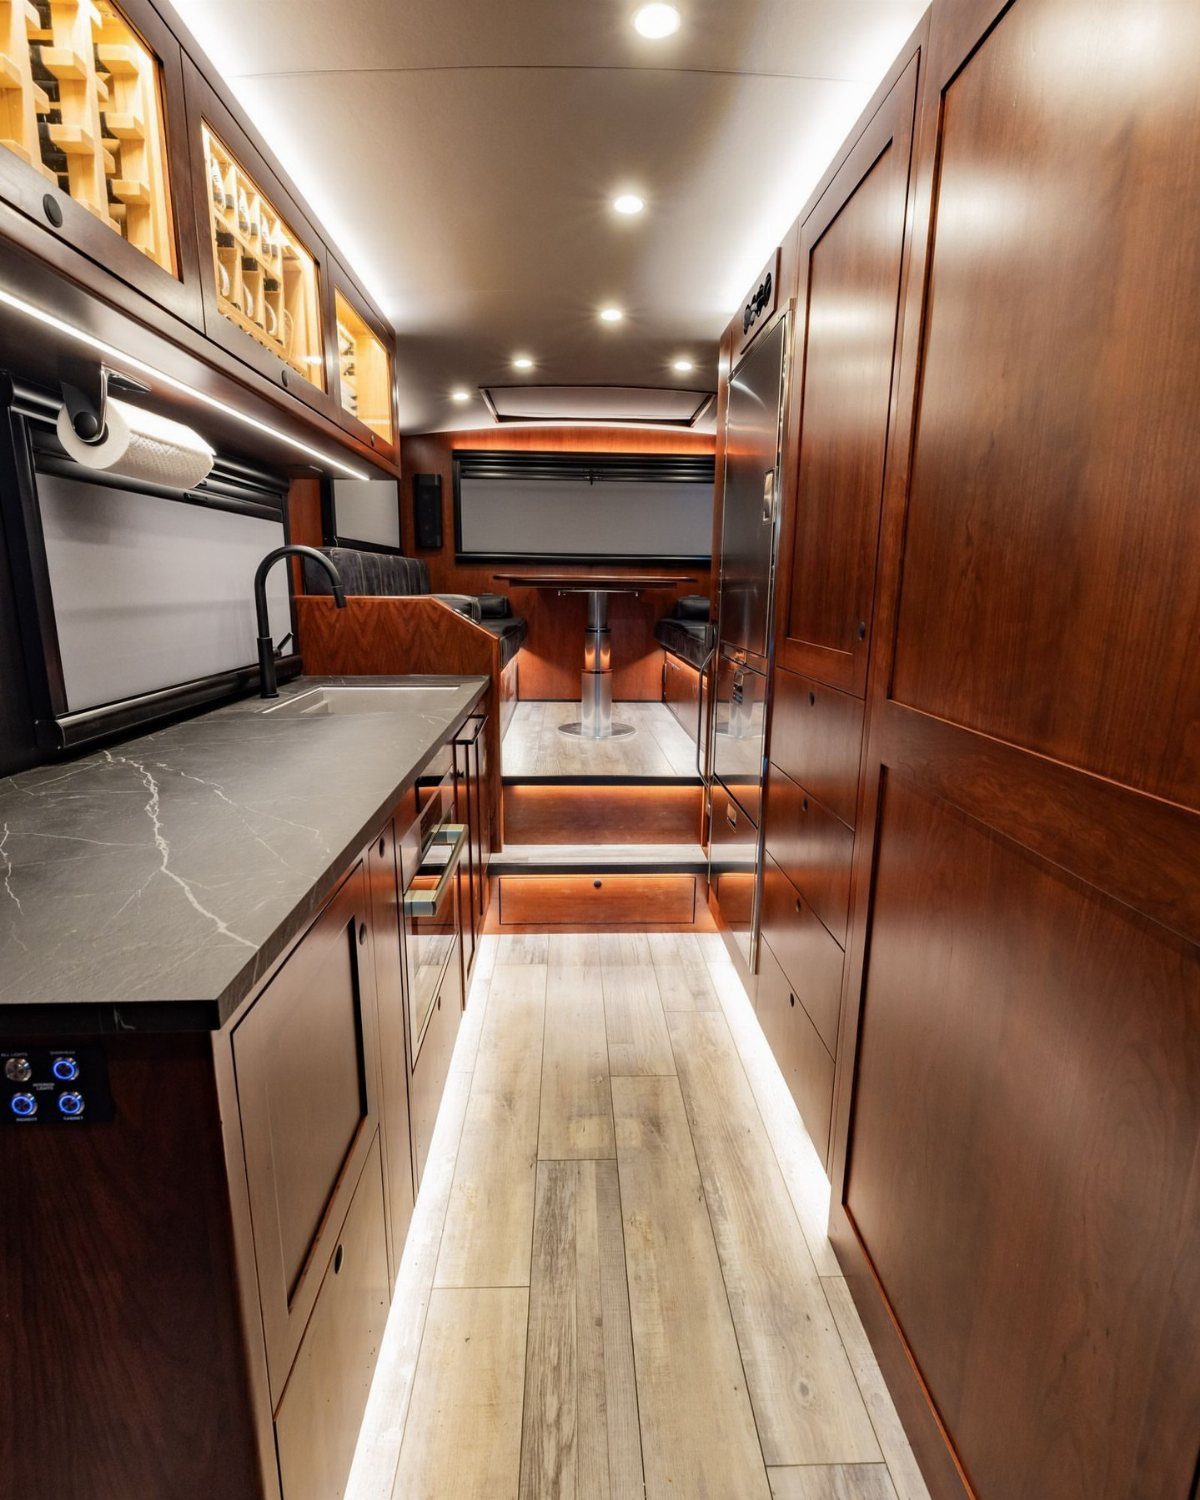
A dedicated wine rack keeps bottles horizontal and out of the way when cabinet space is tight.
The rack here mounts above the kitchen counter where upper cabinets would normally sit, holding bottles in individual slots that let you grab one without disturbing the rest.
Most racks mount to wall studs with L-brackets.
Measure the space between your counter and ceiling, then size the rack to fit. Horizontal slots keep corks wet and stop bottles from rolling when you’re moving.
9. Residential Mini-Split Air Conditioners
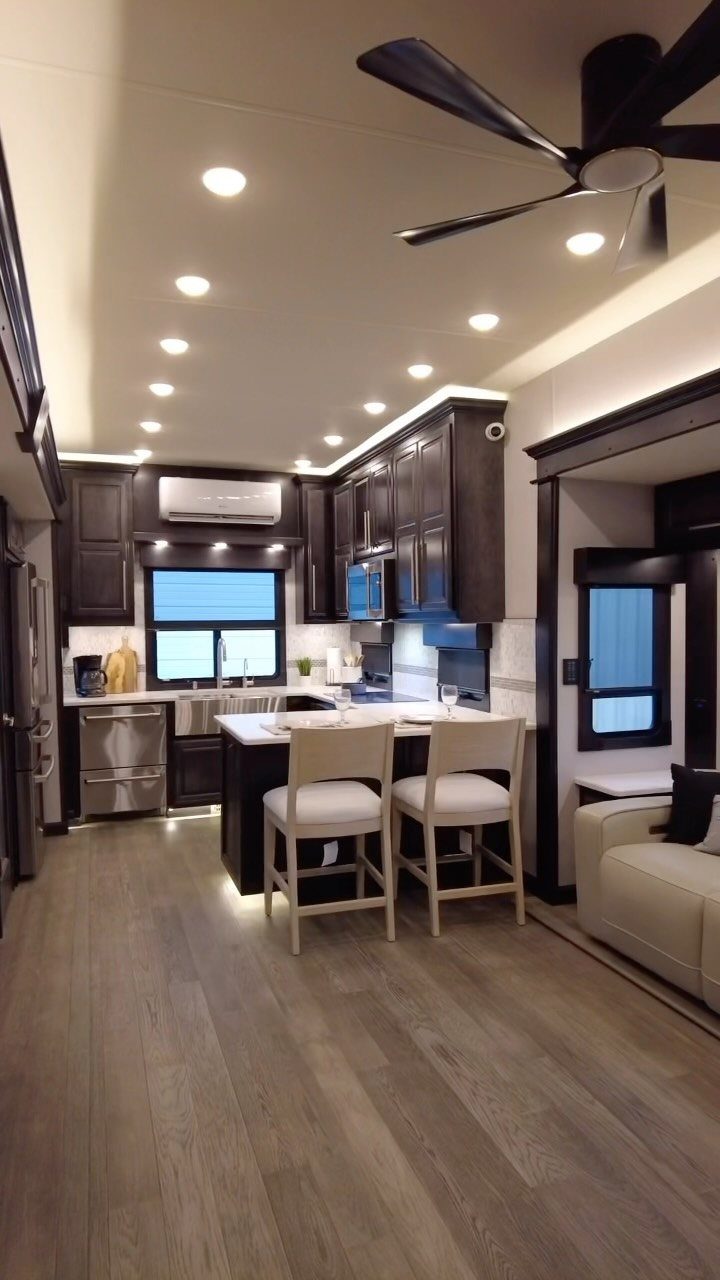
Residential mini-split air conditioners cool and heat without the noise or rooftop footprint of RV units. The compressor sits outside, the air handler mounts inside on the wall, and a small line set connects the two through an exterior wall.
Mini-splits run on shore power or a generator, not batteries, but they move more air and let you control temperature room by room if you add multiple heads.
Installation takes a few hours and requires cutting a hole for the refrigerant lines. I’d hire an HVAC tech for the refrigerant work unless you’re certified.
10. Blue Cabinetry and Accents
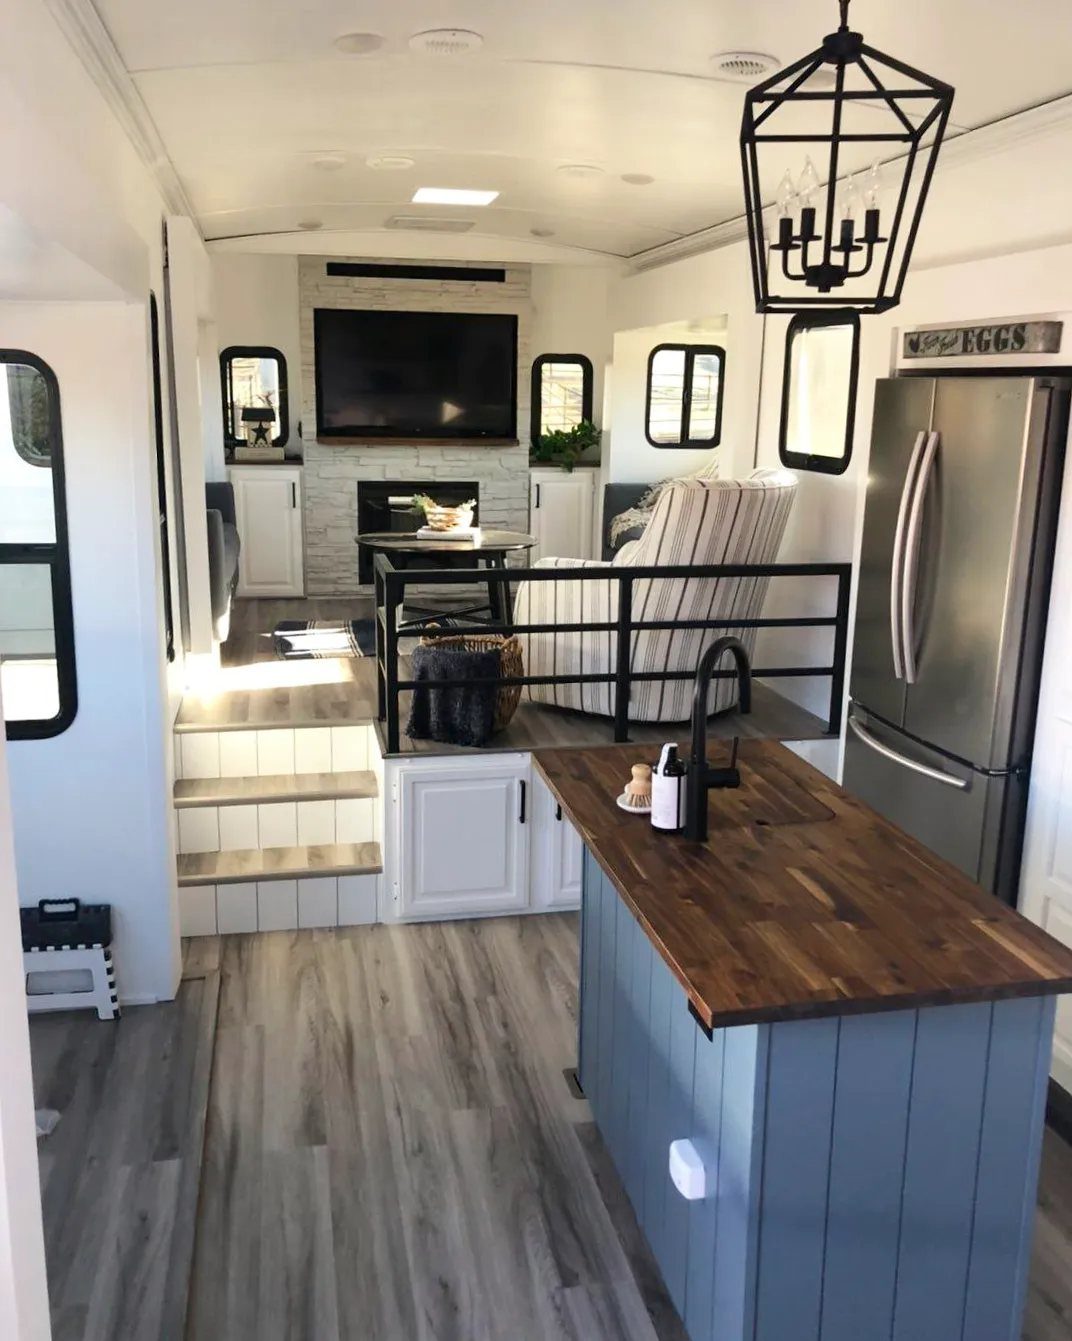
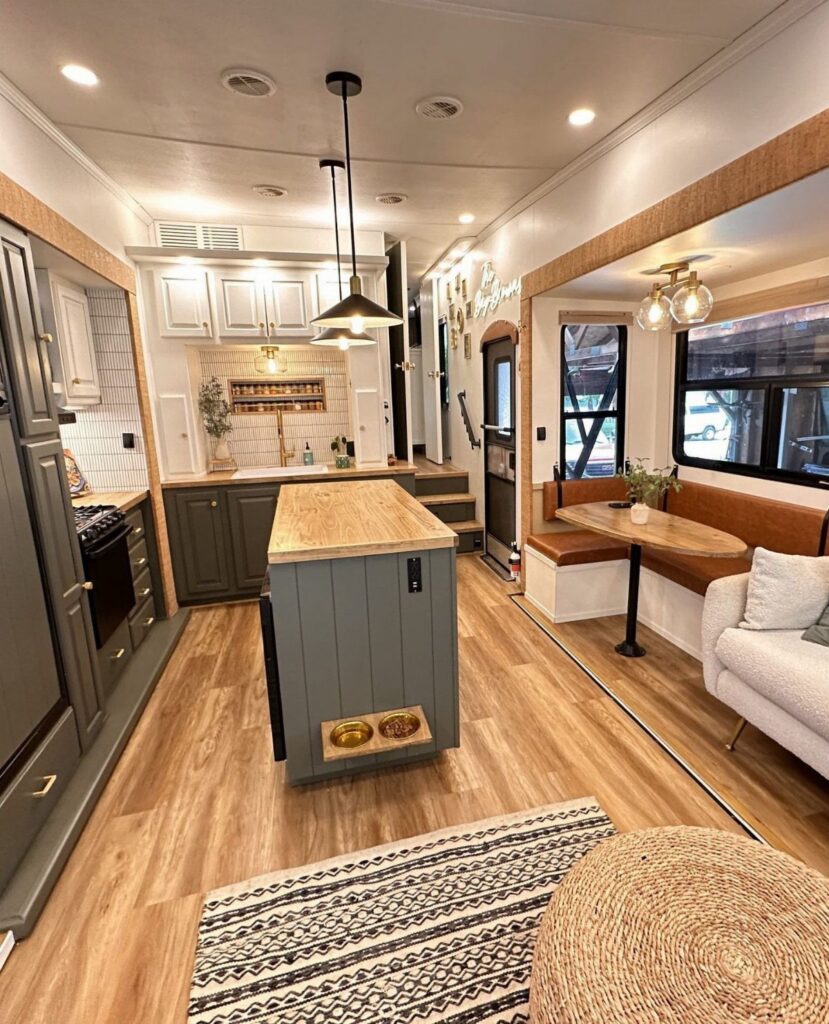
Blue cabinetry breaks up the tan and grey that dominate most fifth wheels, and it pairs well with stainless appliances and wood countertops without reading as loud or coastal.
The island here runs a darker blue that anchors the kitchen, while the upper living area stays neutral.
Paint is the simplest route if your cabinets are solid wood or MDF. Sand lightly, prime, then use a semi-gloss or satin cabinet paint.
2 coats cover most RV finishes. Blue works in kitchens and bathrooms where you want color without committing every wall.
11. Bright White Open Interior
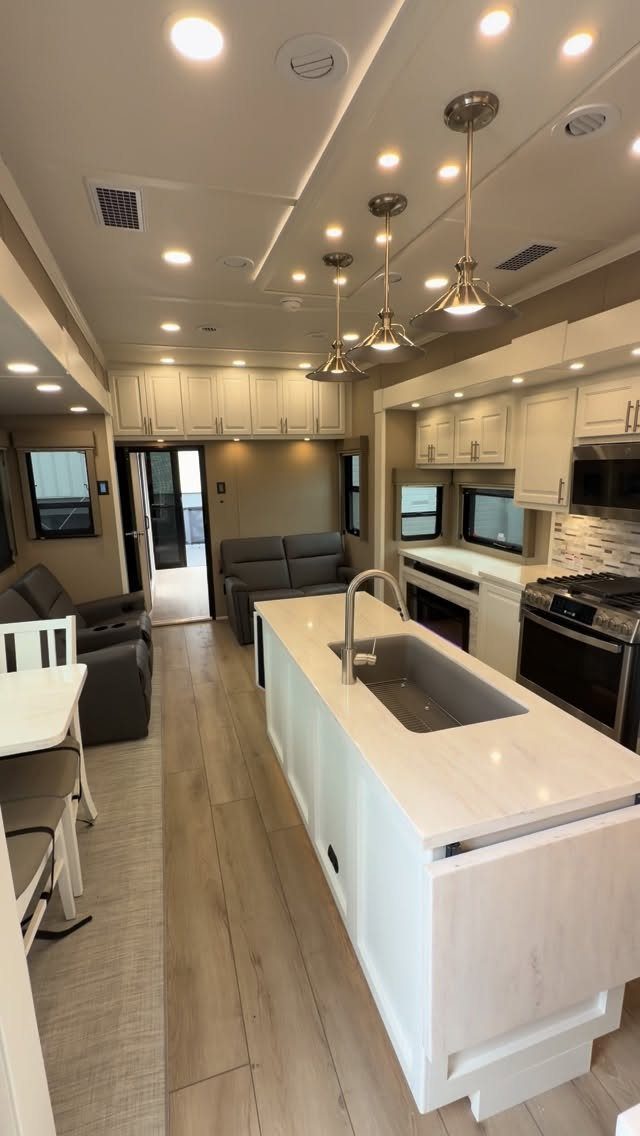
White cabinets and pale countertops bounce light through small interiors and make slide-outs feel less like add-ons.
The layout here keeps the kitchen, dining, and living areas open to each other, with no walls or dark trim to chop the sightlines.
Painting existing cabinets white takes less time than replacing them.
Remove doors and hardware, clean with TSP, prime, then paint with a durable cabinet enamel. Light wood or vinyl plank flooring keeps the floor from disappearing, which matters when walls and cabinets are both white.
12. Modern Neutral Remodel
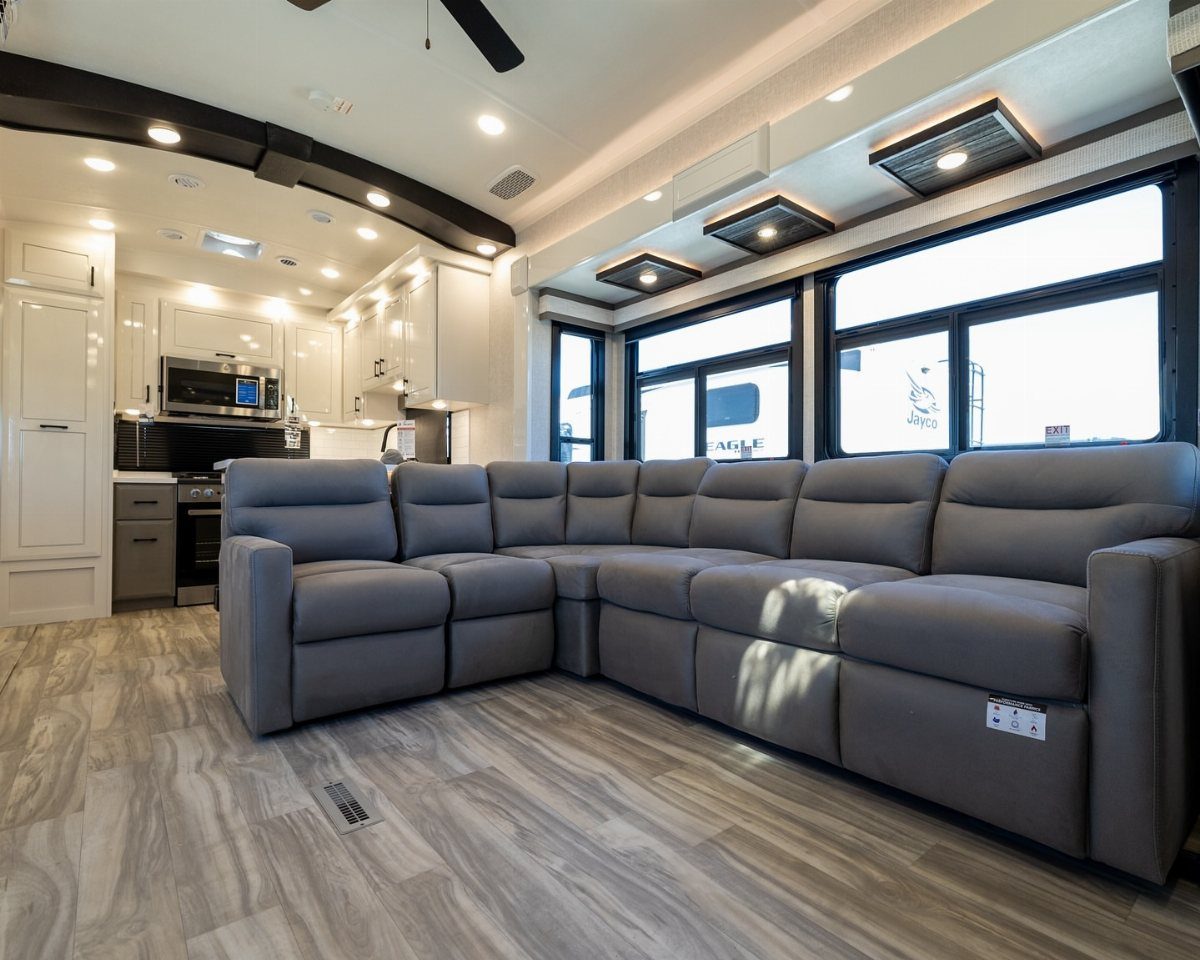
Grey upholstery and wood-look flooring update a fifth wheel without requiring construction or paint.
Luxury vinyl plank installs over most RV floors with adhesive or a floating click system.
Measure the space, order extra for cuts and waste, and start at the longest wall. Grey furniture hides dirt better than beige and pairs with most cabinet colors, whether you leave them stock or paint them later.
13. Sage Green Entryway
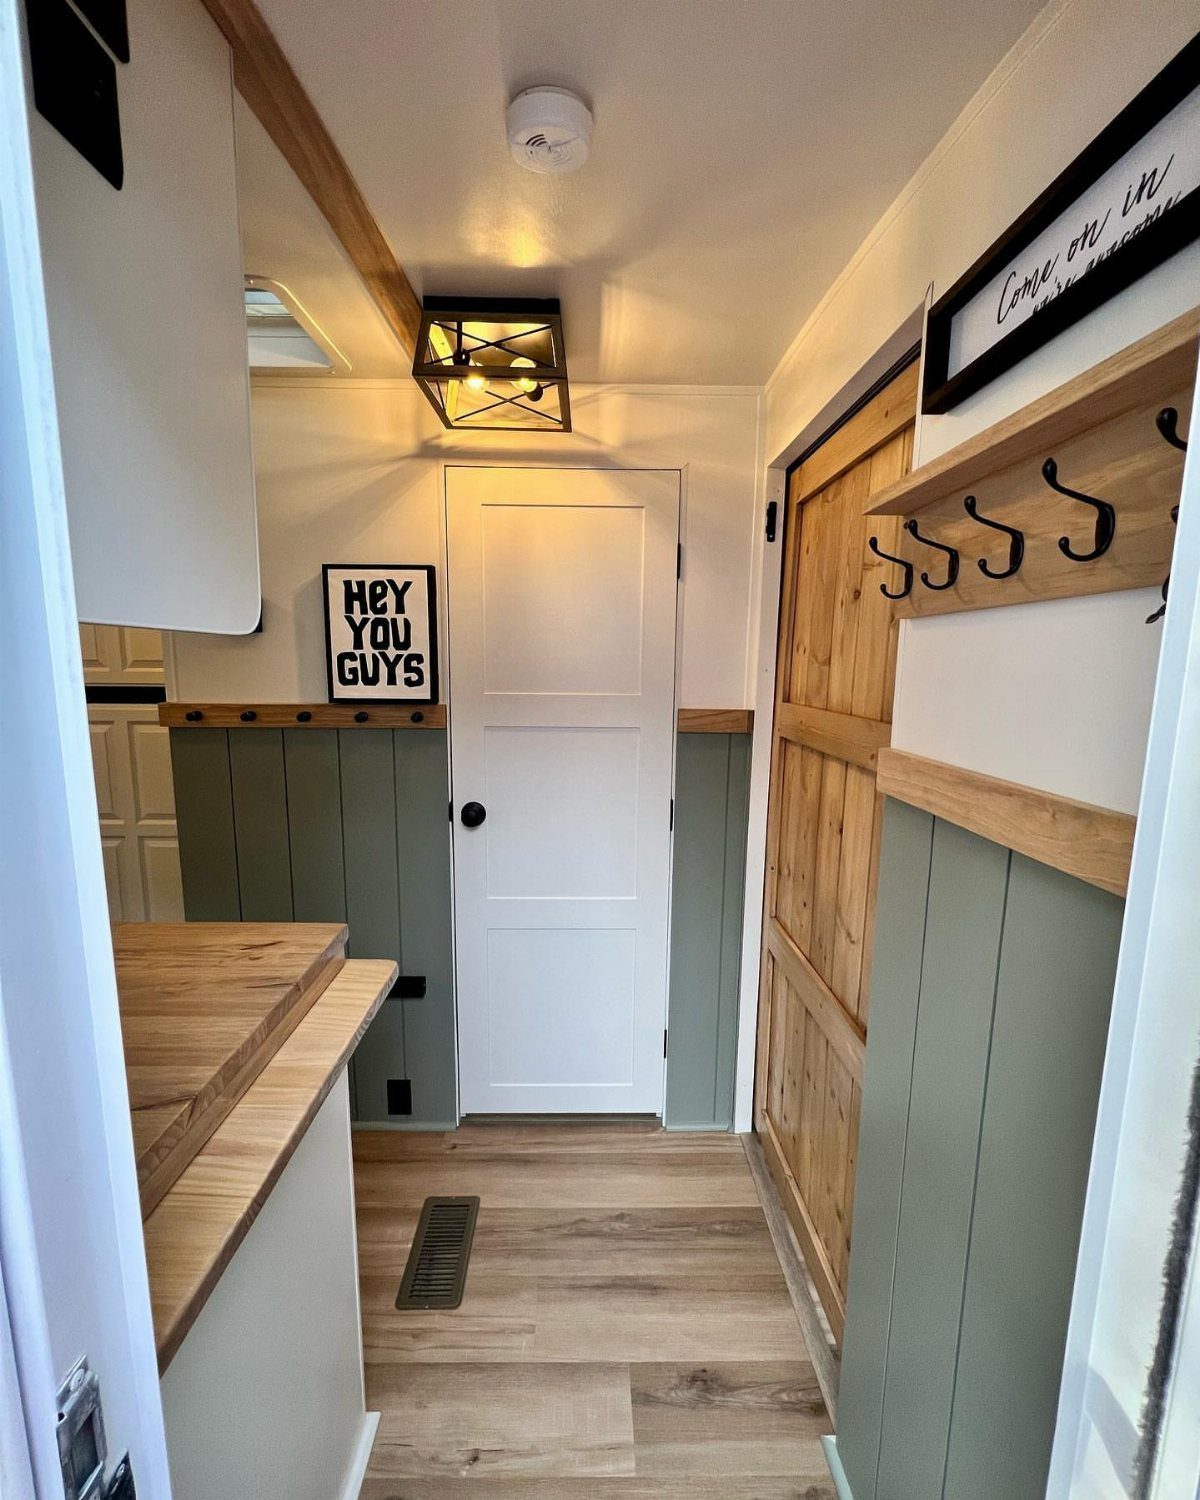
Wainscoting covers the lower half of an entry wall and leaves the upper half light, which gives a narrow RV hall a defined edge. Sage green sits well next to a white door and wood trim without clashing.
Test a sample patch on the wall first, since sage can read grey or green depending on the light. Mount a coat rack right by the door so jackets land there instead of on the dinette.
14. Attached Outdoor Deck
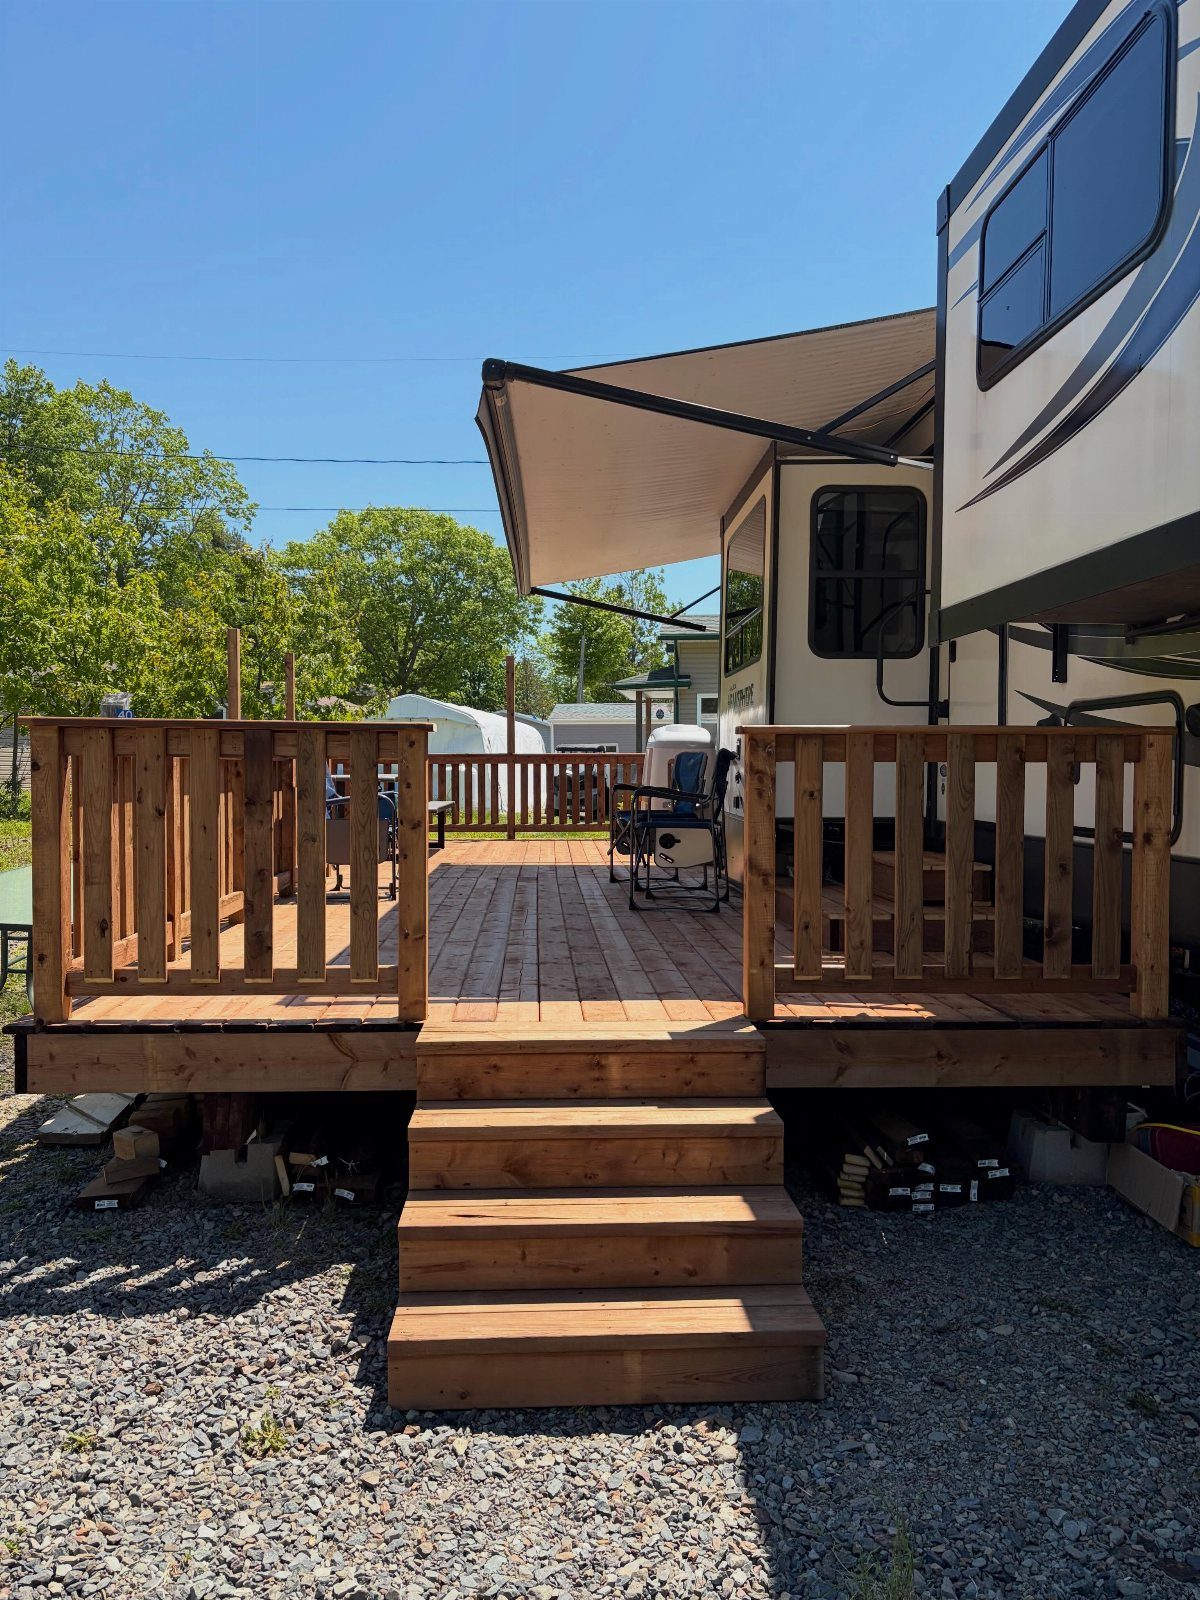
Before buying lumber, measure from the ground to the door threshold.
The deck surface should land just below it, so stepping out feels like walking onto a porch instead of climbing down a ladder. Pack a gravel pad flat first so the frame sits level.
Stairs and railings add cost and build time, but I’d include both. If you move often, build the deck in sections that unbolt and stack.
Renting a lot? Check the campground’s rules before you build.
15. Built-In Home Office
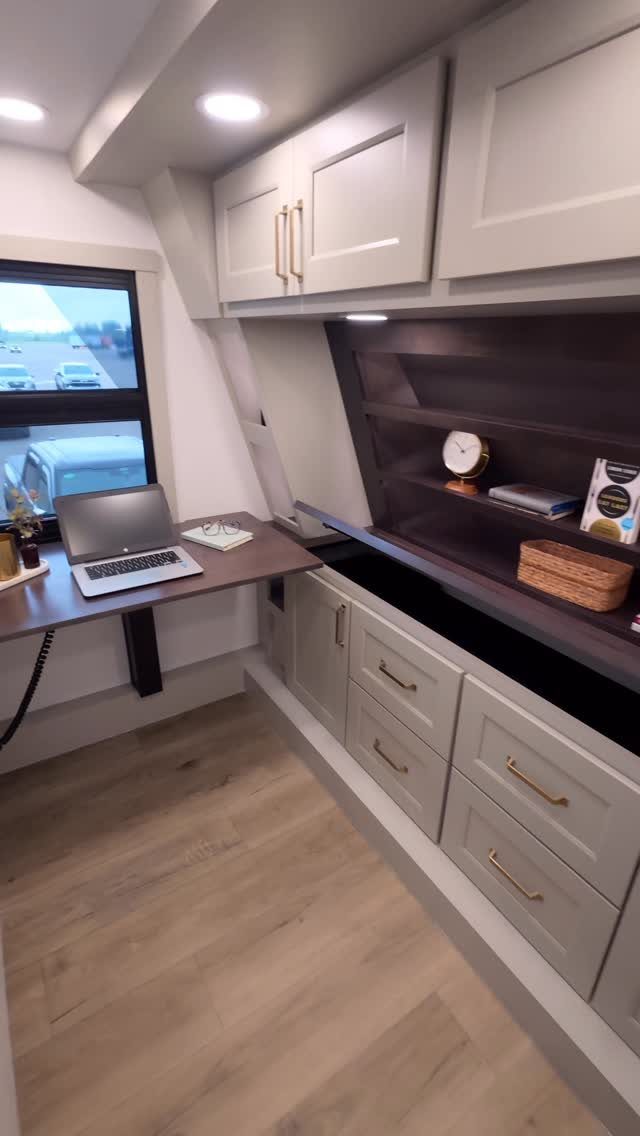
A desk with drawers below and cabinets above keeps a laptop, chargers and paperwork in one spot instead of spread across the dinette.
Pick the location by 2 things: a nearby outlet and a window, since you’ll sit there for hours.
Build the desk to fit your laptop plus a mouse, and choose a chair that tucks fully underneath so it doesn’t block the aisle.
Painting the desk to match the neighboring cabinets, as the grey does here, makes it look original to the layout.
16. Ceiling-Mounted Organizer
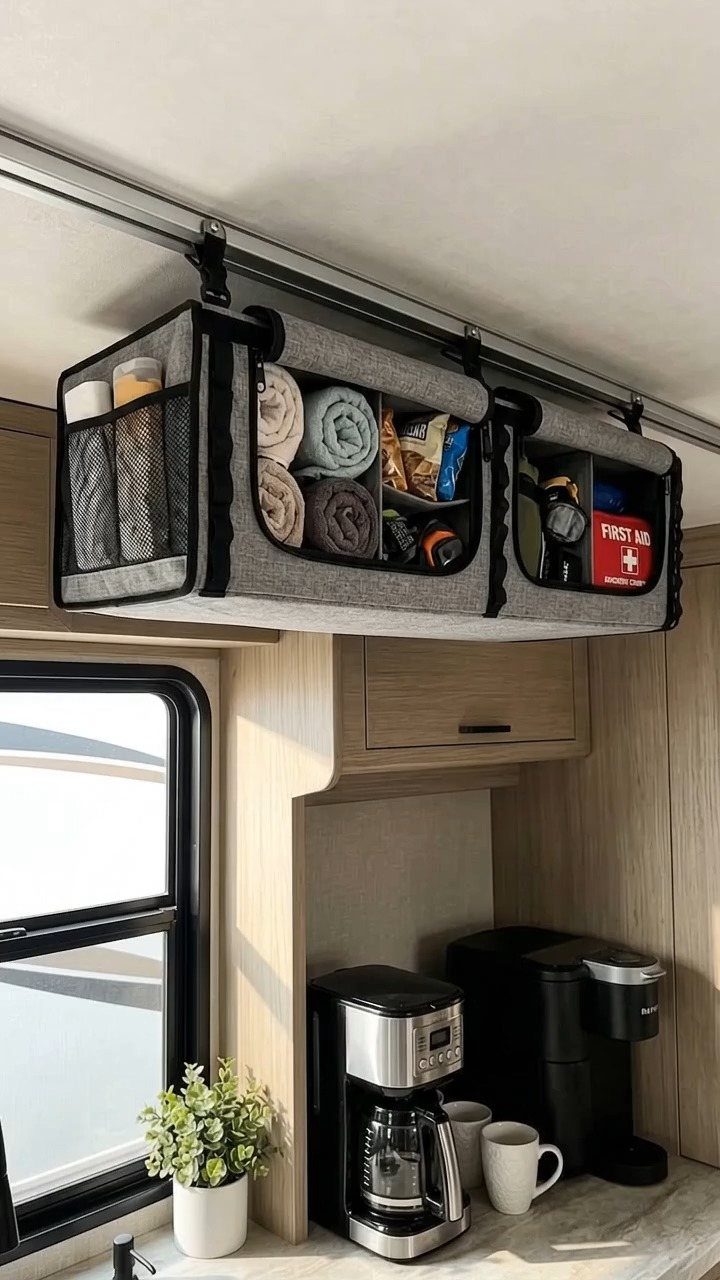
Dead air over a coffee station or entry is where a ceiling rail with a fabric organizer earns its spot. Find the framing before you screw the rail up, so it holds on something sturdier than the ceiling skin.
Keep the load light, like towels and a first aid kit.
Choose a style with closures on each pocket so the contents stay put while the RV is moving. Fabric also means no cabinet door swinging at your head.
17. Mountain Exterior Mural
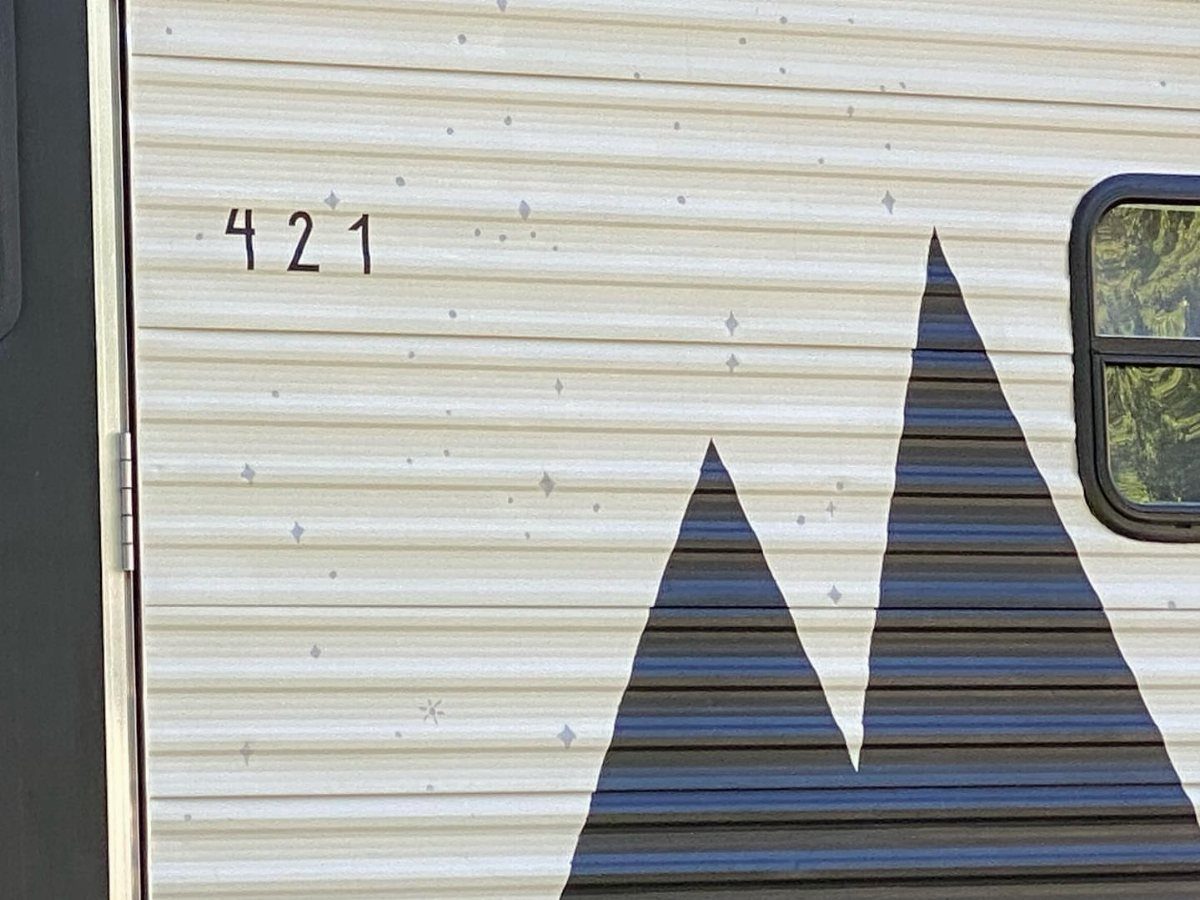
Corrugated siding forgives a mountain silhouette better than a realistic scene, because the ridges already break up straight lines and a jagged peak hides a wobble. Wash the wall and let it dry so the paint grips.
Sketch the ridge line in chalk, tape the base edge, and fill with exterior-rated dark grey over the white.
A second coat is normally all it takes to hide the old finish. Add the stars last with a small brush, dotting rather than drawing.
18. White Beadboard Backsplash
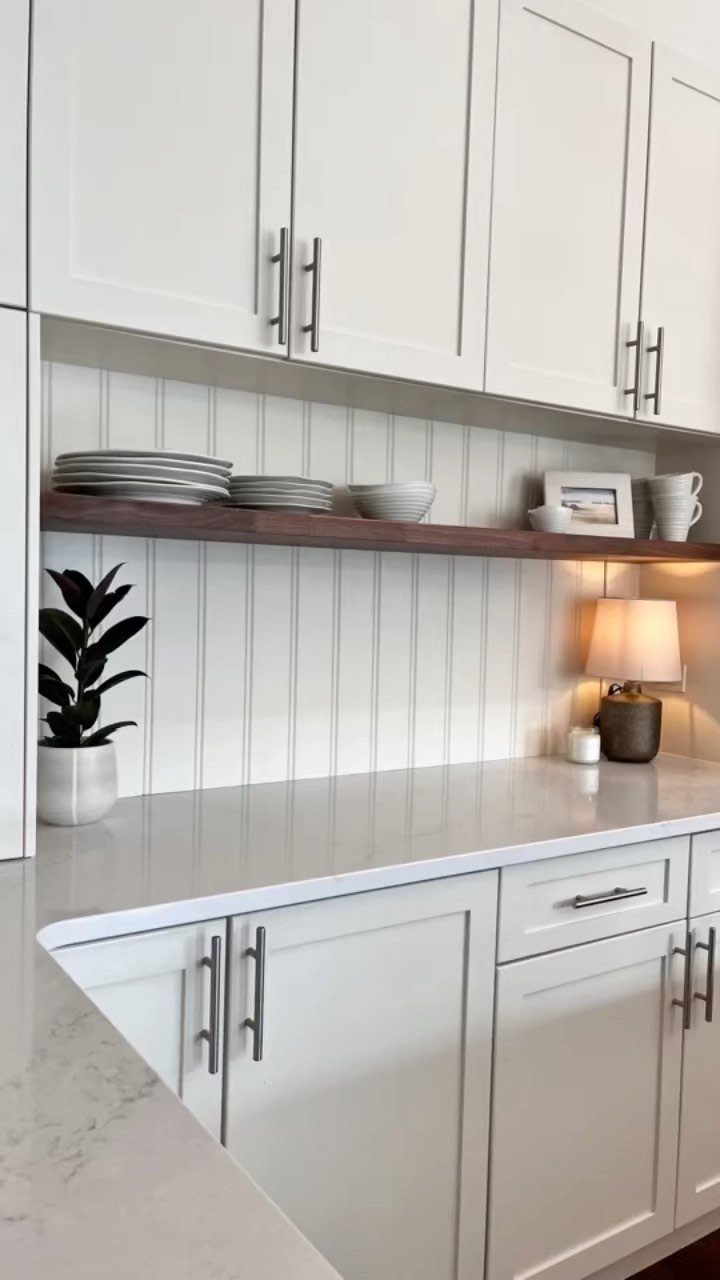
Beadboard behind the counter adds texture to an all-white kitchen without adding another color.
Cut panels to fit between the countertop and the underside of the shelf, glue them with construction adhesive, and paint them the same white as the cabinets.
Caulk the seam along the counter and the top edge so the lines look clean. The wood floating shelf then reads as the one warm note against all that white paneling.
19. Cane-Front Cabinets
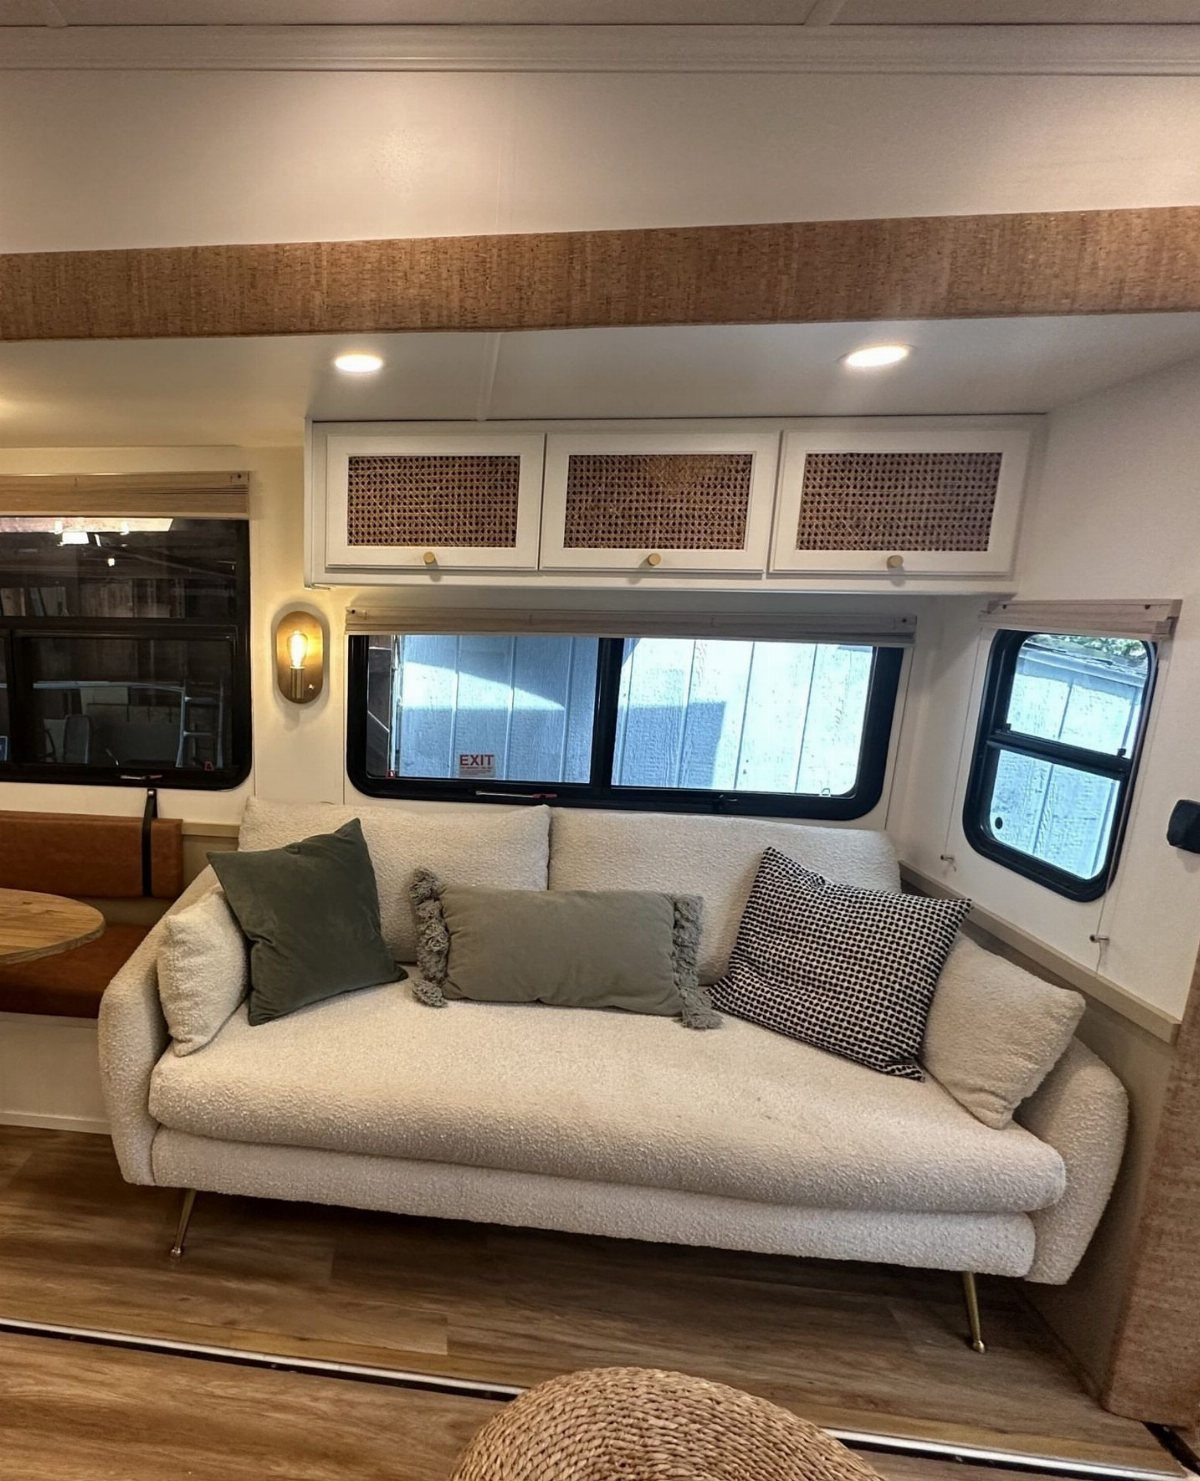
Woven cane in the door fronts softens a row of overhead cabinets that would otherwise read as flat white boxes.
Cane webbing is sold pre-woven by the foot, so you cut out each door’s center panel and fit the webbing behind the frame.
Soak the webbing in water first so it bends without cracking, then glue or staple it in place and let it dry tight.
Cane is open, so whatever sits behind it shows. I’d keep those cabinets for matching baskets and bins.
20. Slatted Wood Kitchen Island
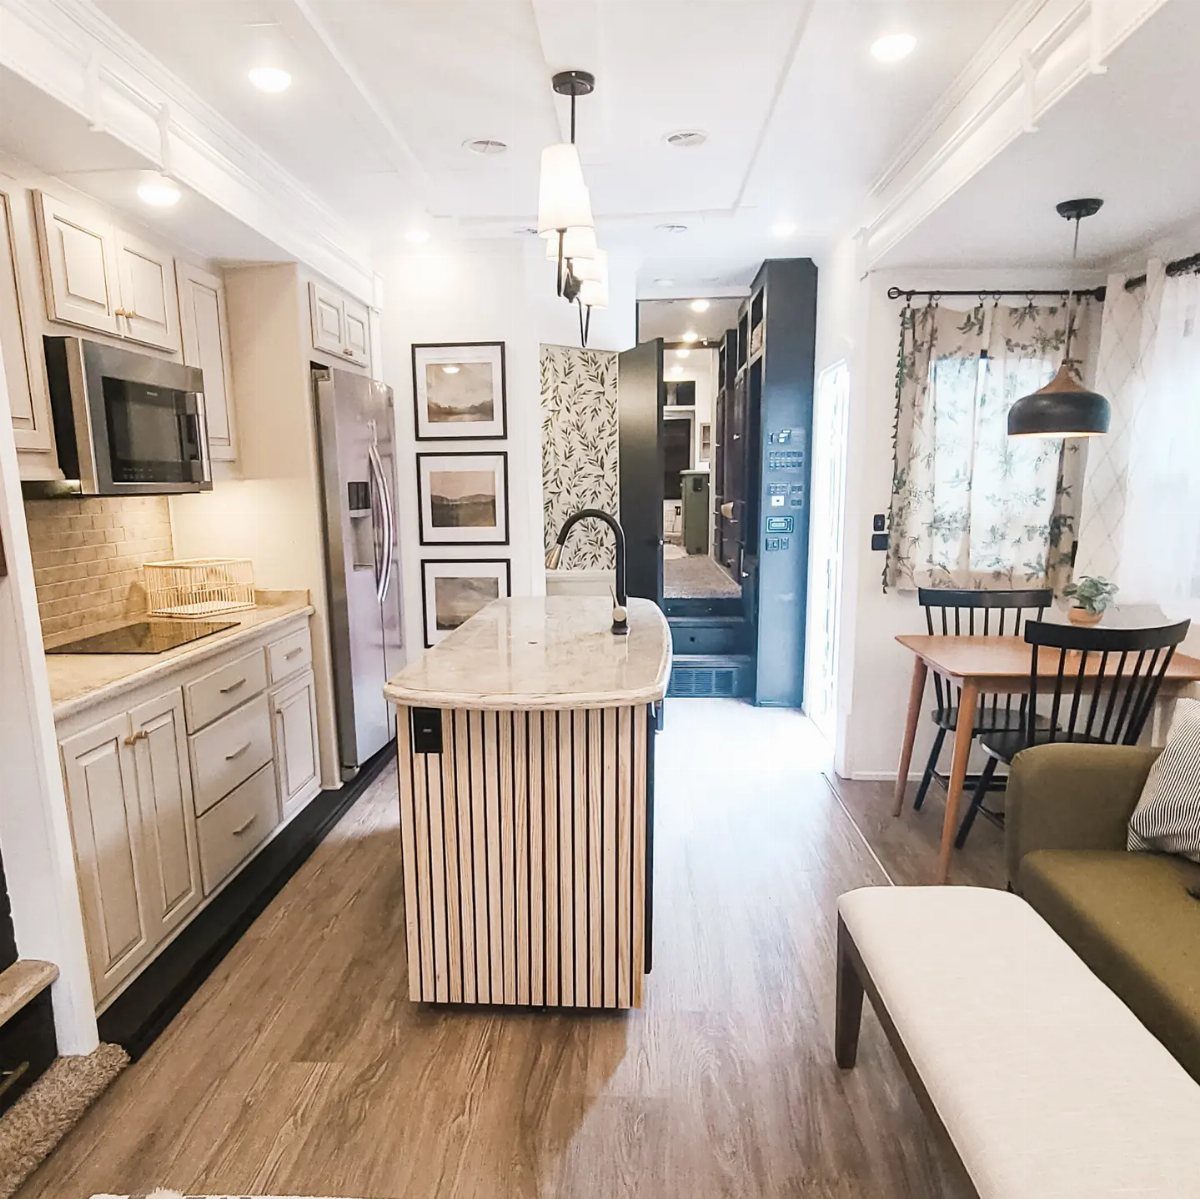
Even spacing decides whether a slatted island looks built or knocked together. Cut every slat to the same length, then use one scrap of wood as a spacer between each so the gaps stay identical down the whole run.
Real marble is heavy for a trailer, so a thin slab or a marble-look laminate is the safer pick.
I’d choose the laminate on a tight budget, and keep the wood base because the slats are what give a white kitchen its warmth.
21. Updated RV Bathroom Vanity
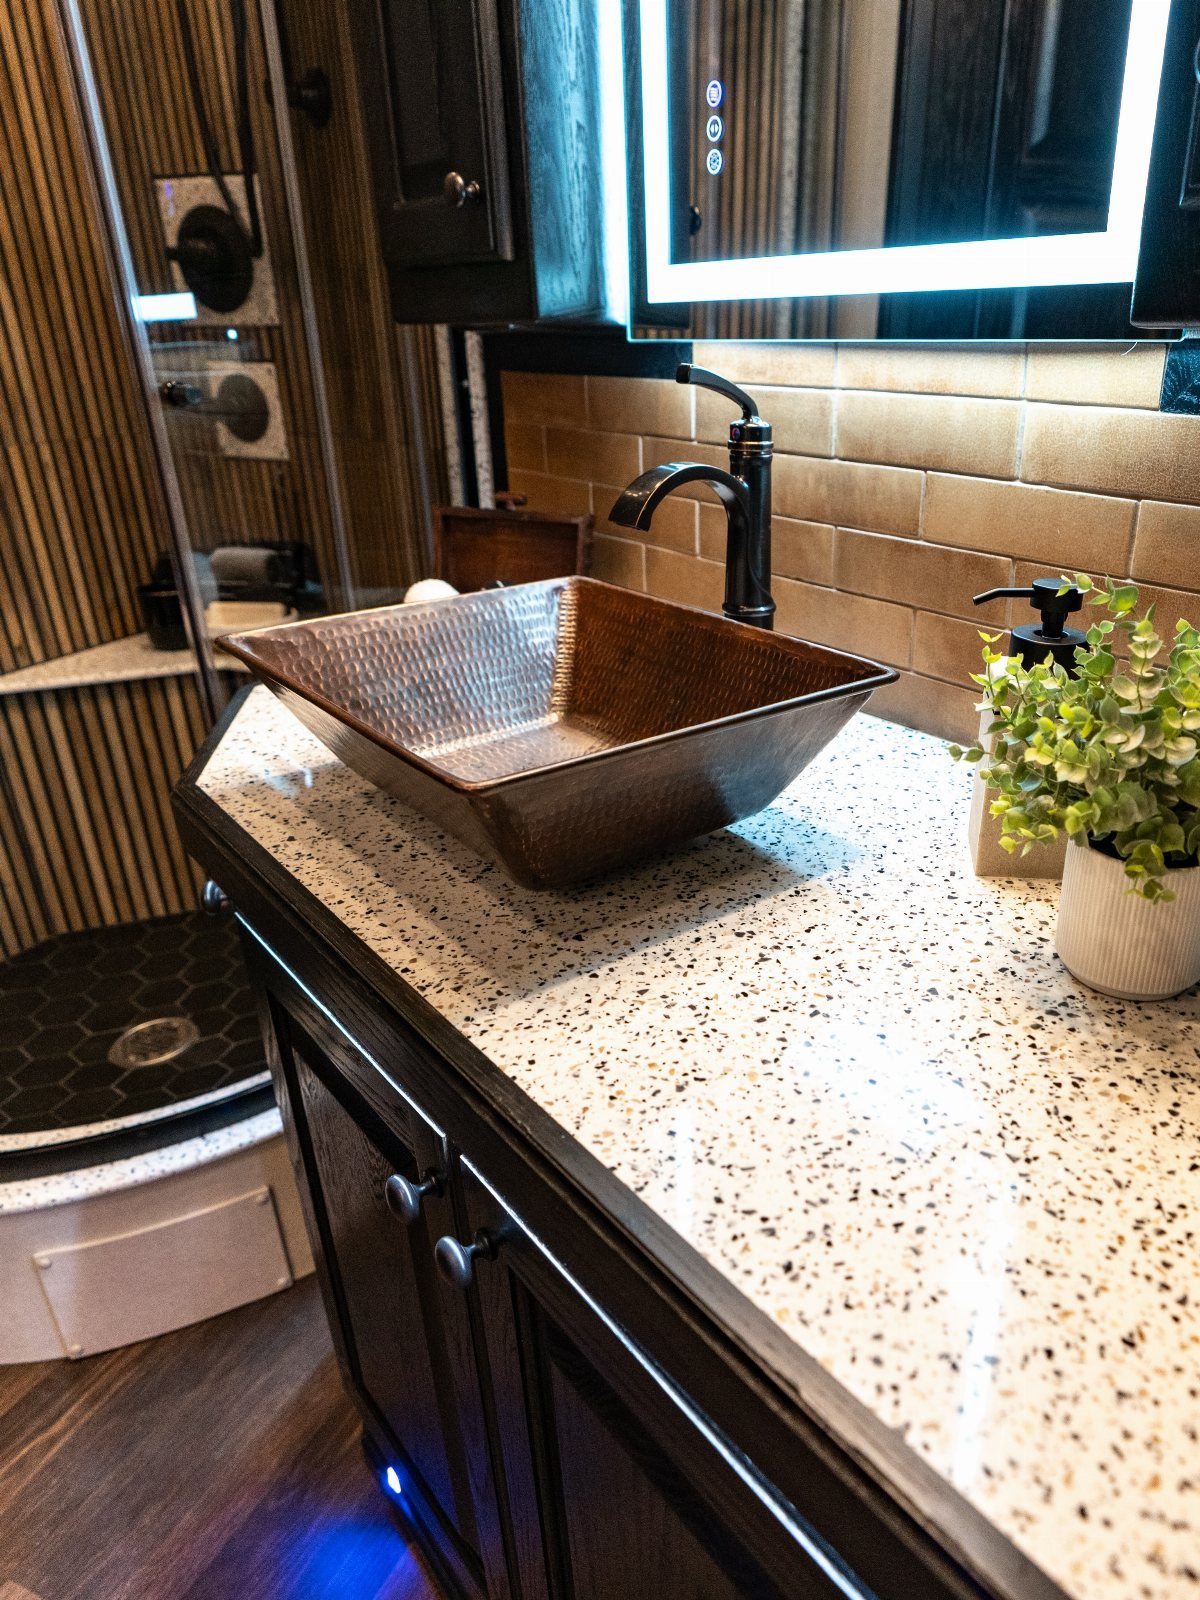
Taller faucets are the part people forget with a vessel sink. Measure from the counter to the top of the bowl rim, then pick a faucet whose spout clears that rim and lands inside the bowl.
A black faucet keeps copper from tipping into too much warmth, and it matches dark cabinets well.
A backlit mirror uses LEDs, so the battery draw stays small. Hold the faucet’s spout over the sink before you drill the counter.
22. Grey Accent Wall
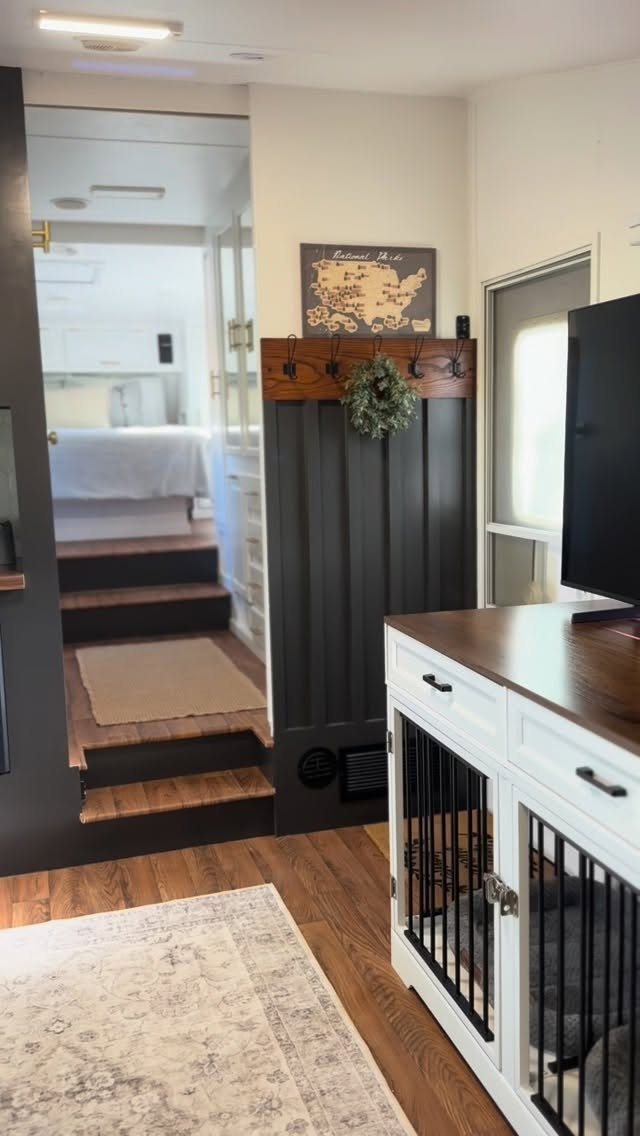
Dark grey works on a single wall because the white cabinets beside it keep the room from closing in.
Pick the wall your eye lands on first, tape the edges at the ceiling and cabinets, and roll on a grey-tinted primer so the color builds evenly.
2 coats of paint are usually enough.
A dark wall also makes a framed map, like the National Parks one here, stand out without any extra lighting. Paint is the cheapest change in this list.
23. Cowhide Rug and Wallpaper
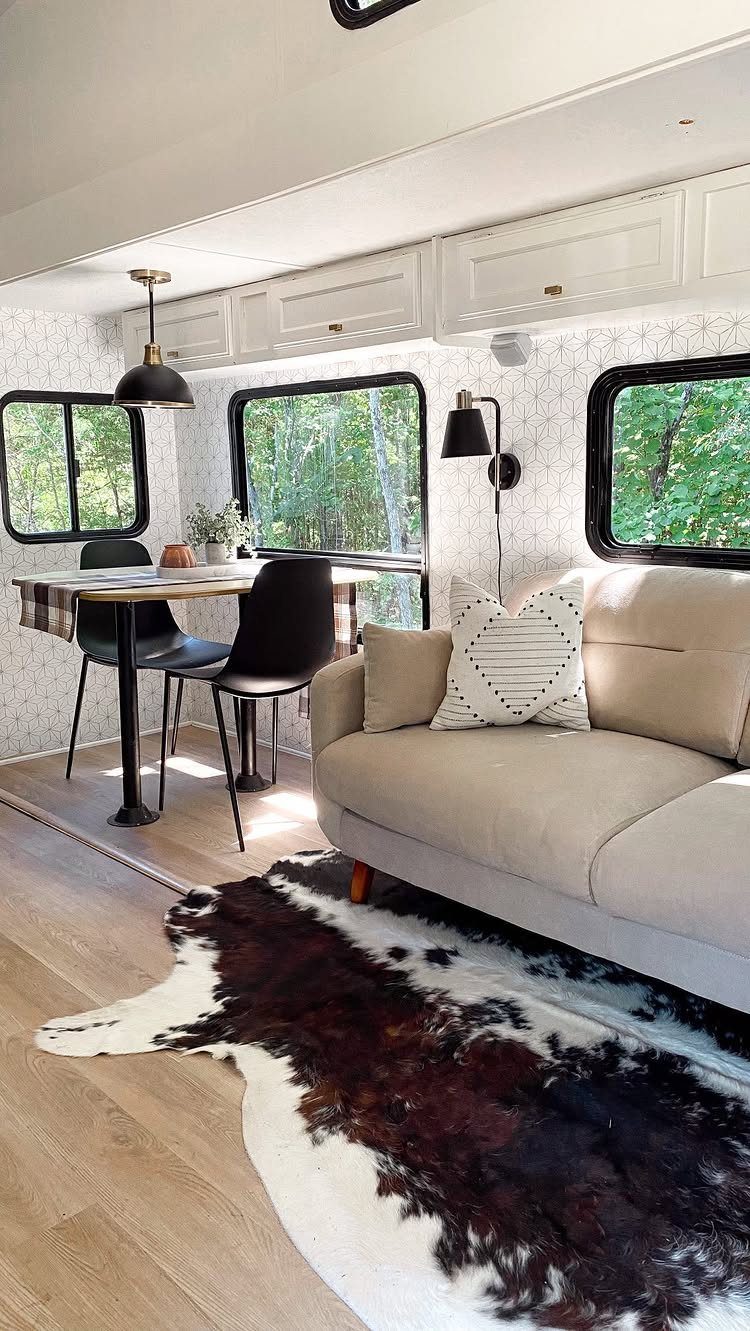
Black chairs keep a cowhide rug and patterned wallpaper from piling into one busy look. With the hide already full of shape, I’d choose a wallpaper pattern in a quiet tone and let the chairs supply the contrast.
Peel-and-stick wallpaper suits a small wall and comes off later if you tire of it. Trim the rug to a shape that clears the slide-out edge, and keep the sofa plain beige so the pattern has room.
Plan Budget and Project Priorities
Sort every project into "now" and "later." Comfort and function go first; purely cosmetic changes can wait for a second round.
Pick the one or two big-ticket items worth paying for, usually whatever you touch or use daily, and hold everything else to a budget version.
Next, write out the supplies for each project with a cost beside every line, then total the list first and shop only after you have the number.
Tools are an easy place to save. Borrow what a friend already owns, rent what you’ll use once, and buy only what you’ll reach for again.
Leave a cushion in the budget.
Once old materials come out, water damage and mold can turn up, and those repairs come before the fun projects. I’d plan on the job being bigger than it looks.
Small changes can make a big difference on a modest budget, so a tight number is no reason to skip the project.
Inspect Before Buying or Renovating
Start with the problems that cost the most to fix: water damage, mold and frame damage. Press on walls, ceilings and floors, and treat soft spots or a musty smell as a reason to walk away or lower your offer.
Then test everything that’s supposed to work:
- Appliances: run each one, not just turn it on
- Water system: pump, faucets, drains and any sign of leaks
- Heating and air conditioning: run both
- Tires, brakes and tow systems
- Awning: extend and retract it fully
Fix structural and water problems before any cosmetic work. Paint over a damp wall hides the damage for a few weeks, and it comes back worse.
Never cover up water damage or mold. Cut it out, dry the area and repair it first.
Allow Time and Prepare Surfaces
Plan on the remodel taking longer than the paint can suggests. Opening up a wall or cabinet can reveal damage you didn’t know about, and that has to be fixed before anything else.
Prep takes the most time, and skipping it means doing the work twice.
RV interiors mix particleboard, solid wood, veneer, painted boards and wallpaper, and older rigs add glass, plastic panels and poly doors, so check what each surface is before you pick products.
Sand, wash with TSP, caulk the gaps, then prime. I’d spend more on the primer than on any other supply, since it decides whether the finish holds.
Wear gloves and eye protection, and cover your skin with long sleeves. Keep pets out of the room until the paint dries.
Frequently Asked Questions
How do you remodel an RV?
Start by inspecting for water damage and structural issues, then fix those before any cosmetic work.
Plan your budget, prioritize function over looks, prep every surface by sanding and priming, then work through organization upgrades, paint, fixtures, and furnishings in that order.
Allow more time than you expect since opening up cabinets or walls can reveal hidden damage that has to be repaired first.
Why renovate your RV?
Renovating updates dated interiors, customizes the space to fit how you actually use it, and improves comfort with better lighting, storage, and furnishings.
It can also increase resale value if the work is done well. Skip the project if major repairs like frame damage or mold would eat your budget before you reach the improvements you want.
How do you prep an RV for paint?
Scuff-sand the walls and cabinets, wipe them down with TSP, fill every gap with caulk, and roll on a coat of primer before any color goes up.
Particleboard, veneer, and old painted panels each take paint differently, so identify what every surface is before you buy primer.
I’d budget more hours for prep than for the painting itself; cut it short and the paint peels, which means doing the whole job twice.