Before you pick a layout, measure the open floor in front of the cabinets.
An island or table wants 36 inches of clearance on every side, and a room that falls short is better off with a bar table or a rolling cart on locking casters.
From there the ideas run up to a range set into an island, and down to paint, tile and lighting for kitchens where nothing can move.
1. Use an Island
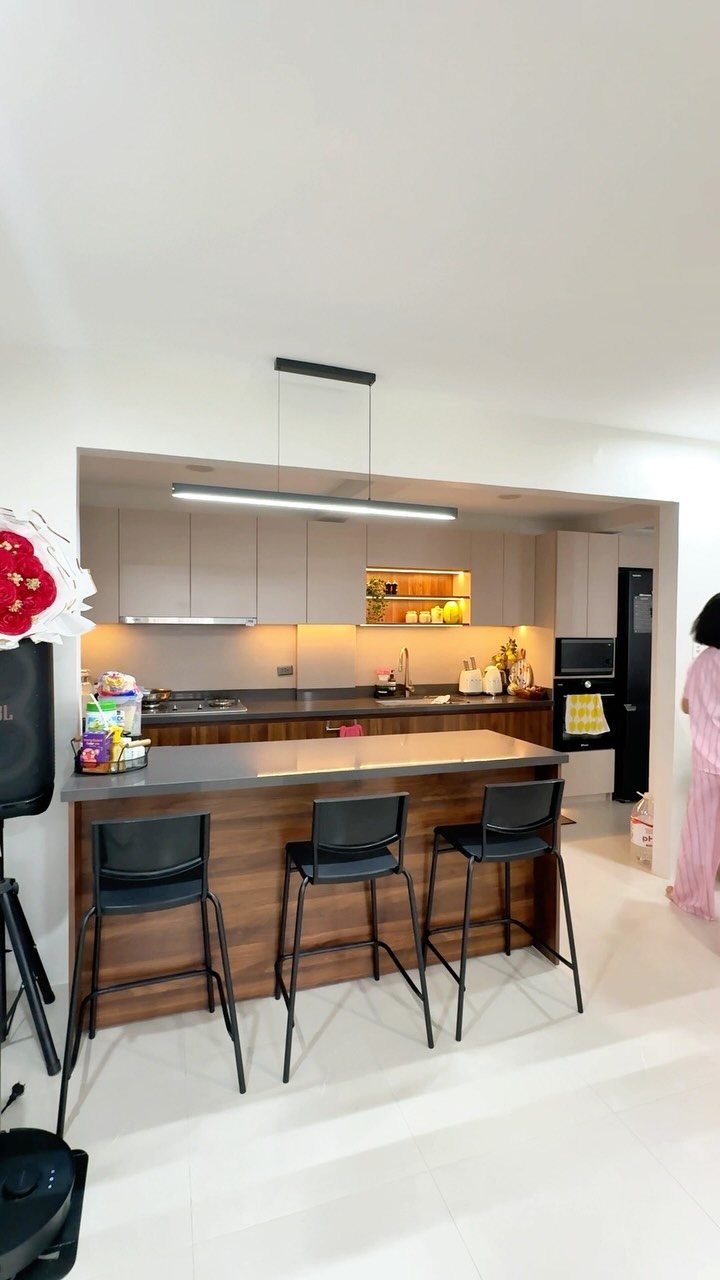
Across from a single wall of cabinets, a freestanding island adds a second work surface, storage underneath and room for stools.
Leave about 36–42 inches of walkway between island and cabinets, a common rule of thumb; tighter than that and an open oven door blocks the path.
If the room can’t spare that clearance, a smaller piece works better than a full island.
2. Add a Dining Table
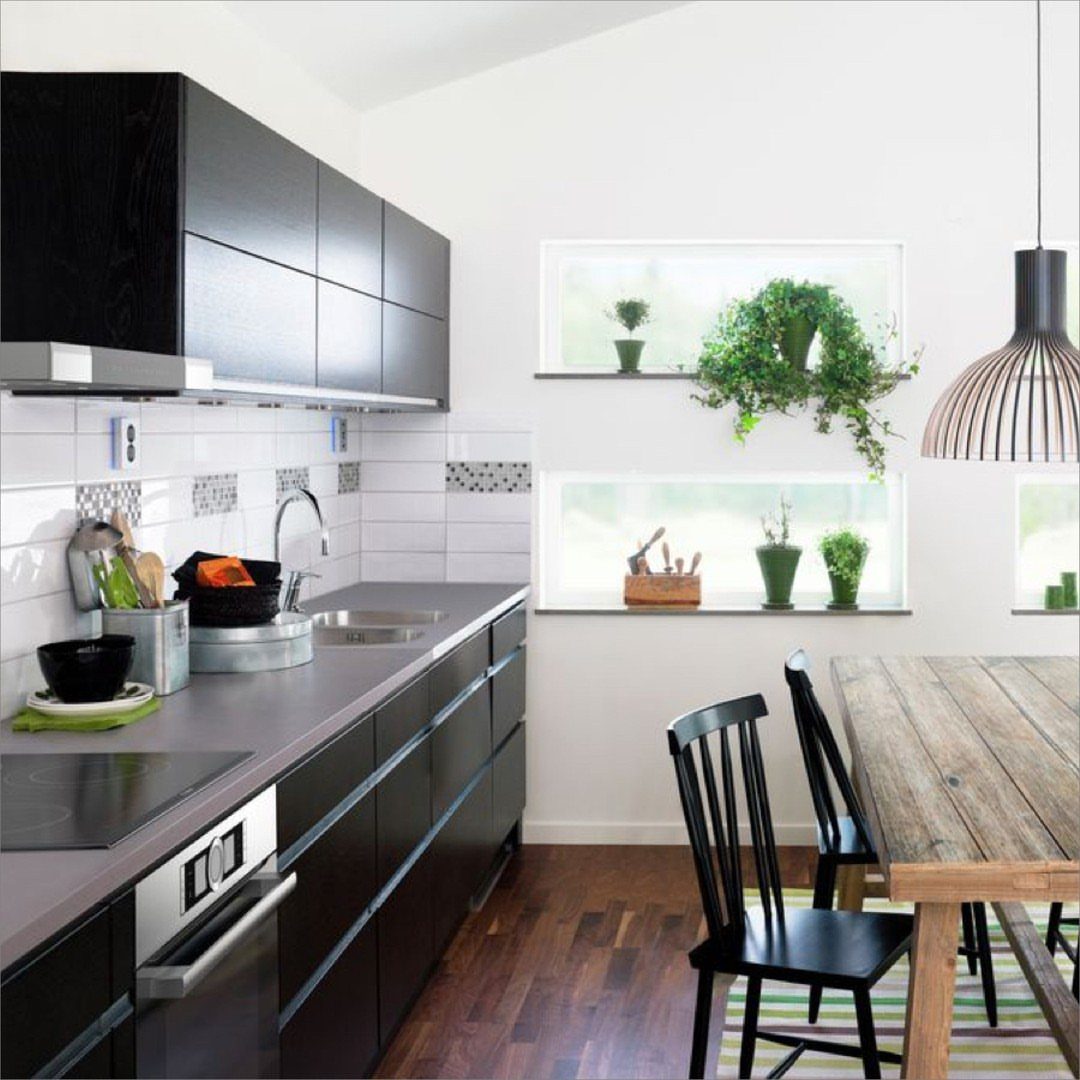
Moving meals to a separate table frees the wall run to handle only cooking and cleanup. Setting the table parallel to the cabinets keeps each in its own zone.
Before you commit to a table spot, pull a chair out from it and check that a seated person can still push back without the seat hitting the counter.
3. Use a Bar Table
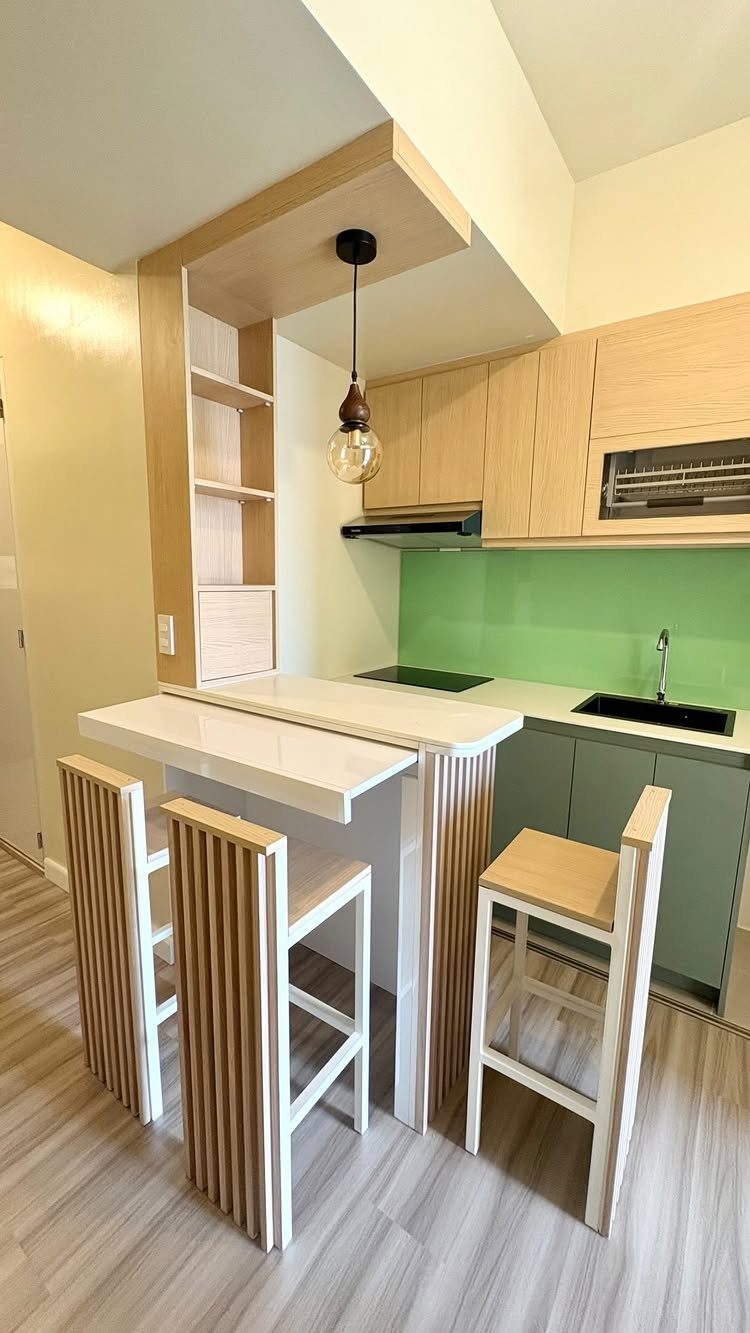
Stools that tuck fully under the top decide whether a bar table works in a tight room. Slim slat stools slide out of the walkway when nobody is sitting.
A bar table takes less floor than an island and still gives you a spot to eat, work or set down groceries.
In a studio, where one surface has to do all three, I’d pick it over an island every time.
4. Frame the Workspace
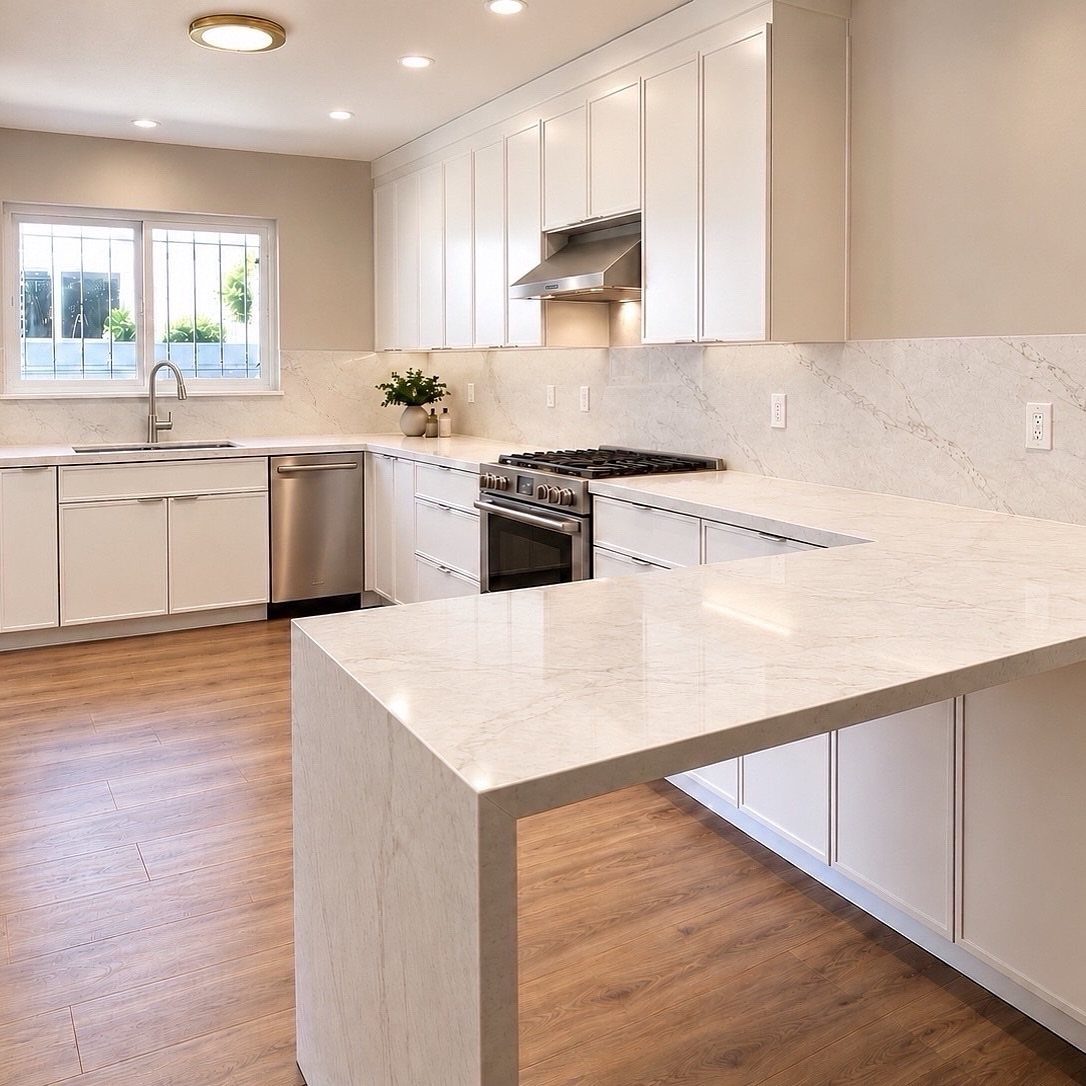
Put tall cabinets at each end of the run, and the lower middle section stays clear for prep and cooking.
Put the sink, cooktop and prep counter in that middle stretch so everything you use daily sits between the 2 towers.
The tall ends can hold what you reach for less often, like pantry goods and small appliances. Flat-panel doors in white keep those towers quiet, so the run reads as one calm wall.
5. Use a Rolling Island
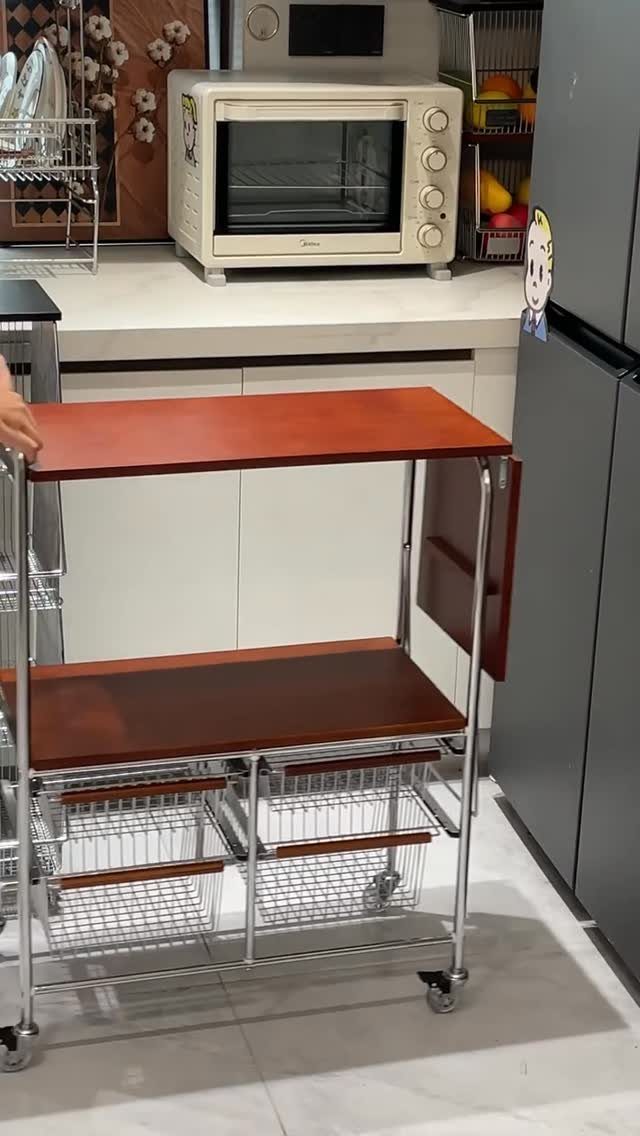
A cart on wheels costs far less than a built island, and it’s the only version you can park out of the way when you need the floor.
Look for locking casters: an unlocked cart slides when you press down to chop or knead.
2 shelves with baskets hold prep tools and produce, and the cart can sit beside the refrigerator between uses.
6. Add a Peninsula
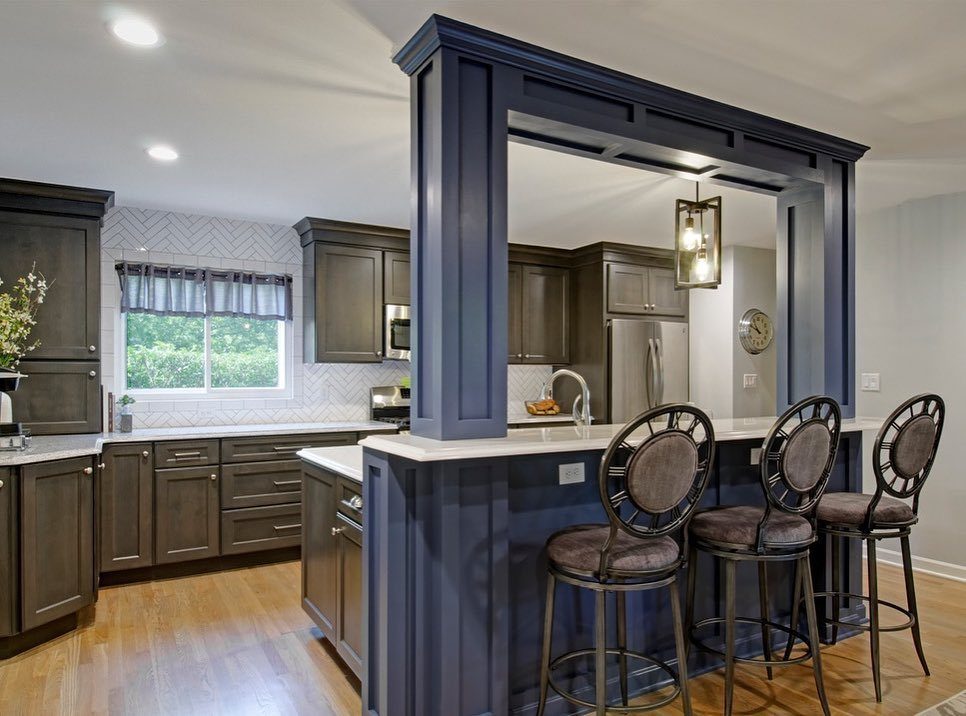
An island needs walkway on both sides; a peninsula needs it on one, because it attaches to the end of the run. That makes it the better pick in a narrow room with space for stools on just one side.
On the seating side, extend the countertop past the cabinet base so knees fit under it. A color like blue lets the peninsula stand apart from darker cabinets.
7. Add a Range to Island
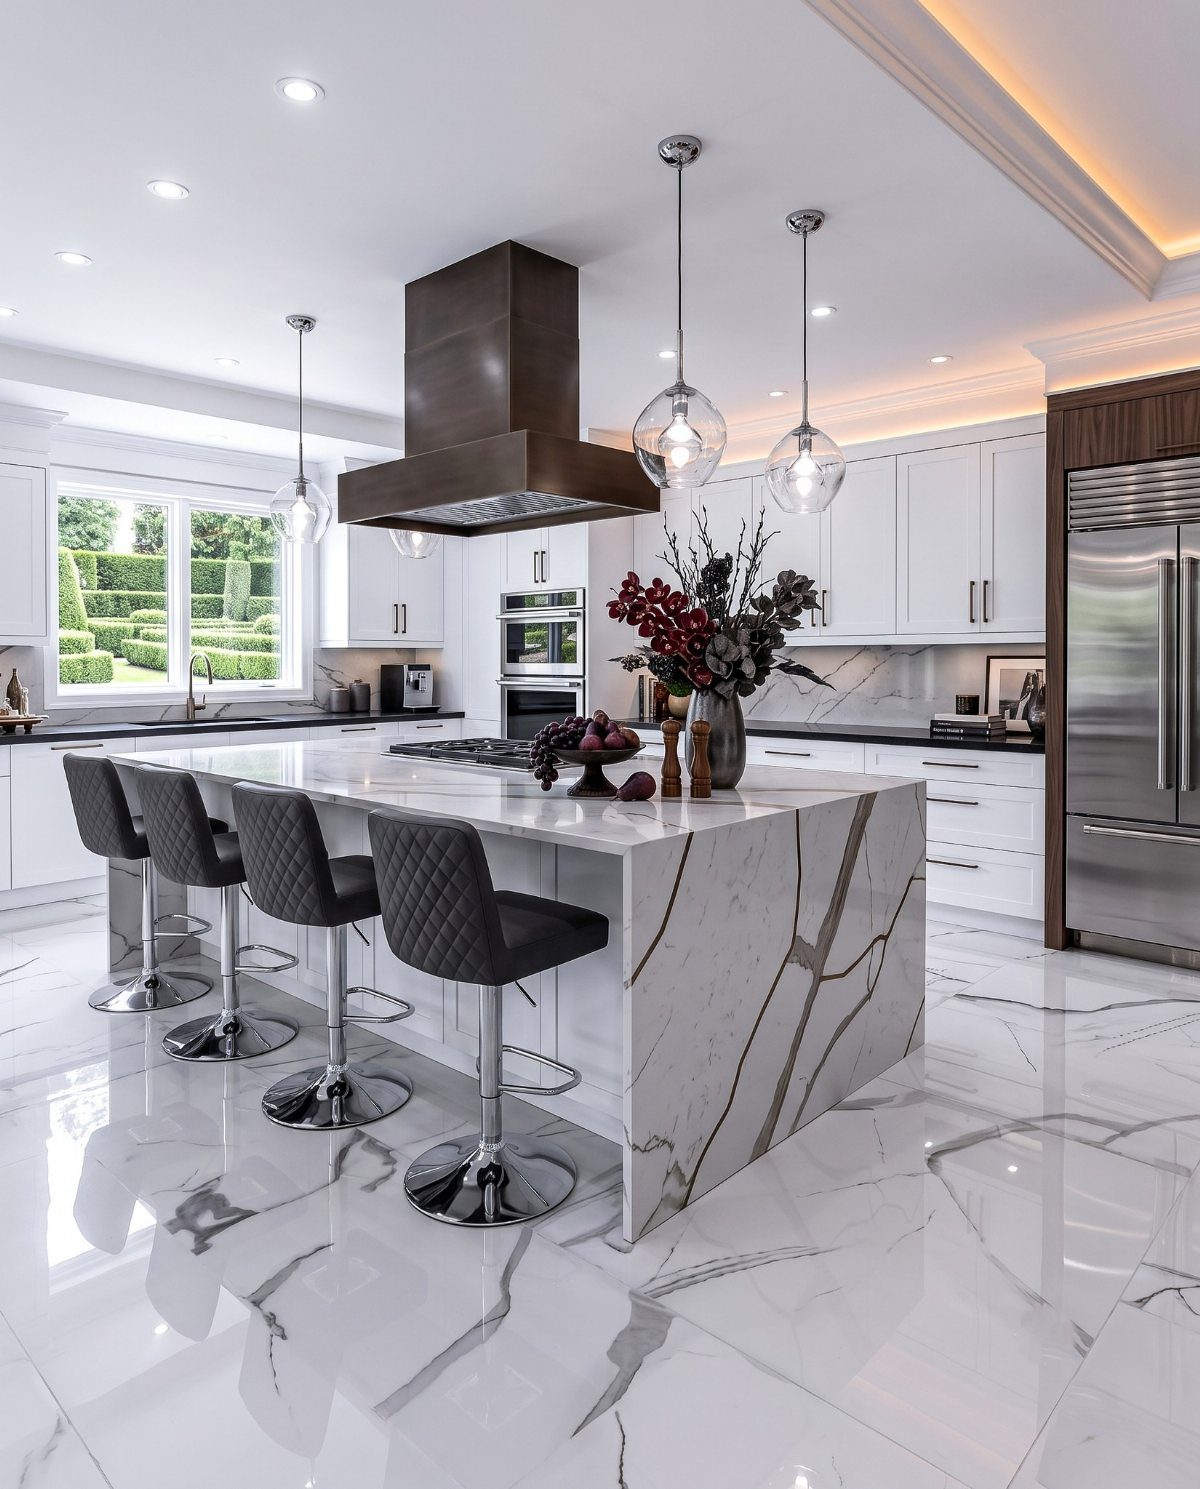
A range set into the island turns the cook to face the room instead of the wall. The vent hood has to hang over the island, so plan the ceiling before you plan the cabinets.
With the cooking surface out in the open, the wall run is free for the sink and refrigerator.
I like this layout best when the island has stools on the far side, so the person cooking can still talk to whoever is sitting.
A hood over an island is a big visual piece. In a small room it can crowd the space, so check how much it will fill before you commit.
8. Use Tall Pantry Towers
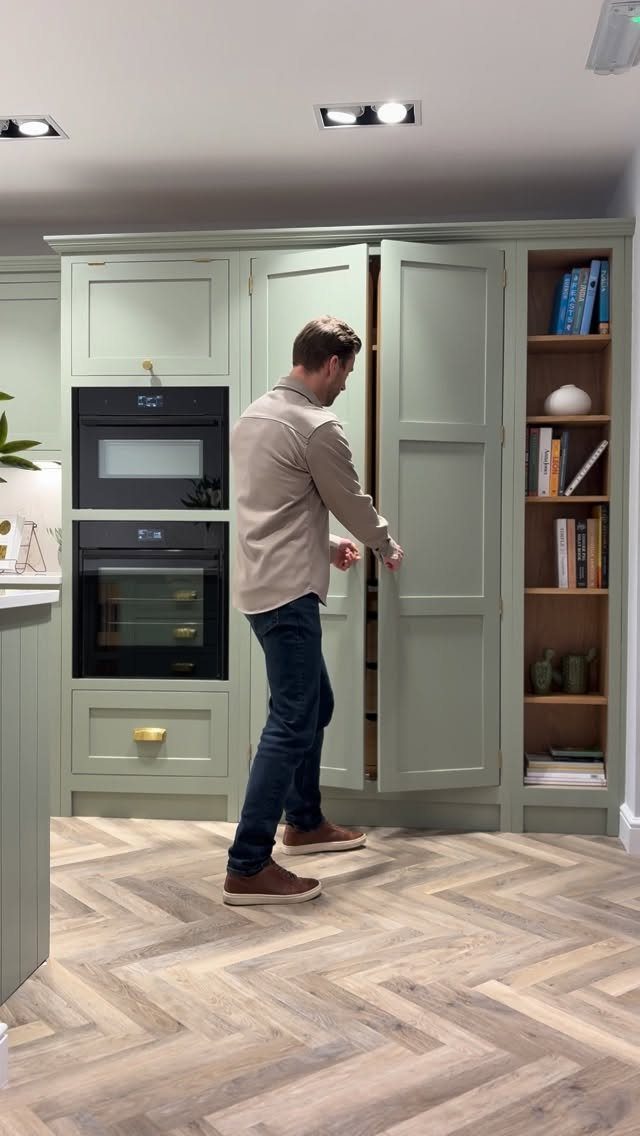
At either end of a single wall run, a pair of full-height pantry cabinets keeps dry goods, small appliances and cleaning supplies off the counters.
Choose cabinets with doors that swing fully open, so you can see every shelf without leaning in. Build the middle of the run around the sink and prep space, with a tower at each end to bookend it.
Built-in ovens can sit in a tower too, which keeps the lower run free for drawers.
9. Add a Pocket-door Kitchen
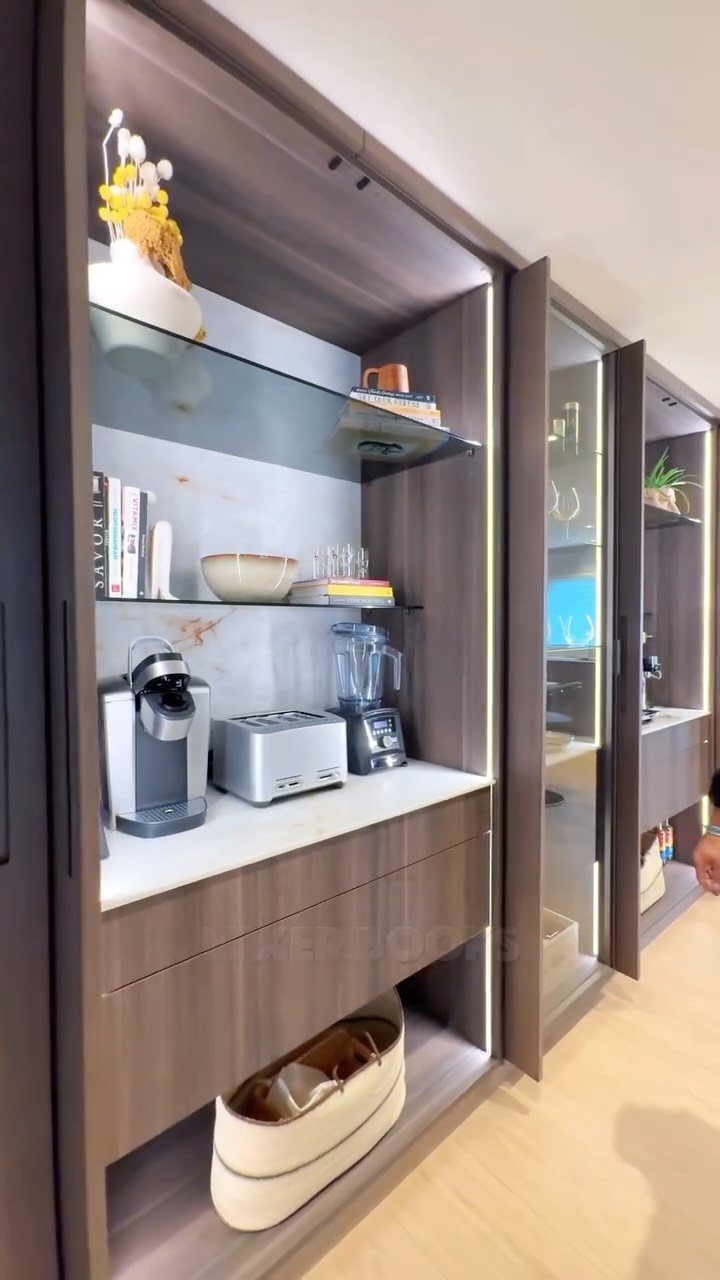
Pocket doors that slide into the cabinet sides let you close the whole kitchen unit when the meal is over.
For a studio, this layout beats an open shelf run: nothing needs wiping or styling before guests arrive.
Leave enough depth behind the doors for the appliances to sit without touching them. Pull a hot toaster or coffee maker clear before you close up, or the doors will trap heat and steam.
10. One-wall Sink and Range
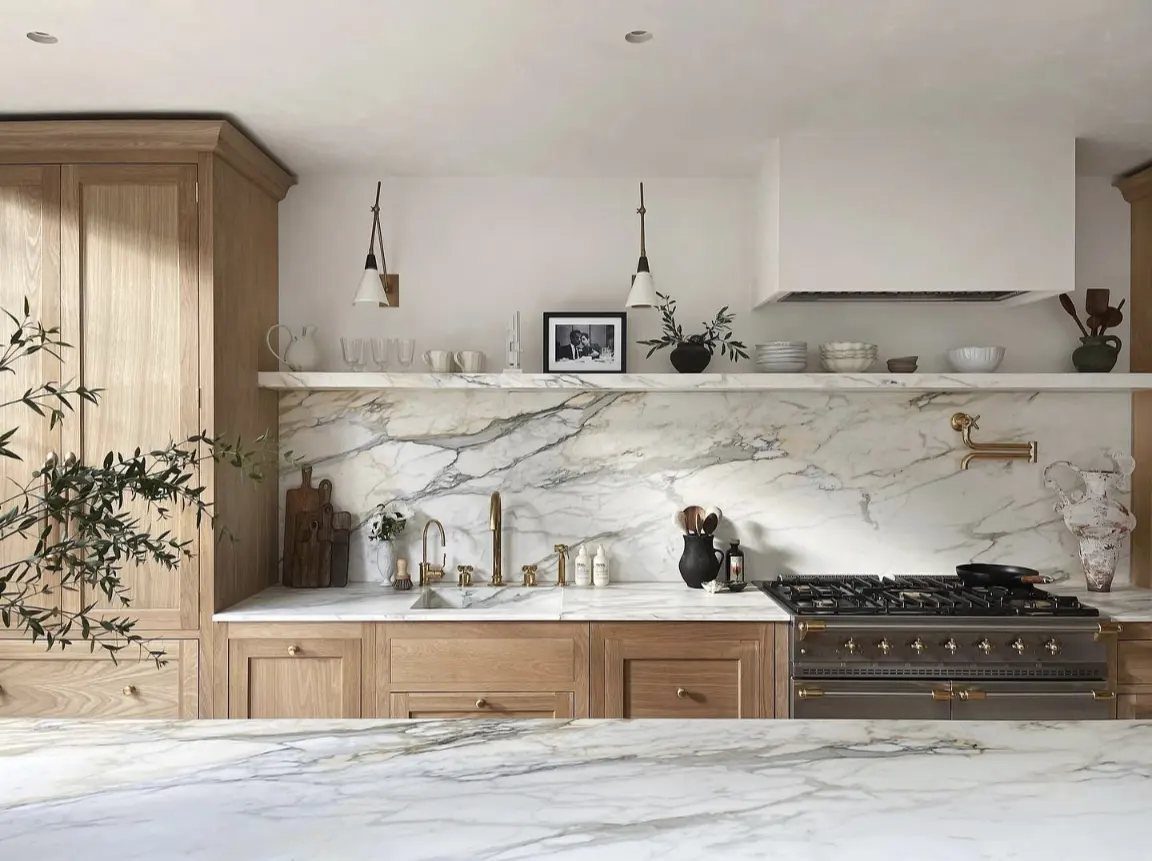
Light wood cabinets run the full wall, with the sink and a professional gas range sharing that one line.
A marble island sits out front, so the sink and range stay within a step or two of each other while the island handles chopping.
Marble on both the backsplash and countertop keeps the wall from looking busy against the wood. I’d put the prep area on the island side, between the 2 work points.
Size the island so you can still walk the length of the run without turning sideways.
11. One-wall Sink and Dishwasher
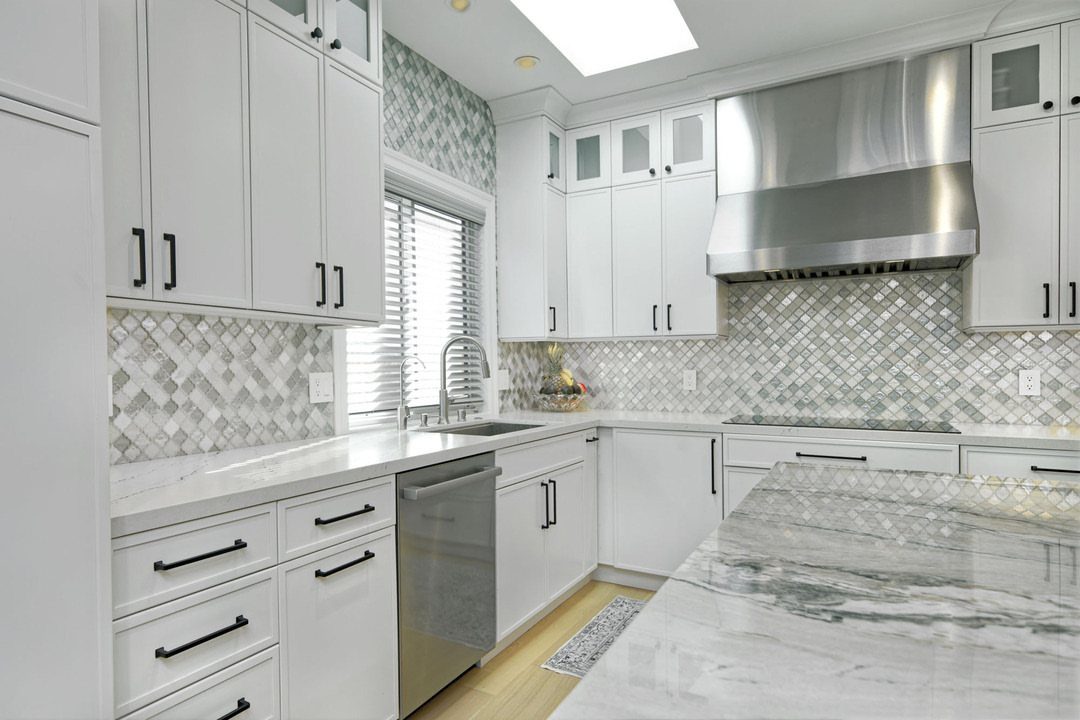
Sink and dishwasher side by side is the layout I’d choose for a single wall, because rinsing and loading happen in the same spot. A patterned tile backsplash behind them gives a plain white run a focal point.
Grey tile against white cabinets stays calm and hides splashes better than a solid white wall. Put the island parallel to the run so dishes can travel to the dishwasher without crossing a walkway.
Keep the range hood on the same wall, so cooking and cleanup stay together.
12. Cream Cabinet Sink Run
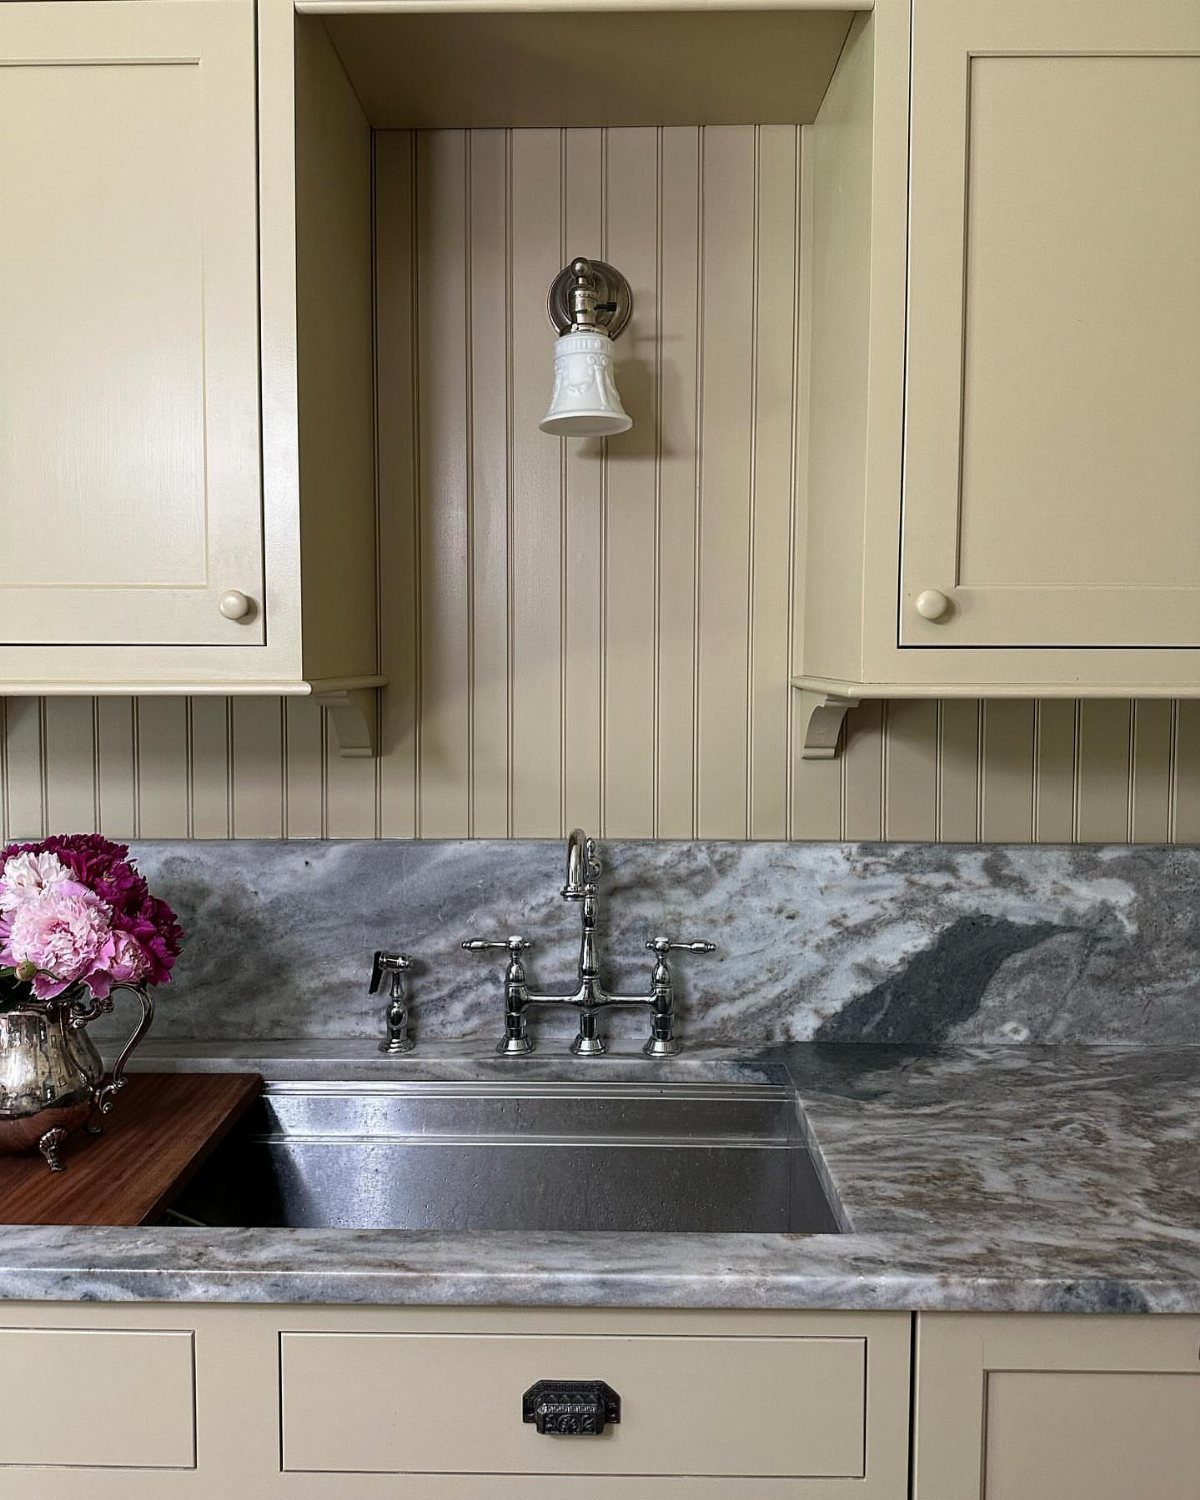
Paneling on the wall and cream cabinets on either side of the sink make the whole run feel like one painted piece.
A marbled counter adds the only pattern, and a small wall lamp over the sink works as task light.
Stainless steel sinks pair well with cream because the metal reads cool against the warm color. Keep the cabinets in one tone and give the counter the contrast.
This suits a short sink-only section of a run, where each cabinet beside the basin doubles as landing space for dishes.
13. Create a Statement Backsplash
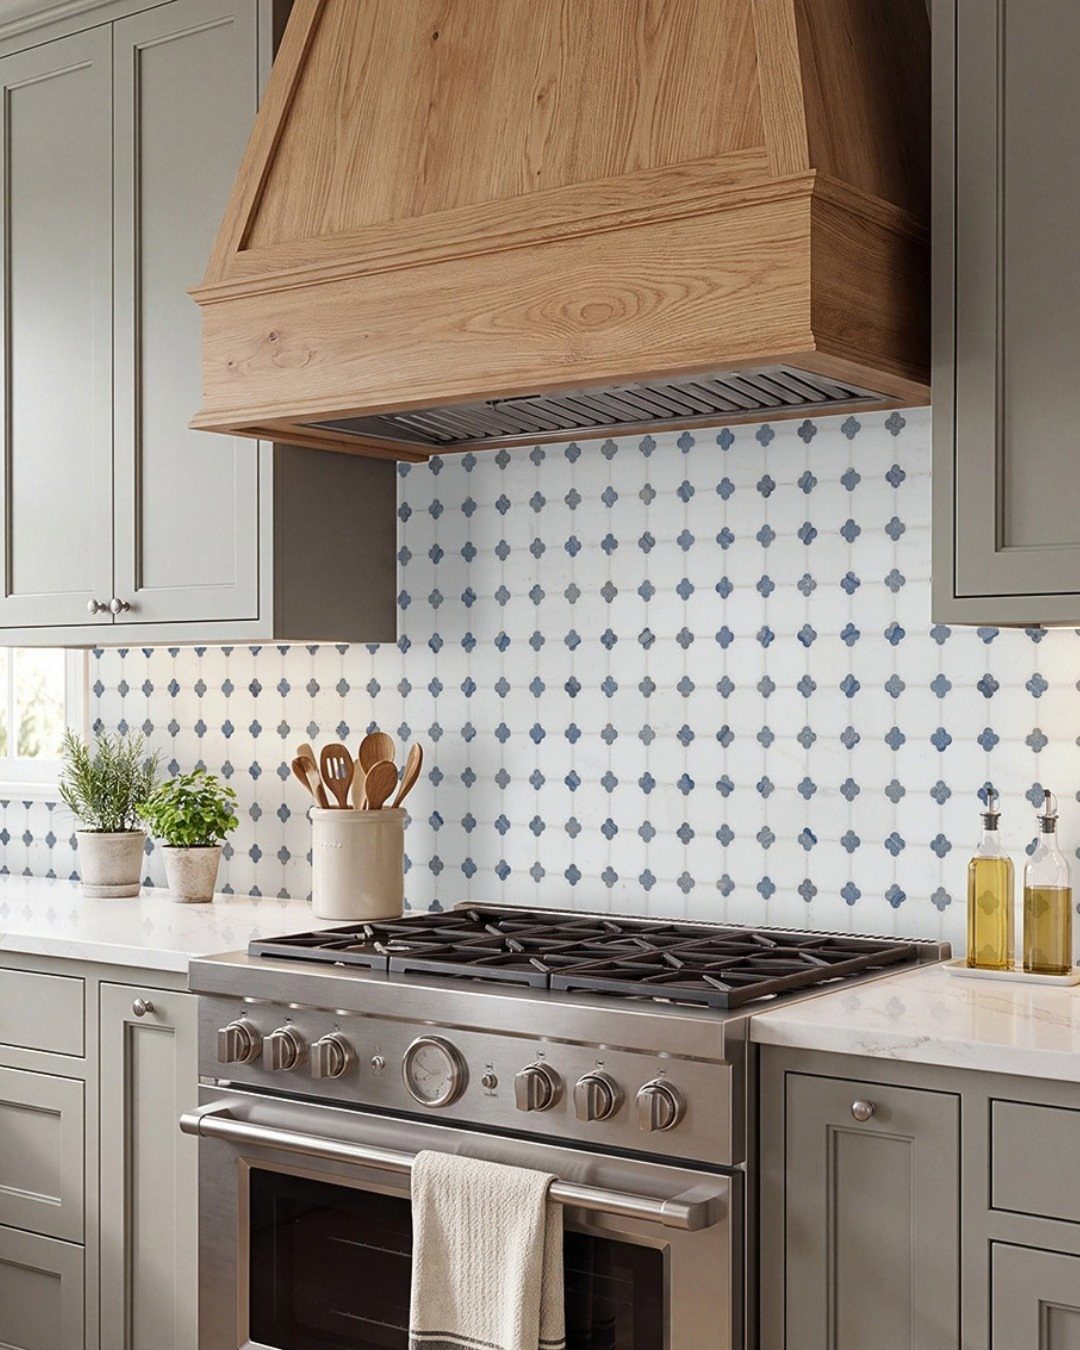
Blue and white diamond tile behind the range lets grey cabinets stay plain while the wall does the talking. 2 colors keep a bold pattern from getting loud.
I’d limit the tile to the stretch behind the cooktop, where the eye lands first. The wooden hood warms the blue, so skip extra accents nearby.
Keep the counter and the rest of the run solid, and the pattern reads as a feature instead of clutter.
14. Add Island Outlets
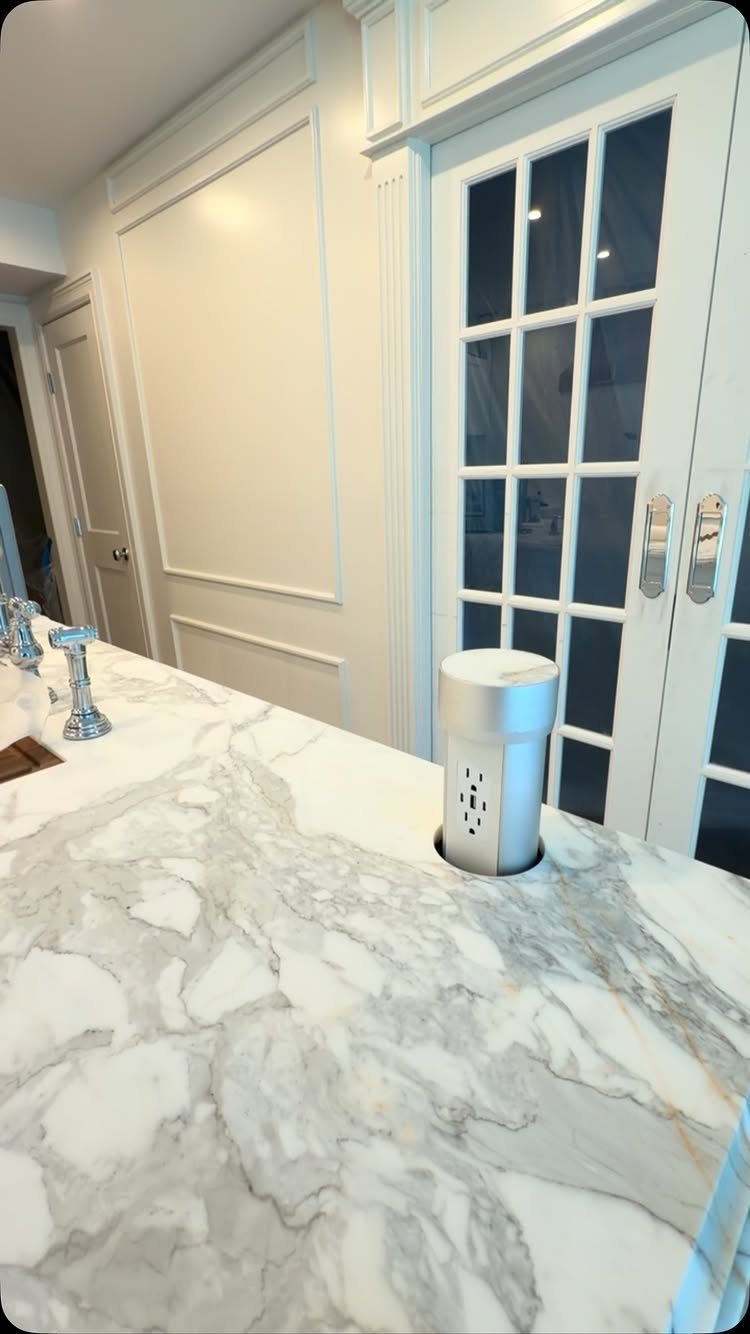
Without an outlet on the island, a blender or laptop means a cord stretched across the walkway. A pop-up outlet sits flush with the countertop and drops out of sight when you close it.
Pick an outlet finish that matches the countertop so it fades back; silver on white marble stays small and quiet.
Place it at the stool side, away from the sink, and have an electrician run the wiring through the cabinet base.
15. Use Light Colours
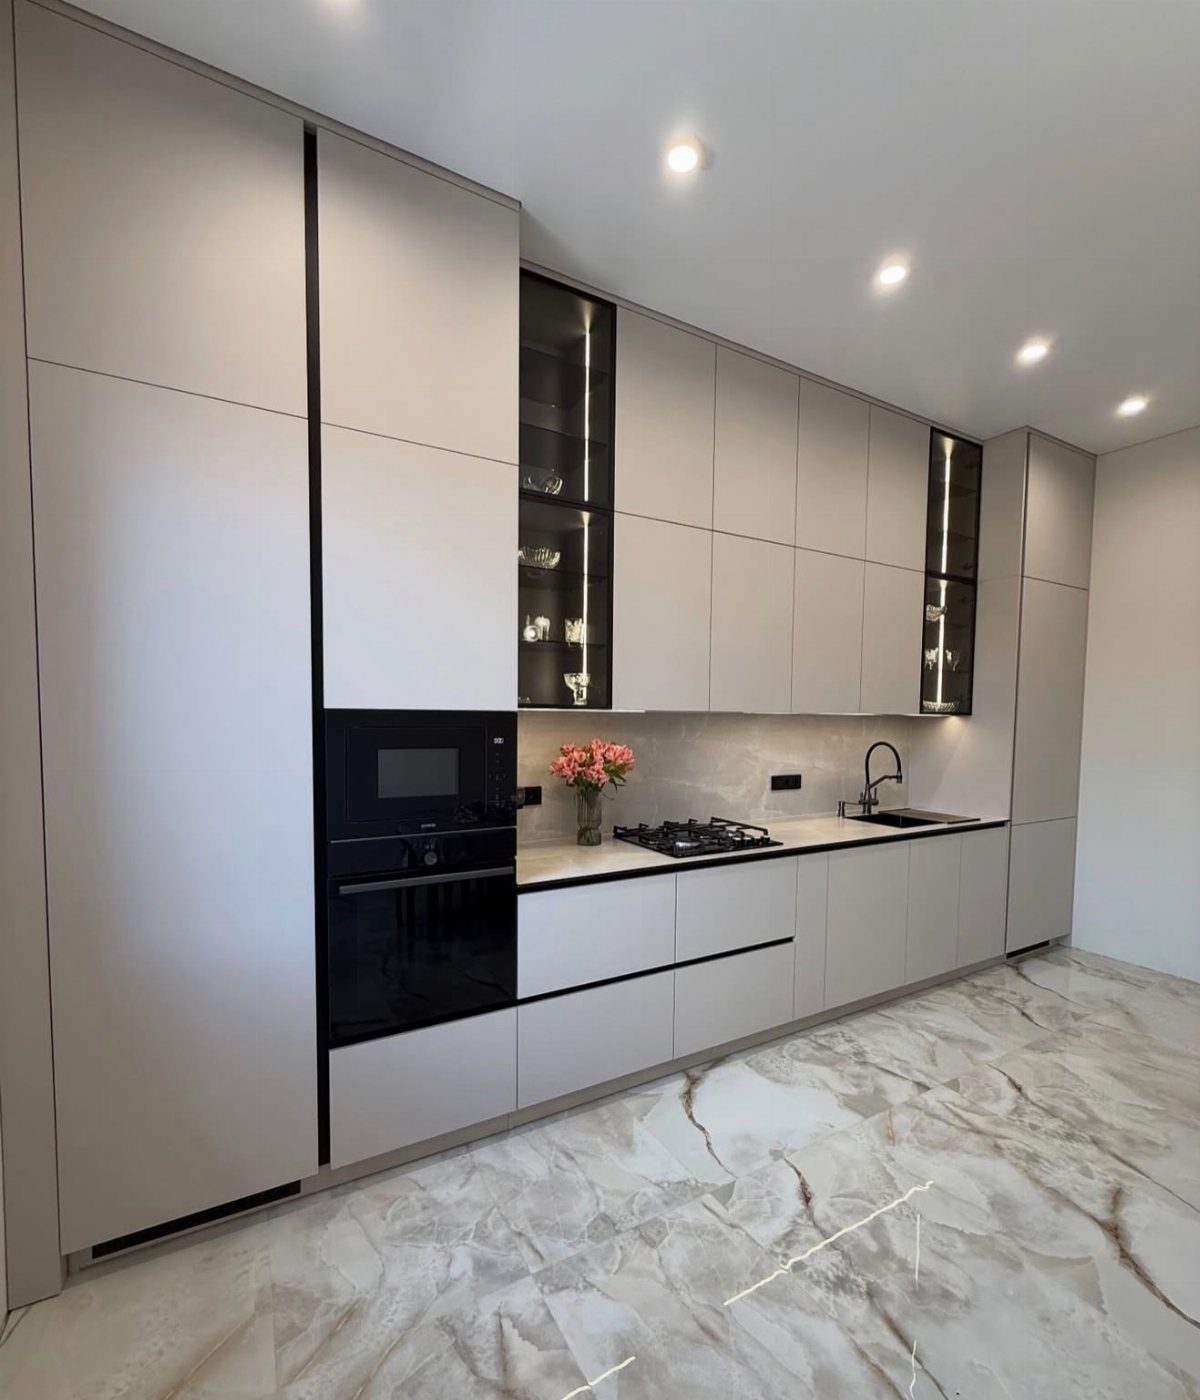
Light grey cabinets, a pale marbled floor and a bright room bounce daylight around a single wall instead of soaking it up. Panels over the appliances keep the run unbroken, which makes a small kitchen feel wider.
A black sink gives the light scheme one dark anchor, and I like that more than going all pale. Keep the floor and cabinets close in tone so nothing chops up the room.
16. Add Open Shelving
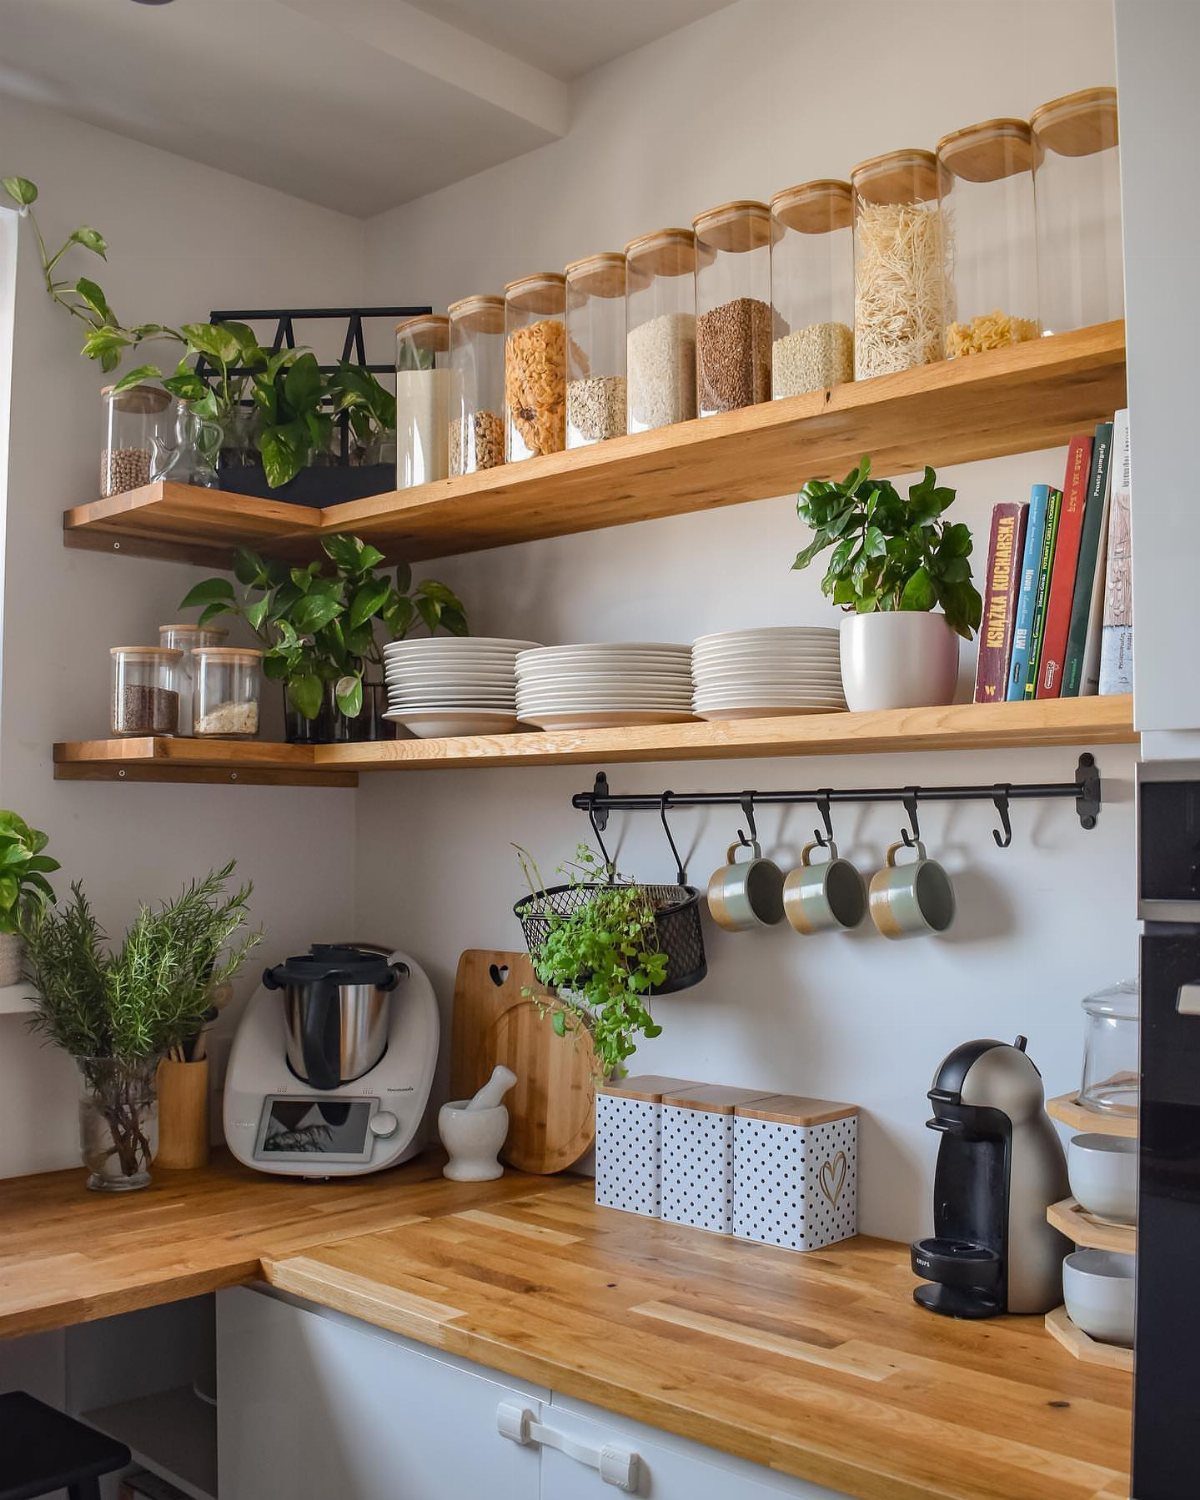
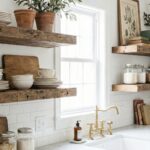
2 wooden shelves in place of upper cabinets leave the wall open and the daily items within reach. Matching glass jars look tidier than mismatched packaging, and a few plants soften the rows.
Fill the shelves with what you use every day, then stop. Keep them away from the range, since cooking grease settles on anything stored in the open and the jars will need washing.
17. Use Glass Cabinet Inserts
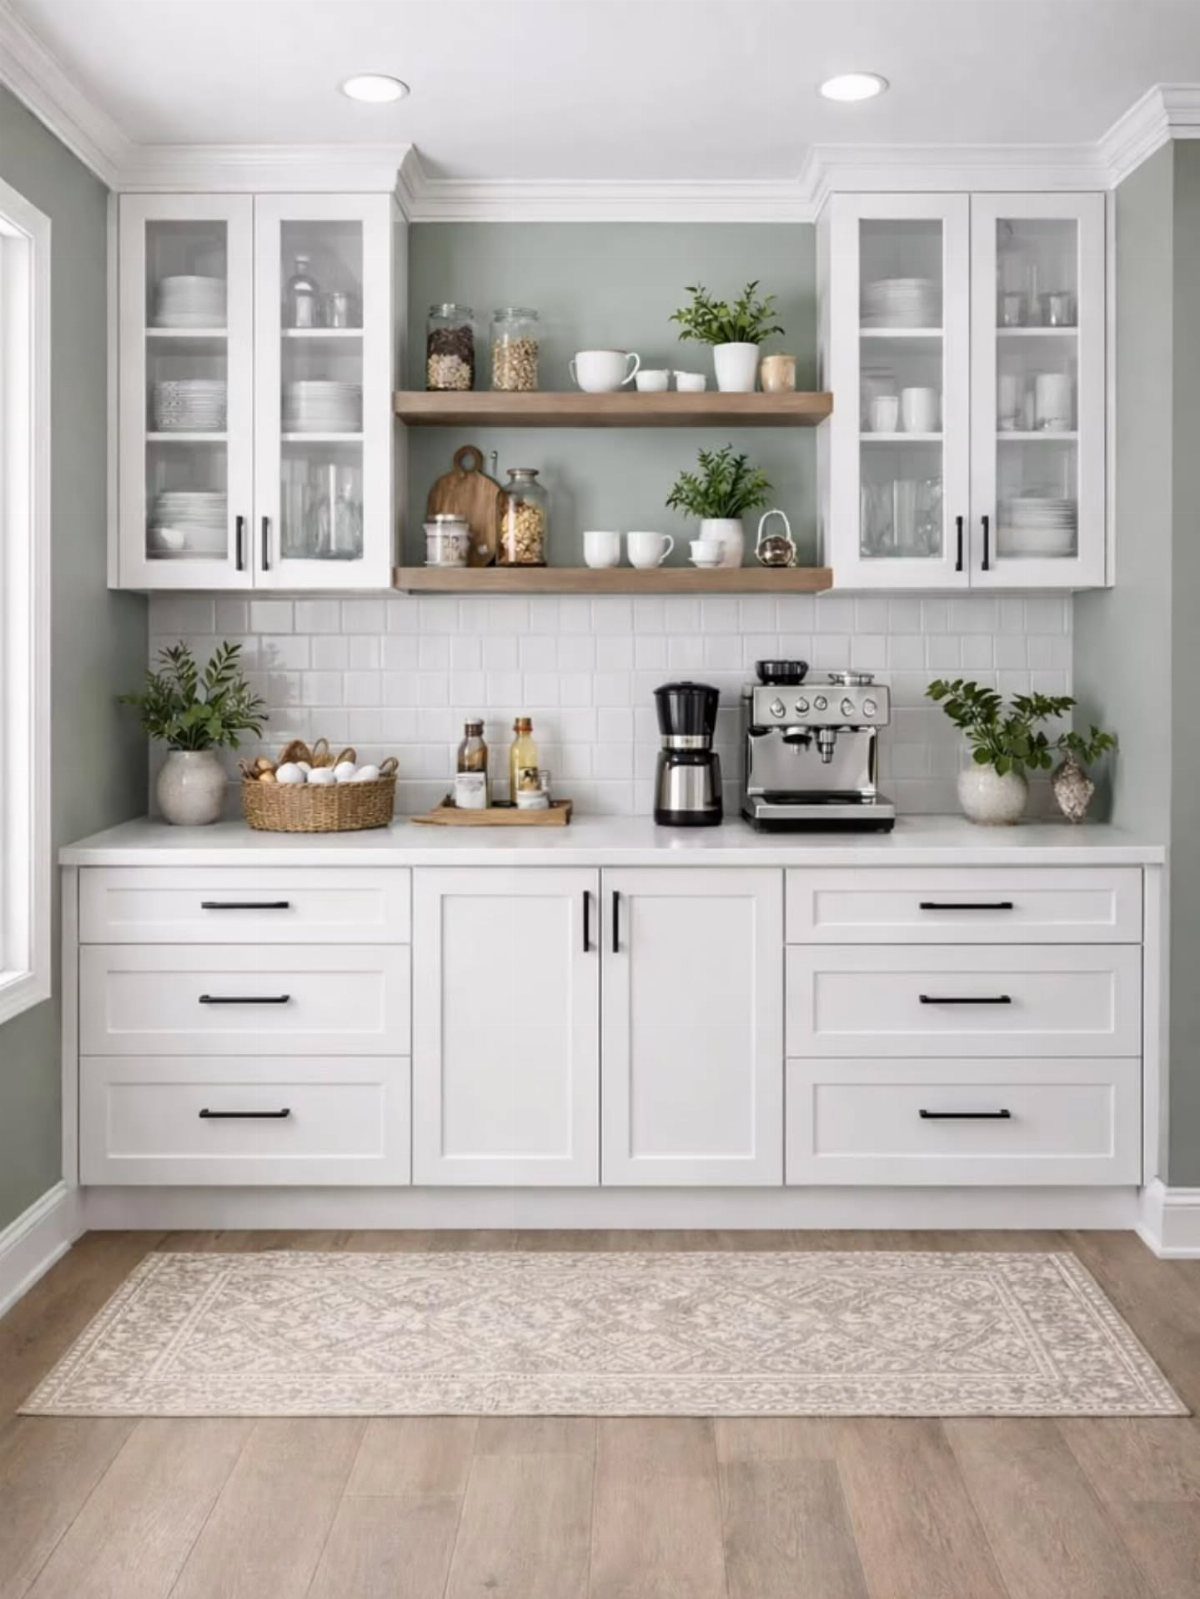
Glass-front uppers hide nothing, so what sits behind them becomes part of the room. Stack matching white plates and mugs inside, and put the mismatched things in the lower drawers.
Mugs behind glass directly above a coffee station make sense to me, since they’re within reach and they look like decoration.
Pair the glass cabinets with a short run of open wood shelving, as here, so the wall isn’t all doors.
18. Add Statement Lights
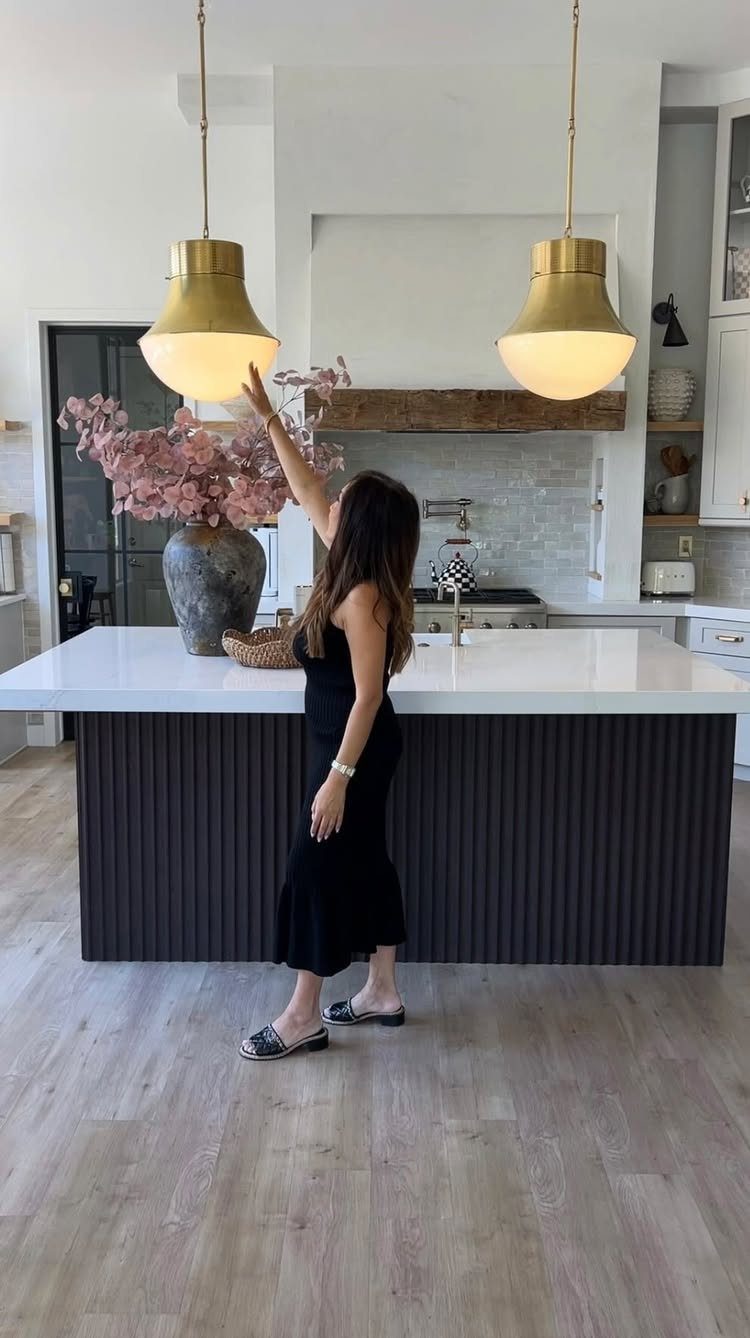
2 large pendants over the island do more for the room than any cabinet color. Gold with white shades warms a white island and draws the eye down the center of the kitchen.
Any lower and they block the view across the island, which matters when someone is sitting on the stool side. Put them on a dimmer, so they work as both task light and mood light.
19. Matte Cabinetry
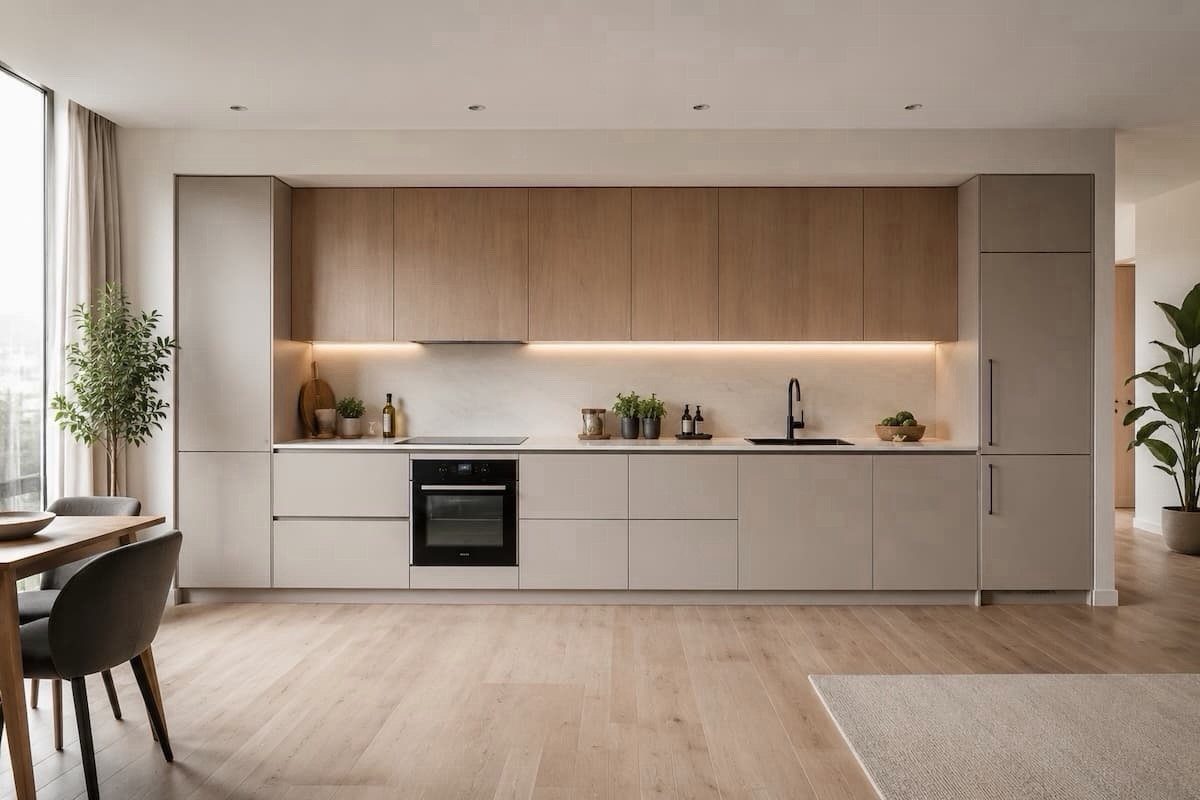
Matte finishes on the lower run cut the glare that glossy doors throw back from windows and ceiling lights. In a one-wall kitchen that sits in the open, that calm surface keeps the cabinets from competing with the living area.
Grey base cabinets under light wood uppers is a pairing I’d copy: the dark lower run grounds the room, and the wood keeps the wall from looking bulky.
Matte doors do show fingerprints more than you’d expect, so keep a soft cloth handy.
20. Use White Cabinetry
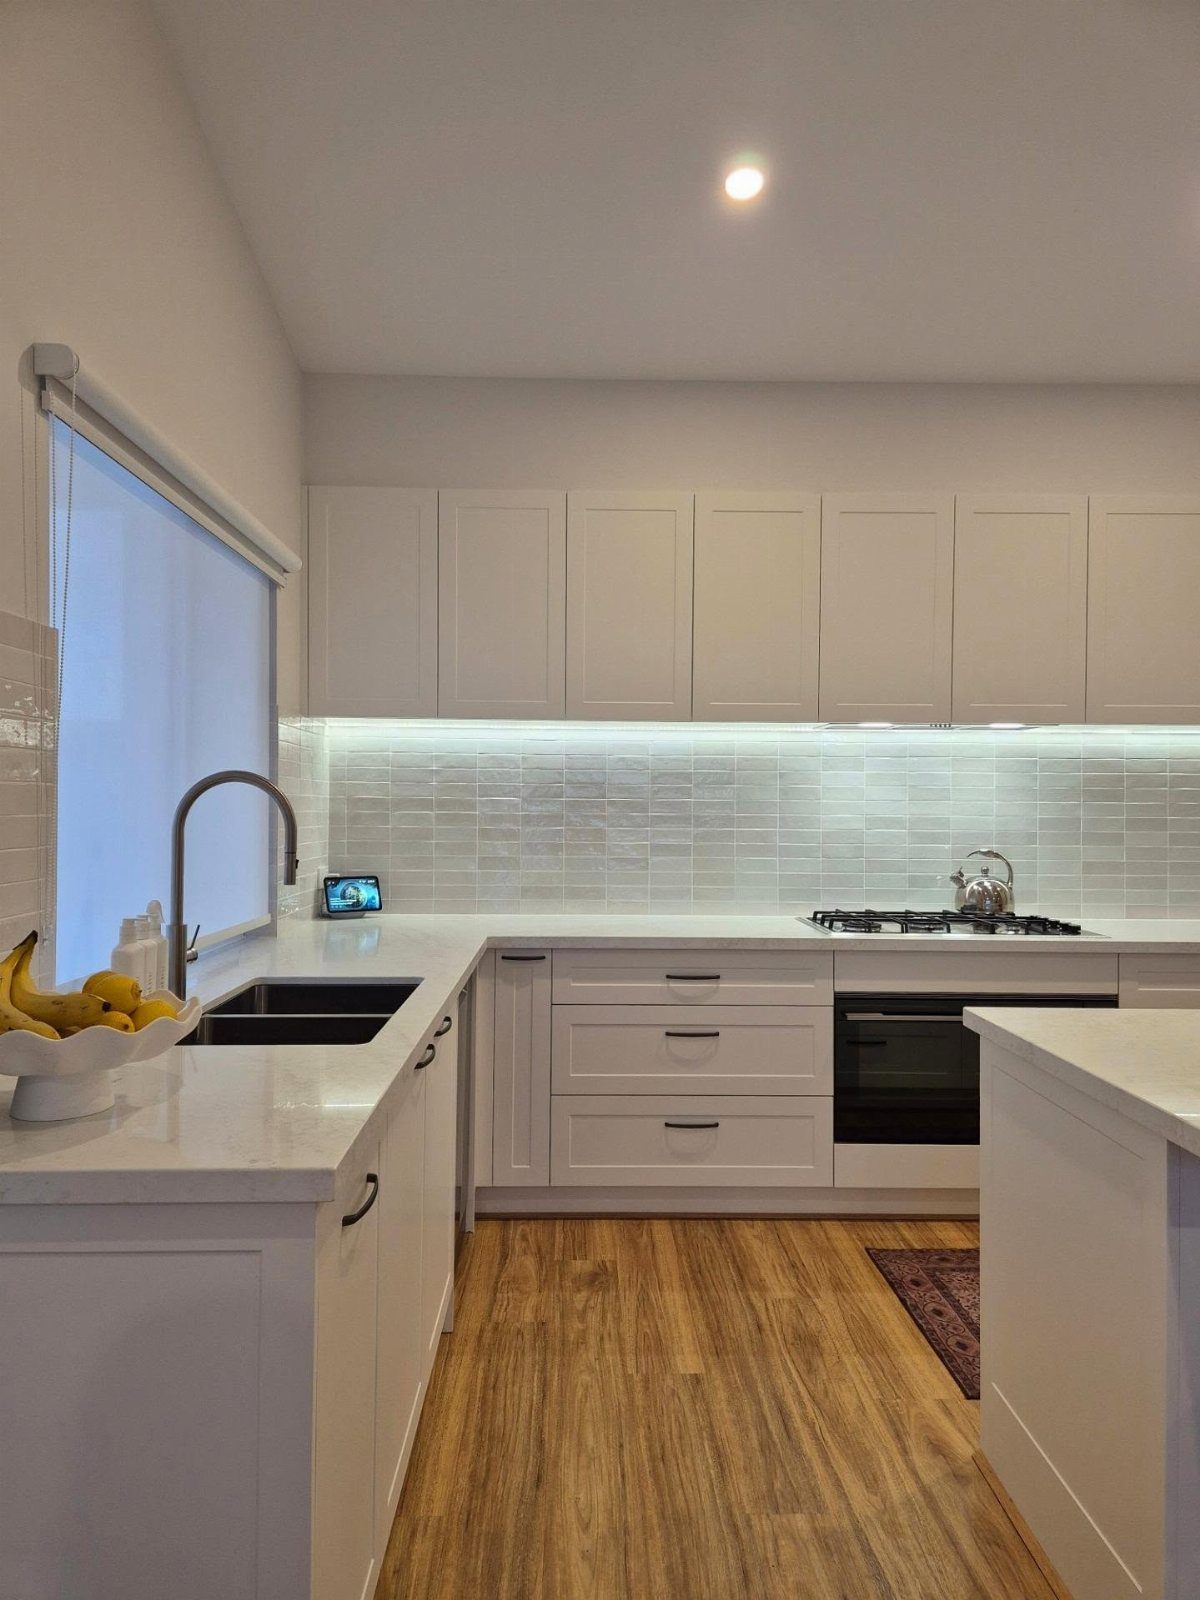
White shaker doors on both the upper and lower runs, plus white counters and a white tiled backsplash, give a one-wall kitchen a single soft tone with no seam to catch the eye.
For a small open room, that uniformity is the whole appeal.
Wood flooring is what stops an all-white scheme from feeling clinical, so I’d choose a light, warm plank rather than a grey one.
Shaker doors have a simple frame profile, which suits plain white better than a heavily detailed panel would.
21. Use Bold Colours
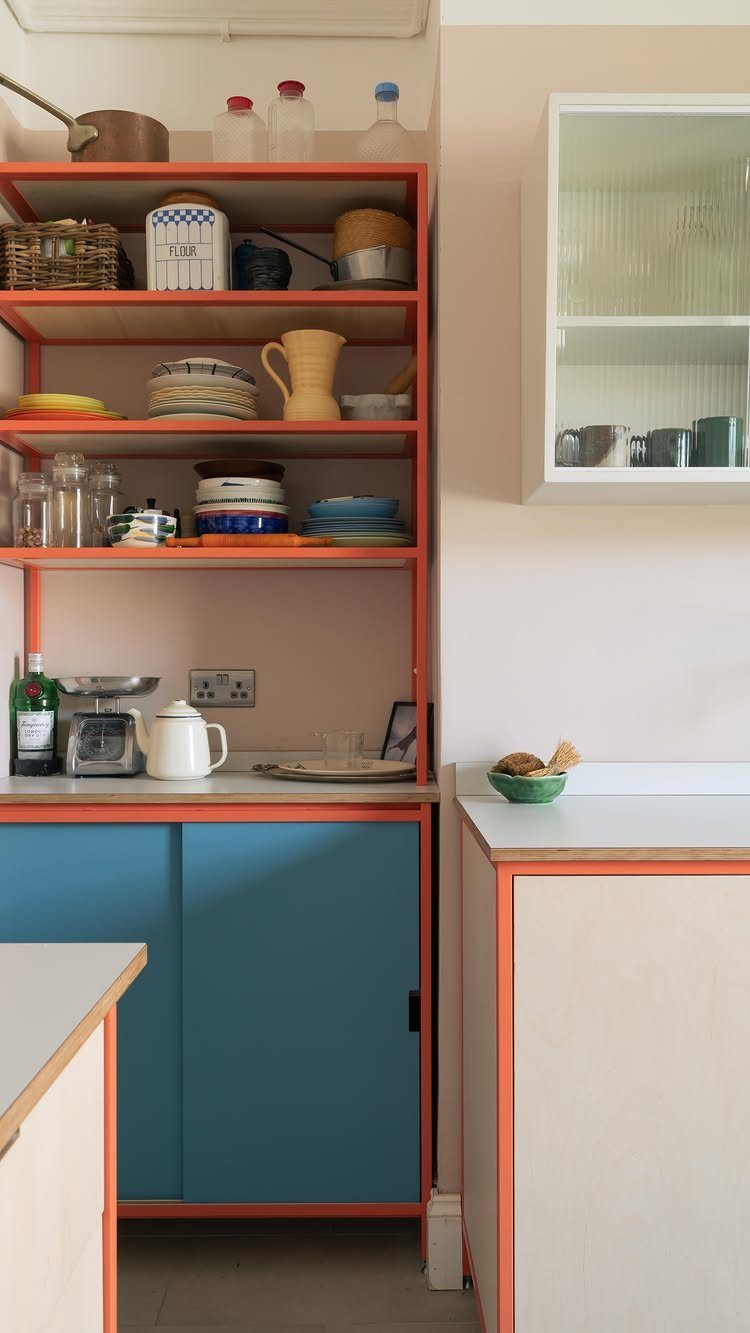
In an open-plan room, a strong color on the kitchen fronts marks where the kitchen starts without a single wall going up.
Blue cabinets against a pale pink wall do that job, and orange open shelving adds a second loud note.
The maker of this one used RAL 5024 for the blue fronts, a pastel blue you can ask a paint shop to match.
I’d keep it to 2 bold colors at most. Let the rest of the wall stay pale so the cabinets carry the room.
22. Choose a Warm Wood Finish
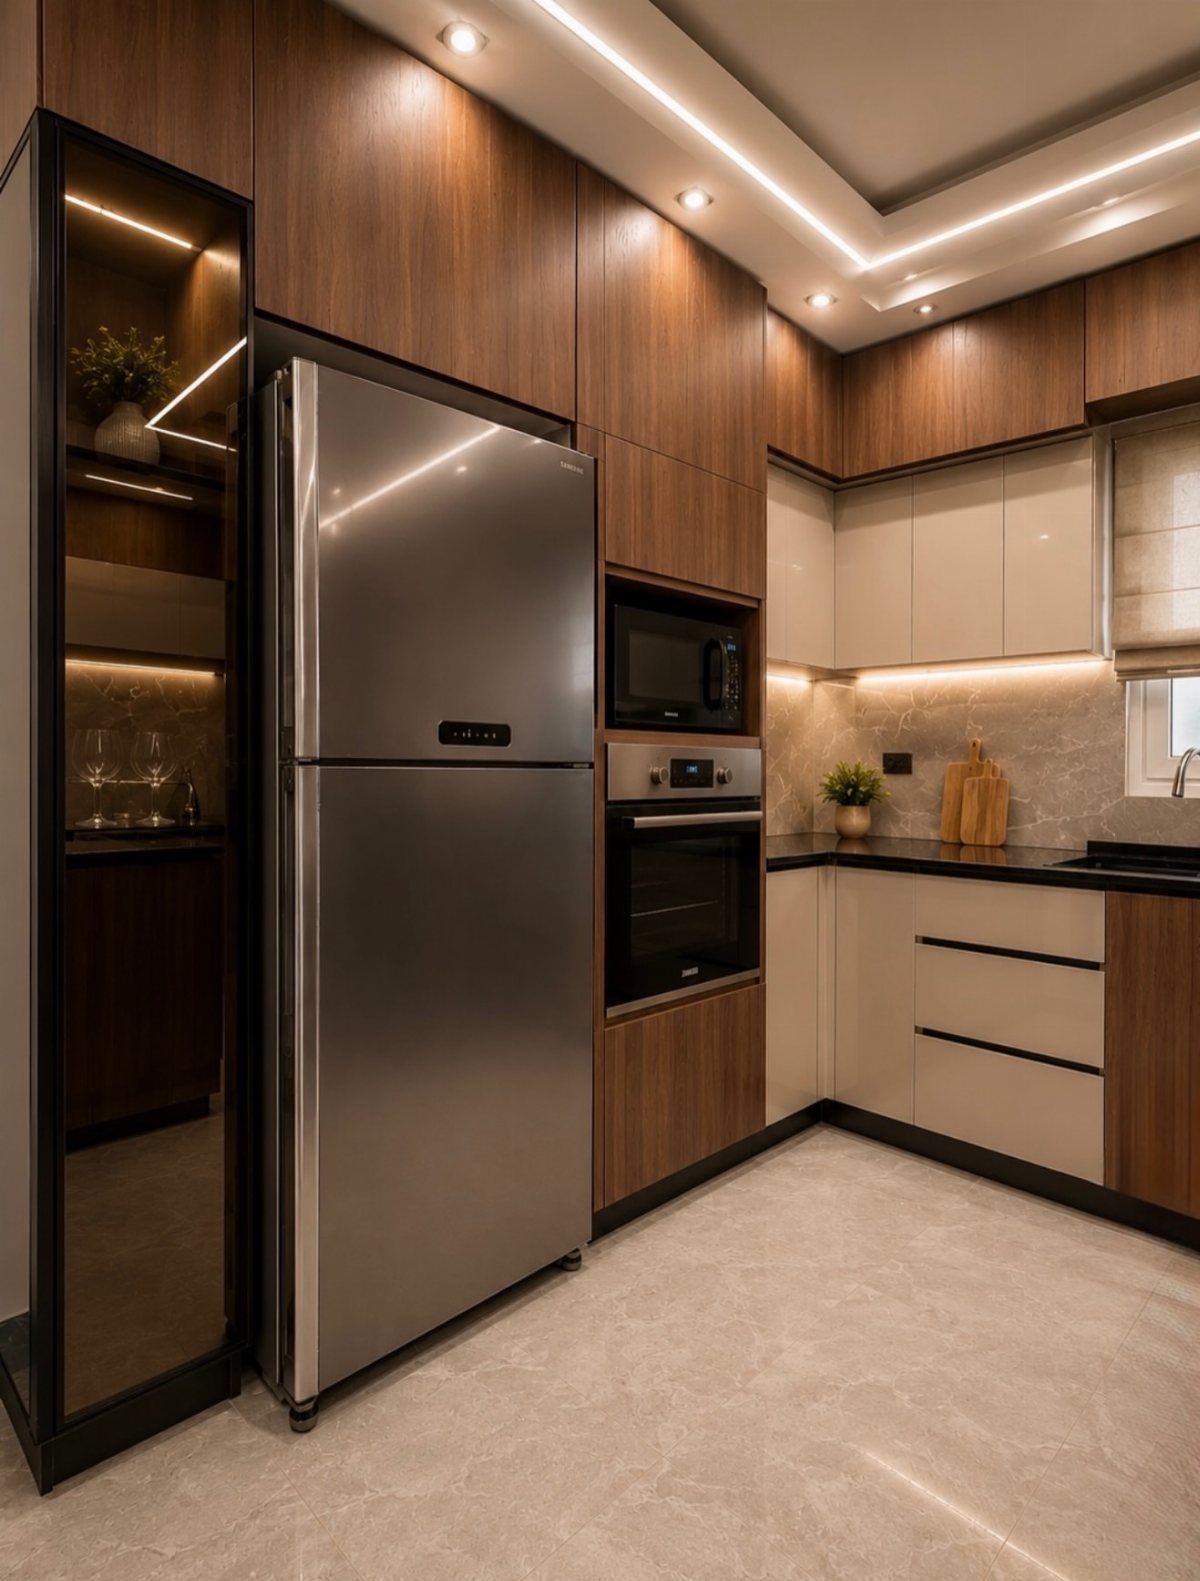
Warm wood on the cabinet fronts adds the color a stainless steel refrigerator and white lowers can’t. Here it sits beside cream doors, which keeps the wood from taking over the whole wall.
I’d use wood on the tall or upper sections, where the eye travels first, and keep the lowers pale so the run stays light.
Recessed ceiling lights and under-cabinet lighting bring out the grain at night.
23. Maximize Vertical Storage
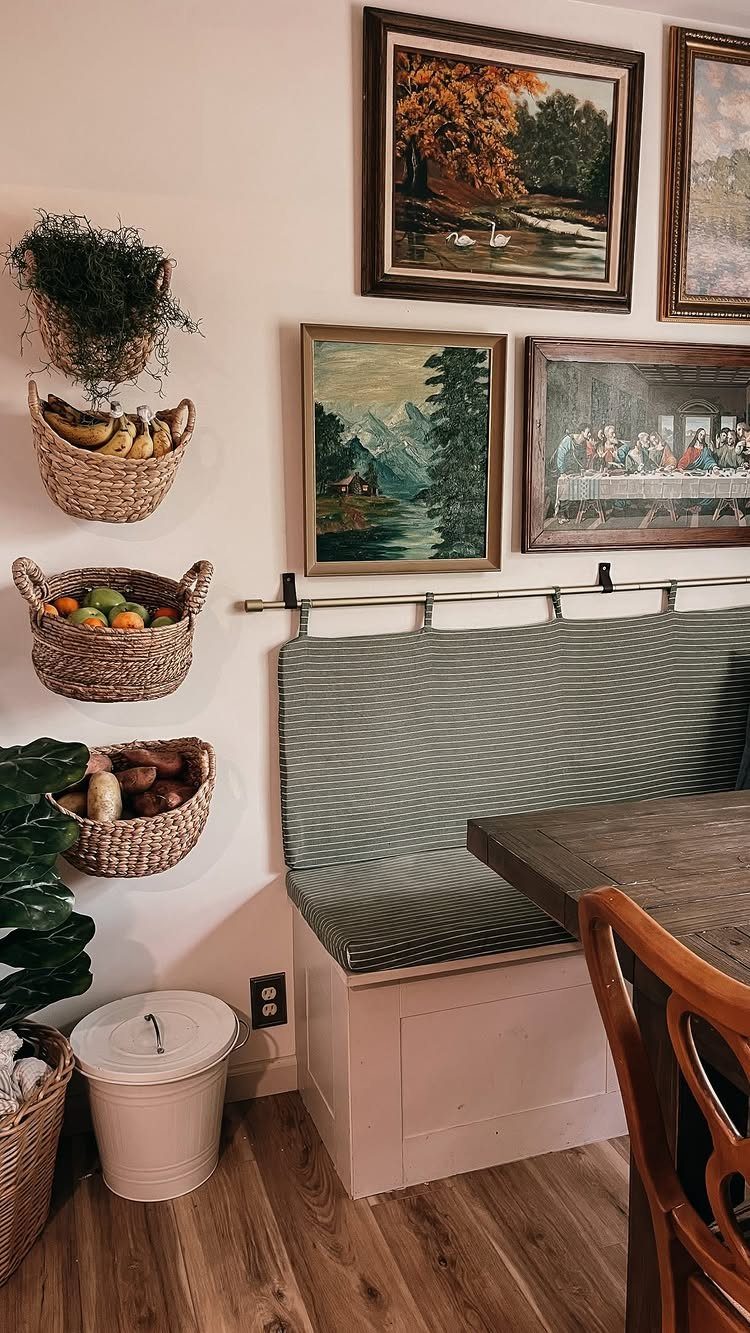
Baskets hung vertically on the wall turn blank height into storage and free up the counter below. The maker of this one mounted four, holding plants and fruit, which keeps a bowl of produce off the table.
Woven baskets feel softer than shelves, and they work in a dining nook beside a one-wall kitchen where a row of upper cabinets would feel heavy.
Mount them into studs or use proper wall anchors, since fruit adds up in weight.
24. Add Under-cabinet Lighting
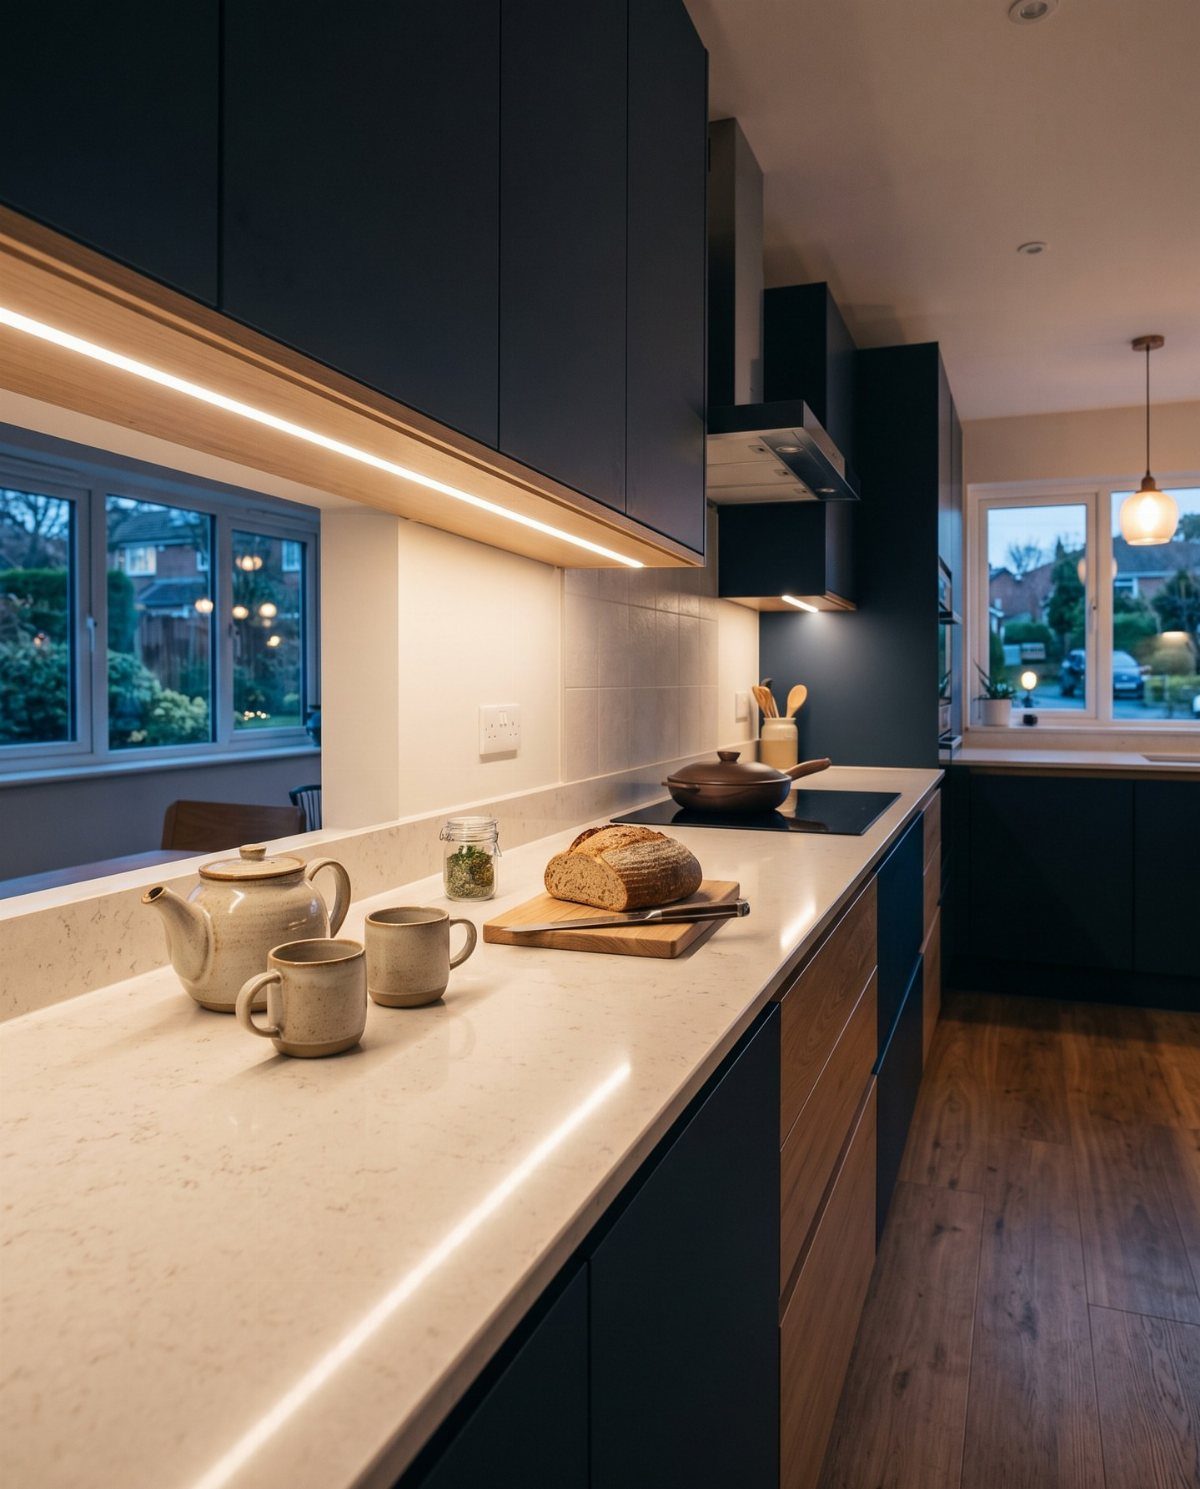
A strip of warm LED light under the wall cabinets puts the glow right where you chop, and it turns a white countertop into the brightest, most welcoming surface in the room.
With dark blue cabinets, that contrast is the best part.
Choose a warm tone rather than a cool white; it flatters a loaf of bread, a teapot and mugs far better.
Mount the strip near the front edge of the cabinet bottom so the light lands on the counter, not the backsplash.
25. Hang Utensils and Spices
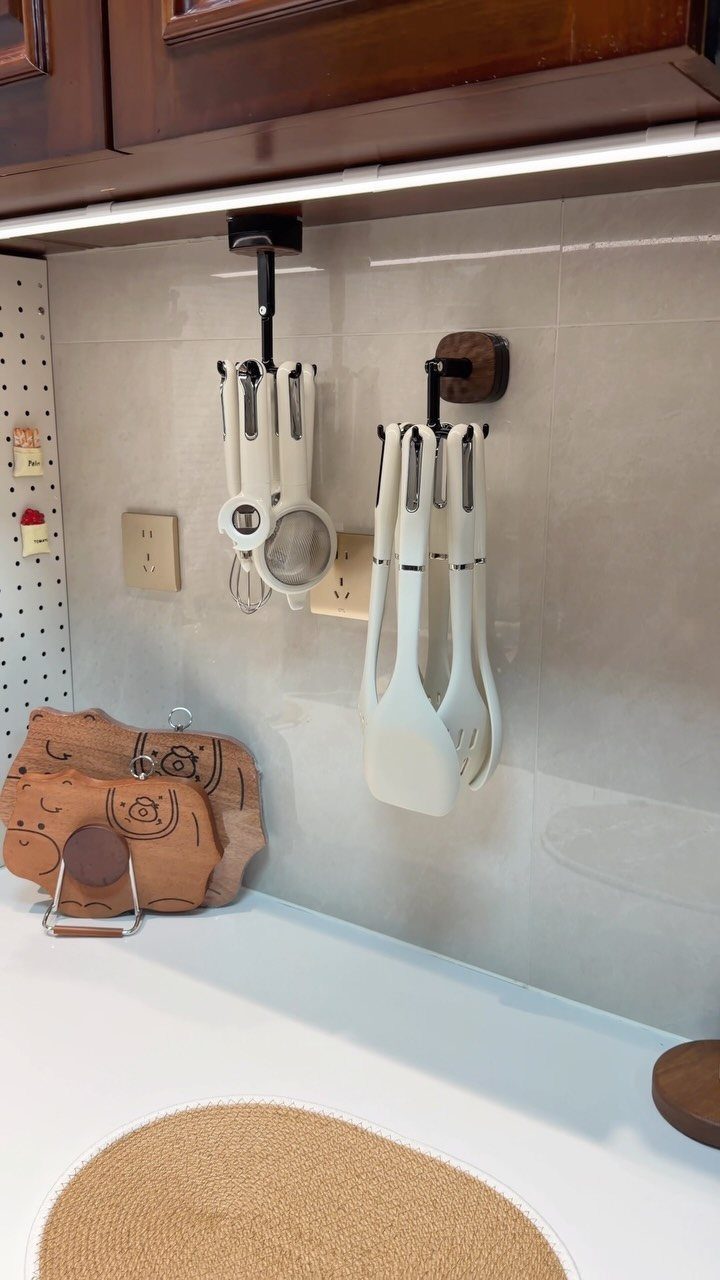
Black wall mounts hold white utensils at arm’s length from the stove, which clears a drawer and a crock off the counter. Against a tiled backsplash, the white handles read clearly, so each tool is easy to grab mid-recipe.
Spices can go the same route on a rail or small shelf. I’d keep the hanging set to what you reach for daily and leave the rest in a drawer, since a crowded rail looks messy fast.
26. Flat-front Cabinet Doors
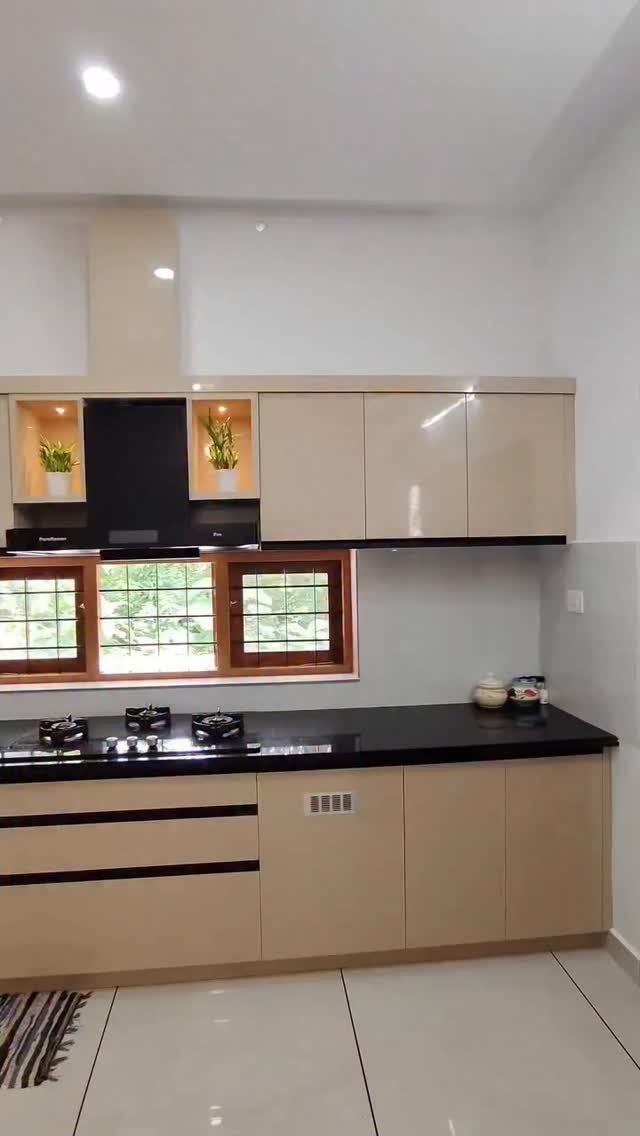
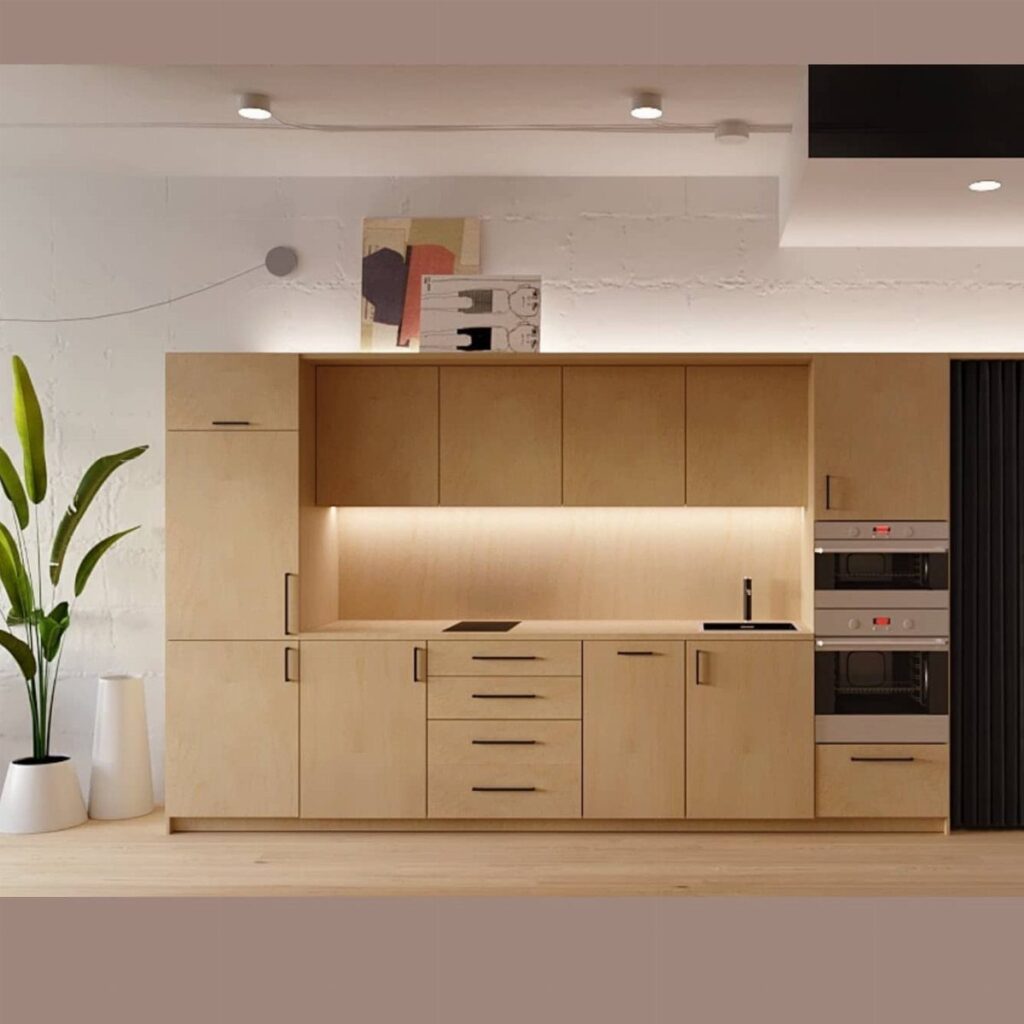
Slab doors with no frame, no panel and no trim give a one-wall run an unbroken face, and beige keeps that flatness soft instead of stark.
A black countertop adds the single hard line, and the built-in stovetop sits flush so nothing interrupts it.
Without profiles to catch the eye, the color and the window frames carry the room. I’d choose this for a plain, quiet kitchen over anything ornate.
Flat fronts also give you fewer crevices to wipe.
27. Use Open Pot Rails
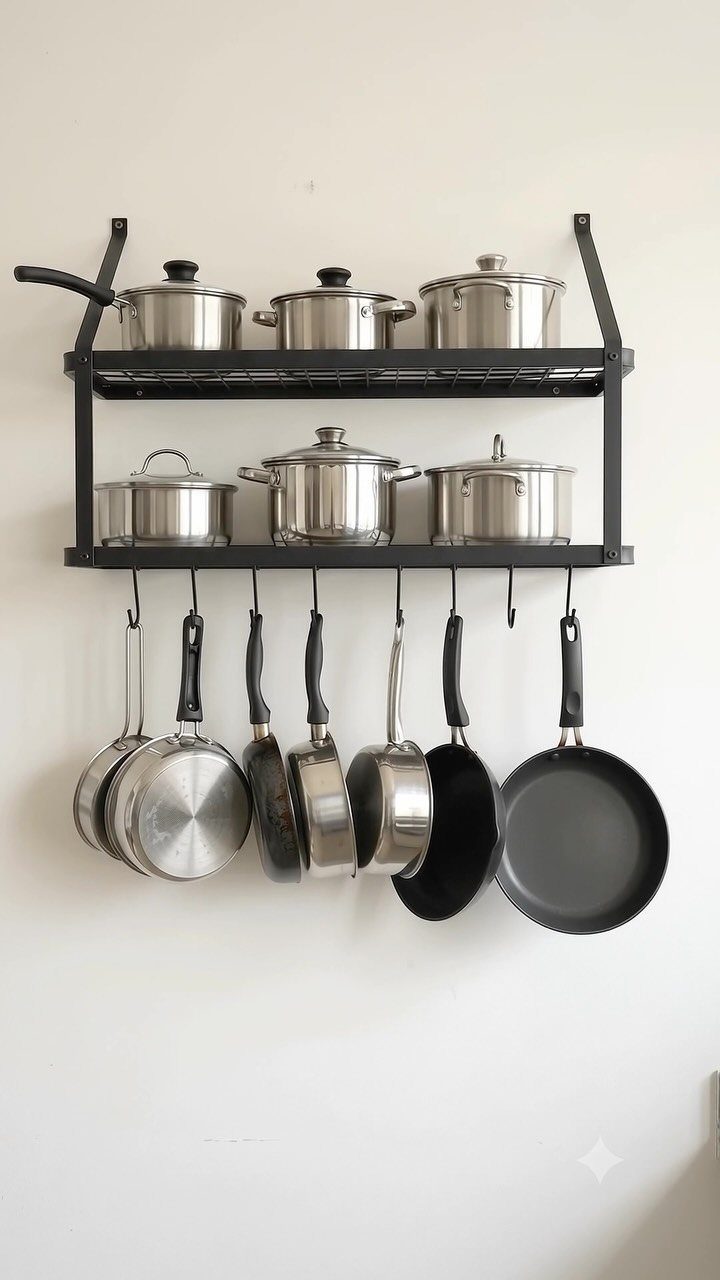
A black metal rail with shelves on top and hooks below holds both pots and pans on one wall, so the cabinet space they used to fill goes to something else.
Stainless steel looks tidy against plain white paint, and pots stacked on the shelves leave the pans free to hang.
Because everything stays in view, I’d buy matching cookware before committing. Mismatched pots make an open rail look cluttered.
Mount it near the range so reaching takes one step.
Work-line Layout and Workflow
A triangle needs three sides, and a single wall only has one. Plan a straight work line instead, with the zones in an order you can walk without doubling back.
My pick is the sink in the middle, with the refrigerator at one end and the range at the other. Food comes out of the fridge, gets rinsed at the sink, and reaches the burners moving in one direction.
Leave landing and prep space between each major unit. A range pushed right up against the sink leaves nowhere to set a cutting board, and a refrigerator beside the range leaves nowhere to put down a hot pan.
On a very short wall, you can run sink and prep area first, then the cooktop, then the refrigerator. That order still cuts down on wasted steps, and it keeps the cold storage out of the heat.
Wall Run Dimensions
For a run that works every day, 8–12 feet is the range to aim for. Under 8 feet you lose real prep space, and past 12 feet the walk between cooking zones starts to drag.
A 9-foot wall will hold a range, a dishwasher and a refrigerator, with a 36-inch uninterrupted stretch of counter left over. If you have the room, 10–12 feet is more comfortable still.
A 6-foot run can function, but only if you accept that prep space will be tight and plan around it.
The smallest room I’d call workable is 5.91 feet by 9.84 feet, which leaves 2.95–3.94 feet of walking space in front of the cabinets.
In a studio, borrow floor from the living area with a banquette or a small table, so the kitchen has room to spill out when you cook.
Clearance and Ventilation
Keep 36 inches of open floor around any island or table. If the room is a main walkway, or it tends to get crowded while you cook, push that toward 42 inches.
Measure with the dishwasher and refrigerator doors open, since a clear aisle on paper can shrink fast.
Ventilation matters more in a one-wall kitchen, because there’s no door to hold cooking smells in. A hood that vents outdoors clears steam and grease better than one that recirculates air through a filter.
Plan wall outlets before the cabinets go in. A common code rule puts an outlet within about 2 feet of any point along the counter, so check your local requirements.
Place them above the work surface, not behind the appliances, so a toaster or mixer never needs an extension cord.
Frequently Asked Questions
What is a one-wall kitchen layout?
A one-wall kitchen puts the cabinets, appliances, countertops and work zones along a single wall.
It’s also called a single-wall or I-shaped kitchen. Because everything shares one line, it saves floor space and suits studios, small homes and open-plan rooms.
What are some ideas for a one-wall kitchen?
Add a second work surface across from the run: a freestanding island, a rolling cart or a bar table, depending on how much floor you have.
Tall cabinets at each end keep the middle of the wall free for the sink, cooktop and prep space, and a warm LED strip under the wall cabinets lights the counter where you chop.
In a tight studio I’d pick the bar table over an island, since it takes less floor and still handles eating, working and setting down groceries.
How much space do you need for a one-wall kitchen?
Aim for a run of 8–12 feet. Shorter than 8 feet and prep space nearly disappears; longer than 12 and you spend too many steps carrying food from the fridge to the stove.
For the floor plan, a room around 6 by 10 feet is about the minimum, with roughly 3–4 feet of open floor in front of the cabinets.
What are the disadvantages of a one-wall kitchen layout?
Counter space and storage run short, which makes it hard for 2 people to cook at the same time, and a wall packed with everything can feel cramped without careful planning. An island, cart or table gives back the missing surface.
What are the benefits of a one-wall kitchen layout?
It tends to cost less than other layouts, and everything sits within arm’s reach, so there are fewer steps between the sink, stove and refrigerator.
It also saves floor space and leaves less backsplash and countertop to clean and seal. For one person or a small household, it feels big enough for everyday cooking.
Are one-wall kitchens cheaper?
Often, yes.
A single run needs fewer cabinets and less countertop, installation is usually faster, and plumbing is simpler when the sink and appliances share one wall. How much you save depends on the materials and appliances you choose.
How do you add more storage to a one-wall kitchen?
Go vertical first. Floor-to-ceiling pantry cabinets at both ends of the run take dry goods, small appliances and cleaners, and the space above the refrigerator suits things you reach for once in a while.
Pull-out pantry drawers and toe-kick drawers for flat pans and baking sheets add more. Wall rails or magnetic strips for utensils and knives free up drawers, and an island adds deep drawers if you have the floor for one.