
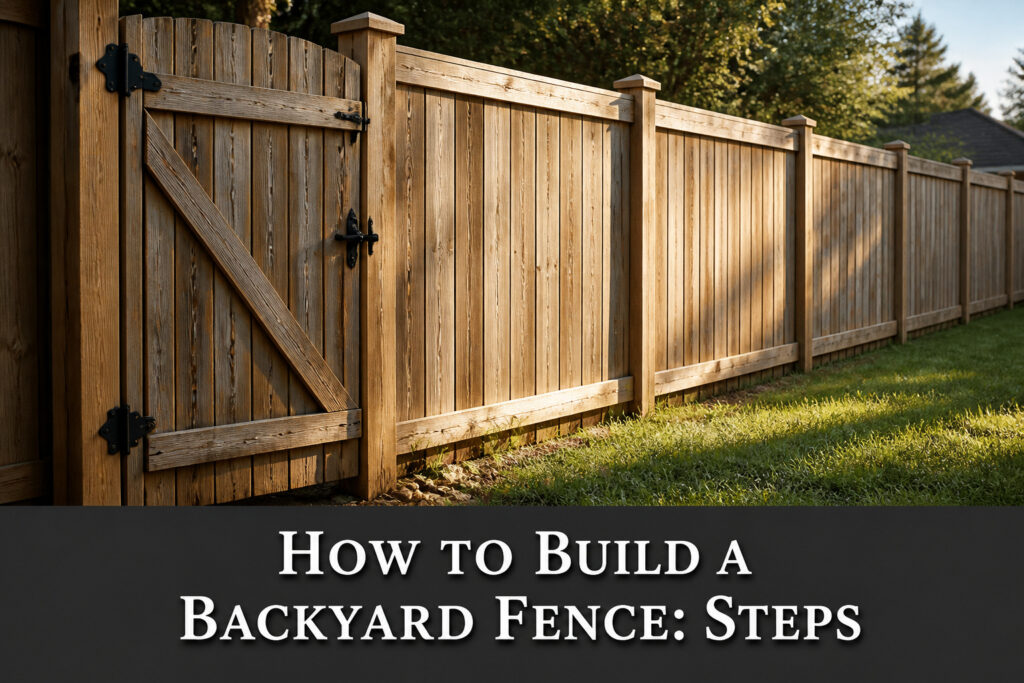
A straight backyard fence that actually blocks sightlines takes two weekends, roughly $800 to $1,500 in treated lumber, and enough concrete to set one 60-pound bag per post.
The gate is where most first-timers lose it: anything past five feet wide twists out of square by the second season unless you brace it properly.
1. Check Property Lines and Local Building Codes

The fence I built two summers ago started with a mistake I almost made: eyeballing the property line because the old fence "looked about right."
That old fence had been there since before I moved in, which meant nothing about where it legally sat.
A neighbor three doors down learned this the hard way when he had to tear out twelve feet of finished work and move it inward by eight inches.
Call your county clerk or surveyor for the plat map, the official drawing that marks your actual boundaries. If you have the paperwork from closing, it may already be in that folder you never opened.
City codes and homeowners associations govern height, style, and sometimes which yard sections can be fenced at all. My own HOA limits fences to the backyard and requires staining afterward; the city caps height at six feet inside the limits.
A permit may be required, and some areas force removal of an existing fence before you start the new one.
Before any post hole gets dug, dial 811 to have utility lines marked.
The locate is free, and the results redraw where your fence can actually run. Gas, electric, or fiber running through your planned line means moving the layout, not hoping you miss them.

Neighbor Privacy, Not Blackout: Blocks direct line-of-sight while allowing airflow — designed for comfortable backyard privacy, not a solid wall or tarp.

Privacy Solution: Most economical way for privacy over chain link fence, porous decorative concealment, existing cyclone wire fence, wood retaining wall, welded wire fence, chain link fence, privacy barrier around swimming pool, block nose neighbor see through, add privacy to acre back yard backdrop, front yard, patio, garden and porch; hide street, road, construction site, pet kennel pen, block surrounding noise and street view, stops dogs from barking at neighbors.

1 SCREEN PURCHASE: You will receive preassembled materials to construct 1 cedar wood outdoor privacy screen in a charcoal finish with your purchase
2. Select the Fence Type
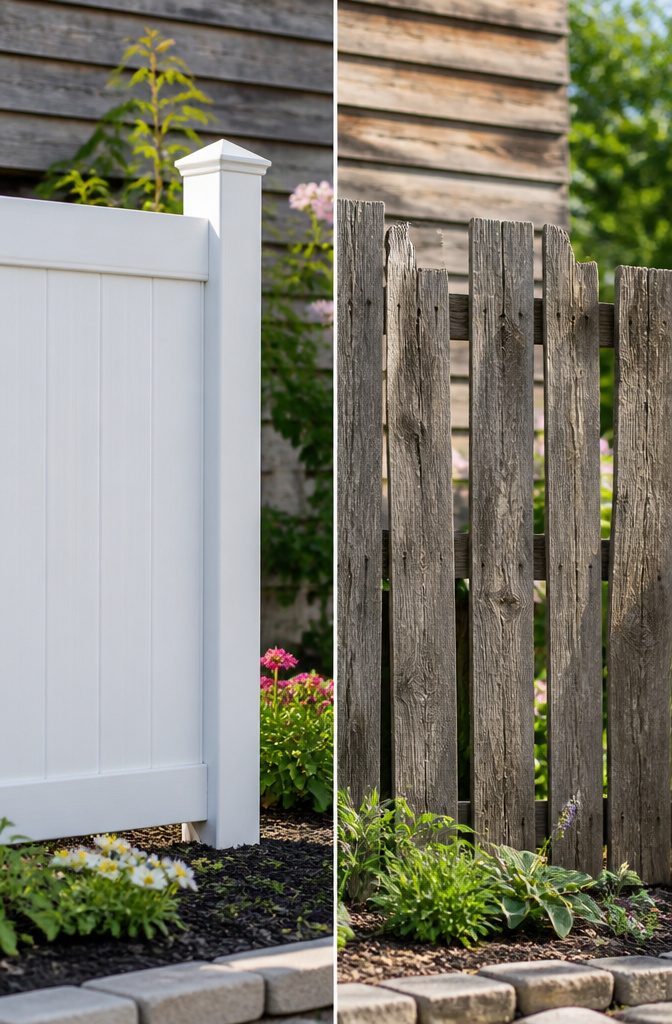
A backyard fence starts with a decision about what it’s actually for. Privacy fences run six feet or taller with no gaps between boards, and that solid wall changes how you use the yard entirely.
Garden fences sit lower, often three to four feet, meant to keep rabbits out or define beds without blocking light. Lattice panels add a decorative top section or work as a standalone screen for air flow with partial coverage.
Wood versus vinyl is the usual fork in the road. Pressure-treated lumber costs less upfront and takes paint or stain however you want it, but boards warp and posts rot over time.
Vinyl fence panels snap together fast and clean up with a hose, yet the color you pick is the color you keep, and a cracked panel means replacing the whole section, not just one board.
Style names matter at the lumber yard. Shadowbox fences alternate boards on each side of the rail so the pattern looks the same from either direction, with gaps that let some breeze through.
Board-on-board overlaps every vertical piece so nothing shows through, giving you true privacy with no see-through strips.
For a weekend build on a real budget, that distinction decides whether you’re satisfied with the result or staring at gaps you didn’t plan for.
EPA-registered, insecticidal exterior wood preservative prevents attacks from termites and other wood boring insects while protecting against rot and decay

MEASURE POST Before ordering These post tops are designed to fit ACTUAL 4"x4" fence posts, these post caps fit 4"x4" up to 4.6"x4.6" Actual sized posts. Perfect for rough cut or composite or vinyl sleeves and are perfect for any outdoor fence or deck project. They slide down the post 1.5 inches; their widest outside dimension is 5.5 inches. They will install on wood, composite, metal, and vinyl posts.

Perfect Fit: These 4x6 post caps are for pressure-treated wood posts measuring 3.5 inches x 5.5 inches up to 3.75 inches x 5.75 inches. These caps slide down post 1.5" and are secured with our patented Snap-Cap installation method.
3. Measure and Mark the Layout
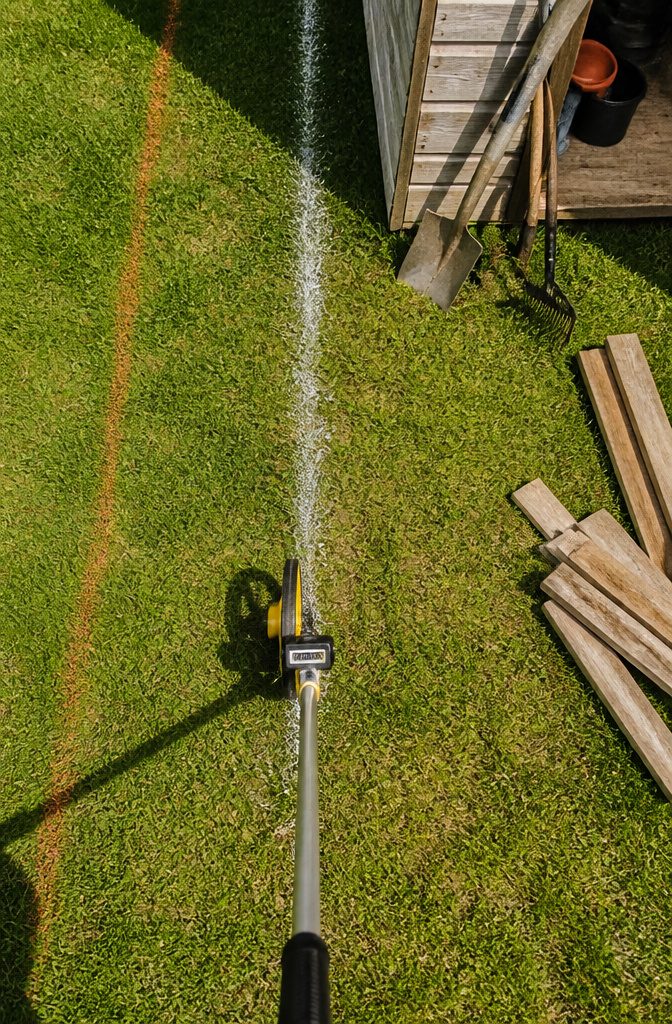
A measuring wheel makes quick work of long fence lines, but a standard tape works fine for most yards. The real mistake is measuring once and calling it done.
I mark the full perimeter with spray paint or chalk, gate locations included, then walk it again with the tape to catch the spots where the wheel skipped a curve or I rounded a corner too generously.
Post spacing of 6 to 8 feet is the range that keeps panels from sagging without wasting posts.
Six feet gives you more strength on uneven ground or in windy areas; eight feet saves money and digging if your yard is flat and sheltered.
I divide my total fence length by the spacing I have picked, rounding up, and that tells me how many holes I am in for.
The gates come out of that math entirely, so I measure those separately and subtract them first.
String tied between two stakes gives you the straight line your eye cannot. I drive scrap wood stakes at either end of each run and pull the string tight before I mark any post locations.
That line stays up while I dig, because a stake knocked loose by a shovel is easier to reset than a fence that wanders six inches off course by the third post.

EASY ORDERING: Everything you need to install your gate is in the box except for posts. Only ONE additional post (search BL19112) is required if you are installing in a fence (search BL19110) run. If you are installing the gate with no fence, you will need to purchase 2 BL19112 posts.

Fast, Effective Repair Of Vinyl Fence Holes, Cracks, and Damage.

DOG FENCE: This no dig fence is great for creating an outdoor dog playpen to keep your pet contained. Have peace of mind knowing that your puppy is safe to run within the boundaries of your backyard. Ideal for small to medium sized dogs.
4. Gather Tools and Materials
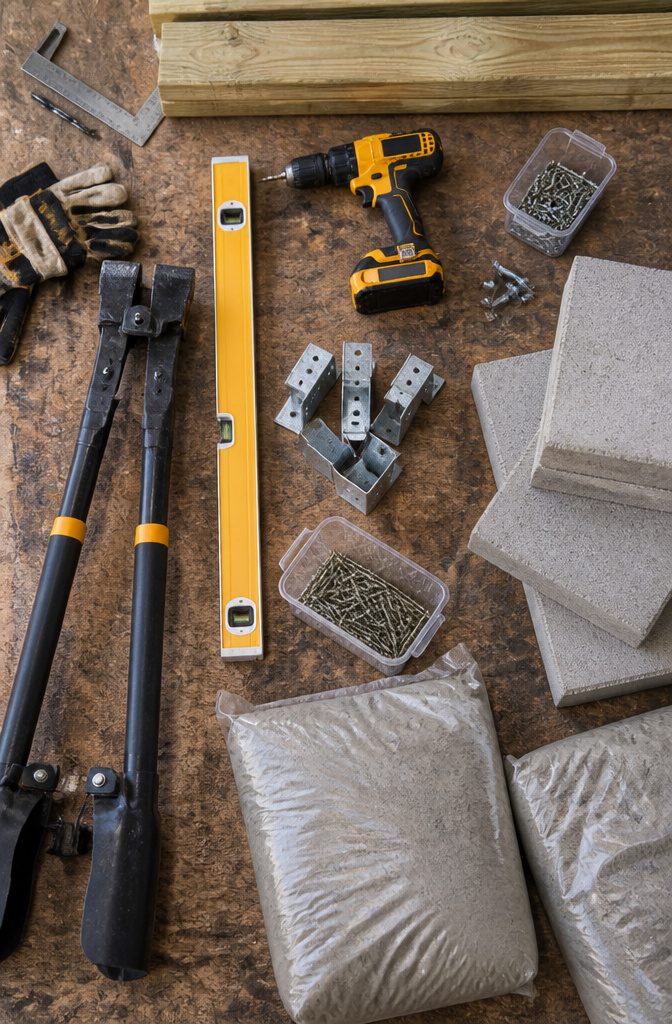
A post hole digger, a level, a power drill, and a tape measure are the non-negotiables.
The digger saves your back on anything over three posts, and the level keeps the line true when concrete starts setting faster than you expect. For fasteners, outdoor-rated screws are the move; standard ones will corrode inside two seasons.
Treated 4×4 posts and treated pickets are what the budget allows and what the weather demands. Cedar looks better on paper, but the price gap is wide enough that most weekend builds stick with pressure-treated stock.
I used 2 ½″ pocket hole screws rated for outdoor use on the rails and 1 ¼″ outdoor wood screws for the pickets, with staples as a backup option on a few stubborn boards.
Concrete is where the math gets simple: 60 lbs, one bag, per 4×4 post hole. That fills the base solid and leaves enough dug dirt to pack tight around the top.
Skip the concrete and the posts lean by year two. I learned that watching a neighbor’s gate sag until the latch missed by three inches.
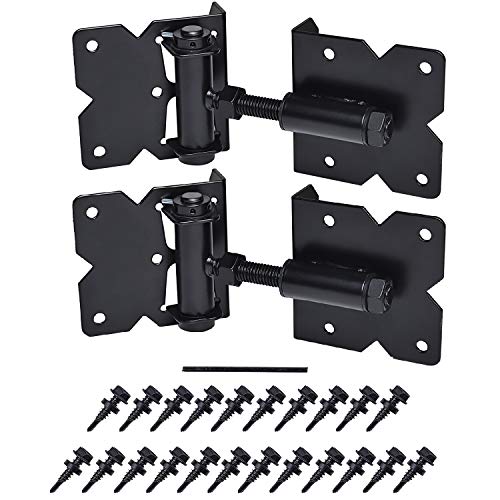
Self Closing Adjustable: SANKINS Gate Hinges with Spring tension,Use the swing adjustment tool inside the series of small holes around the top of the hinge and place the stop (small rod) inside the hole to hold it in place.Adjust to the tension you want in order to achieve self-locking.

Note: Installation of the latch and handle applies to the right door, for the left door you need to remove and install the latch again, the installation steps refer to the product details page

Esign Patent: Our T-Post Gate Hinge Pins made of heavy duty steel, sturdy , and not easy to rust or oxidize. can better protect your home,Protected from vandalism. Patent No.: US D1,009,591 S
5. Dig Holes and Set Posts
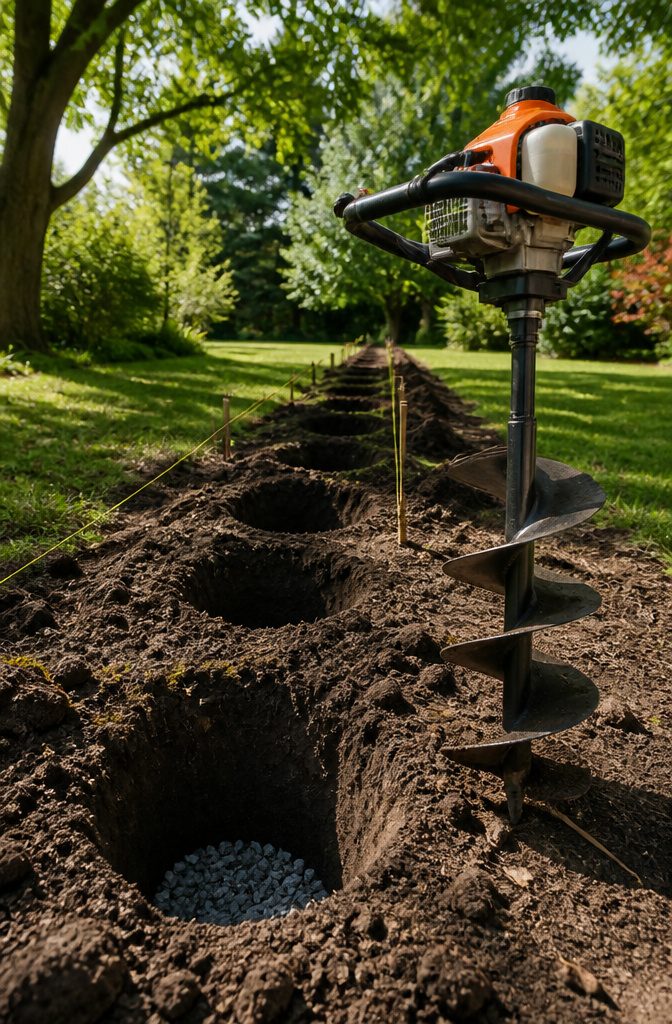
A 6-foot fence needs holes 2 to 3 feet deep, spaced every 6 to 8 feet along your line.
I measure center to center and mark each spot before touching dirt, because once the digging starts, the string line gets kicked around and distances blur.
The hole itself is only half the work. I drop 3 to 4 inches of gravel at the bottom for drainage, then stand the post and plumb it with a level before any concrete touches it.
One bag, about 60 pounds, fills each hole; I pour dry mix straight in and let ground moisture do the curing, though a dry week means adding water yourself.
The concrete needs a few days to set, not the afternoon you wish it did.
I learned that on a Saturday job where I started hanging rails Sunday morning and the posts leaned like tired sentries by Tuesday. Now I dig on Thursday, set Friday, and build the following weekend.
A gas-powered auger saves your back on anything past four holes, though the one-man version suits me fine. Two-man augers work if you have the extra hands and the beer to pay them with after.

REALISTIC WOOD-LOOK WITHOUT THE MAINTENANCE: Beautifully embossed wood-grain boards provide the warm, natural look of real wood in Slate Grey or Walnut Brown — no staining, sealing, or painting required

STYLISH NATURAL WOOD: This FSC certified wood screen is made with real wood meaning no two boards have the same grain color, finish, or wood knots differing it from vinyl outdoor privacy fence screen panels.
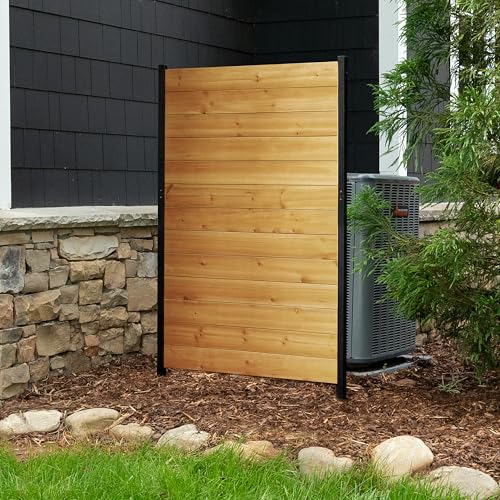
STYLISH NATURAL WOOD: This FSC certified wood screen is made with real wood meaning no two boards have the same grain color, finish, or wood knots differing it from vinyl outdoor privacy fence screen panels.
6. Install Rails to the Posts
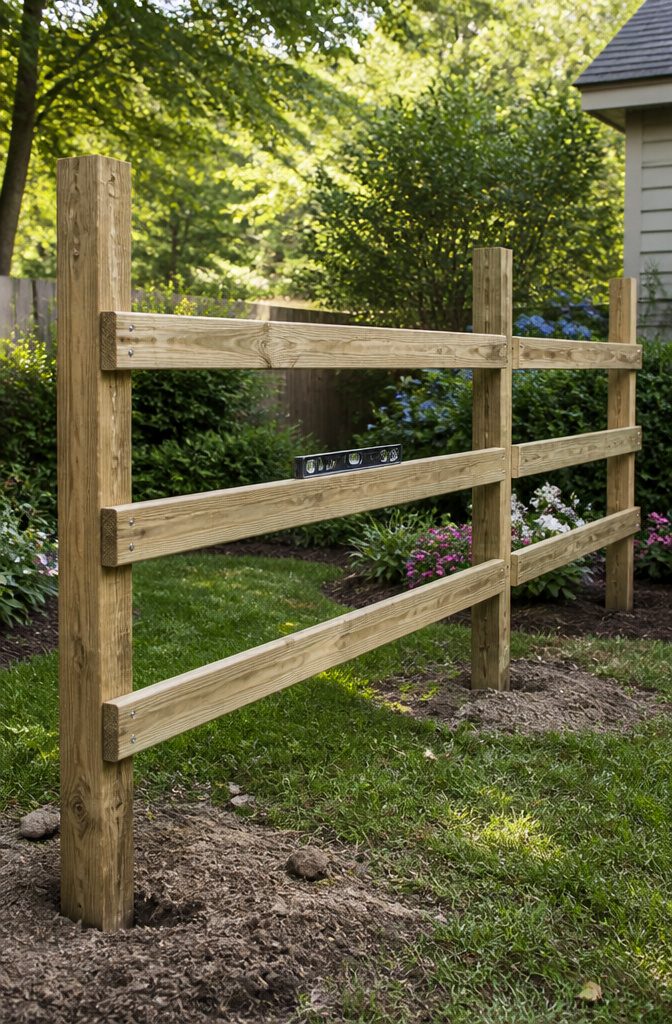
Concrete usually needs a full day or two before it can take any real load, and rushing that part only means leaning posts back into place later. Once the bases feel solid, the rails go on.
A privacy fence tall enough to block sight lines needs three horizontal rails to keep pickets from warping or bowing: one set at the bottom edge, one at the top, and one dead center to carry the load between them.
Spacing matters more than I expected when I first read through the steps.
Measuring down two feet five inches from the top of the upper rail sets the height for the middle rail, then the same drop again for the bottom rail.
That spacing keeps the rails visually straight across a whole run, which is harder to eyeball than it sounds.
For fastening, deck screws and a power drill do the job, though a hammer and nails still work if that is what is on hand.
The heavier approach uses three-and-a-half-inch galvanized ring-shank nails, three driven through the rail into each post end.
Six nails total per rail, three at each post, is enough to hold the rail firm against the weight of the pickets that come next. Four-inch wood screws are another option if you are working from a screw-first list.
The key is getting the rails level and truly fixed before anything vertical goes up, because every picket after this will telegraph a crooked rail straight into the finished look.

【Above 1000Hrs Salt Spray Test】Specifically designed to work best with either pressure-treated lumber or composite decking. Adopt premium carbon steel with high hardness coating against rust and corrosion. Our deck screws have passed about 1000 hours salt spray test provide exceptional protection against corrosion.

MEASURE POST BEFORE ORDERING - We carry the Perfect Fit for your post. These standard sized 6x6 fence post caps are for pressure treated posts measuring 5.5 inches x 5.5 inches up to 5.75 inches x 5.75 inches. We also have an ACTUAL 6"x6" version for rough cut and vinyl or composite wrapped post.

STRONG WOODEN SUPPORT POST – Provide a reliable foundation for your bird house, feeder, or mailbox with this durable 4" x 4" treated pine post. Built to support heavy outdoor fixtures with ease.
7. Attach Pickets or Panels
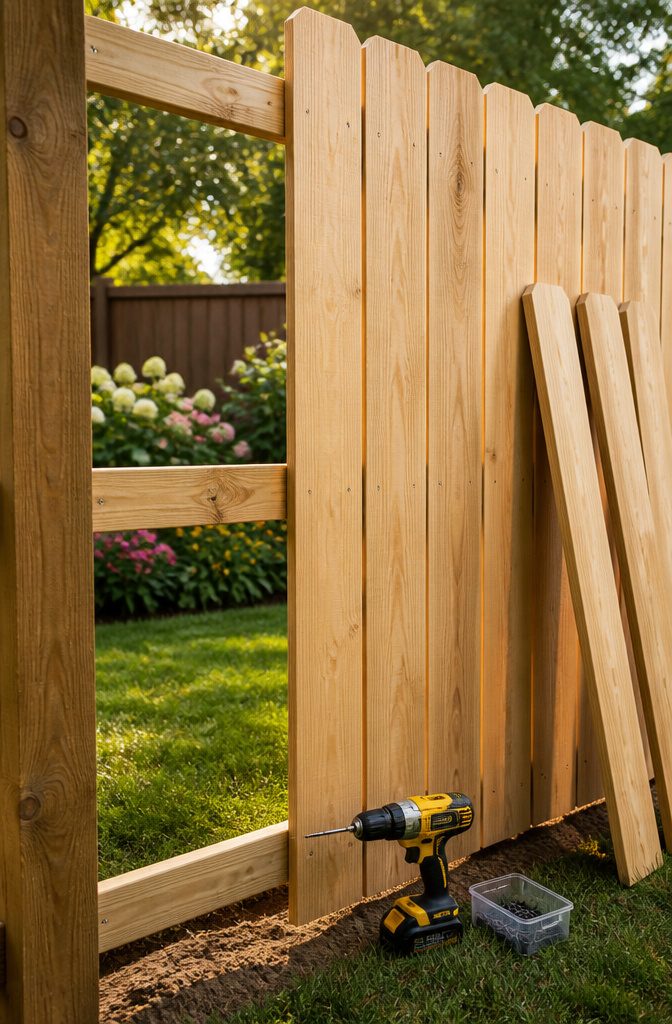
1×6 pickets are the standard choice for a privacy fence, and an 8-foot section takes roughly 17 of them if you’re butting them edge to edge.
That figure comes from the standard 6-inch width; the math works out clean, and I always order a couple extras because at least one or two in the bundle will be crowned, warped, or split in a way that makes you glad you planned for it.
Two-inch screws or galvanized ring-shank nails both work here. Drive two fasteners per rail, so six total per picket on a three-rail fence.
I leave about 1–2 inches of clearance at the bottom to keep the wood off the soil and rot away slower, and run the picket tops about 5 inches above the post cap line.
The first picket has to be dead plumb; every one after that follows its shadow, so check early and check again every few boards.
A picket that leans even slightly starts a domino tilt you’ll fight the rest of the afternoon.
The last picket in a section almost never fits whole.
Rip it on a table saw or circular saw, then screw it in place. After the field is done, 1×4 trim along the top and bottom rails cleans up the edges and hides the rail ends from weather.

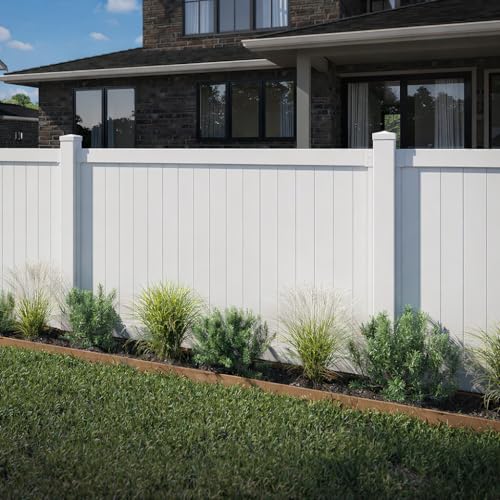
FINISHING POST REQUIRED: This vinyl fence is designed to scale, so you will need to order a finishing post to complete your yard fence or pool fence project (item BL19042). A compatible gate is available by searching BL19106.

Sufficient Quantity: our product package includes 4 x Vinyl pocket rails; These are precision-crafted and come in an aesthetic white color adding value and elegance to your property; Trust our quality and design to provide your property with an attractive, durable and secure construction
8. Install the Gate
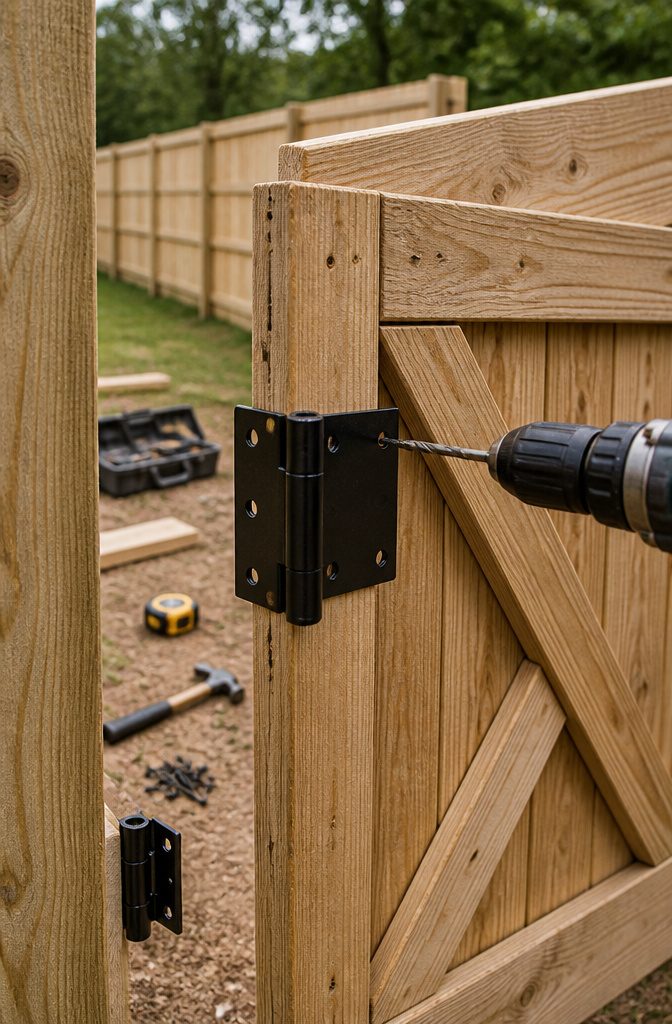
A swinging single gate needs 4 to 5 feet of width to move easily without warping the frame. Anything wider and the weight starts to pull the gate out of square by the second season.
I learned the hard way that hinges matter more than the gate itself.
The Nationwide guide I read suggested predrilling every hole before driving a single screw, which sounds fussy until you’ve split a cedar rail at four o’clock on a Sunday.
Two heavy-duty hinges, one set a few inches from the top and another the same distance from the bottom, carry the load without letting the gate sag.
For a wood build, a steel gate kit from the hardware store adds the cross-bracing that keeps the rectangle true; Pete from DIY Pete used one and added an X-pattern facing for a barn-door look that still tracked straight.
The locking hardware goes on last, following the manufacturer’s spacing.
A simple gate latch is enough for most backyards. The mistake I almost made was mounting the latch before checking swing clearance against the fence line; the gate needs to open a full ninety degrees without catching the nearest panel.
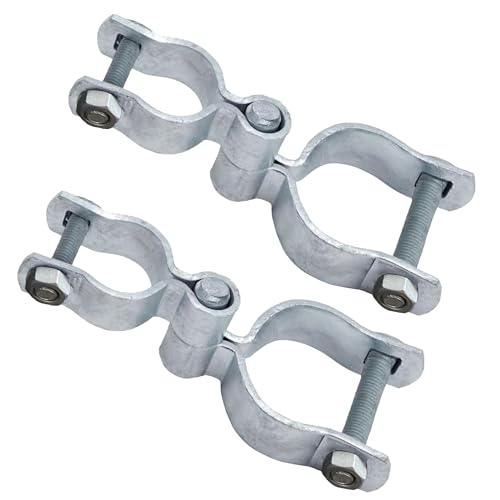
√【Hot-Dip Galvanized Steel】Our gate hinge is made of hot-dipped galvanized steel, providing excellent rust and corrosion resistance along with outstanding durability—ideal for long-term outdoor use.
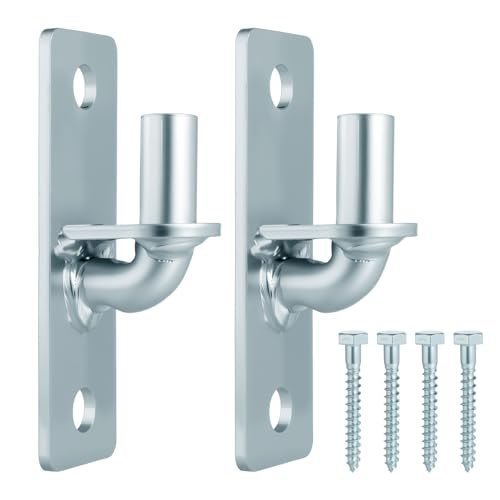
Premium Quality & Heavy Duty - Crafted from high-quality galvanized steel, the chain link gate hardware offer durability, rust resistance, and long-lasting performance for gates, barns, and fences

【 ULTIMATE HEAVY DUTY STEEL STABILITY 】 Stop sagging before it starts. Forged from thick, high-strength structural steel, these fence post components act as a permanent gate hanger system. They provide an unyielding, rigid foundation that ensures heavy outdoor entryways remain perfectly level over years of intense structural stress
9. Finish the Fence
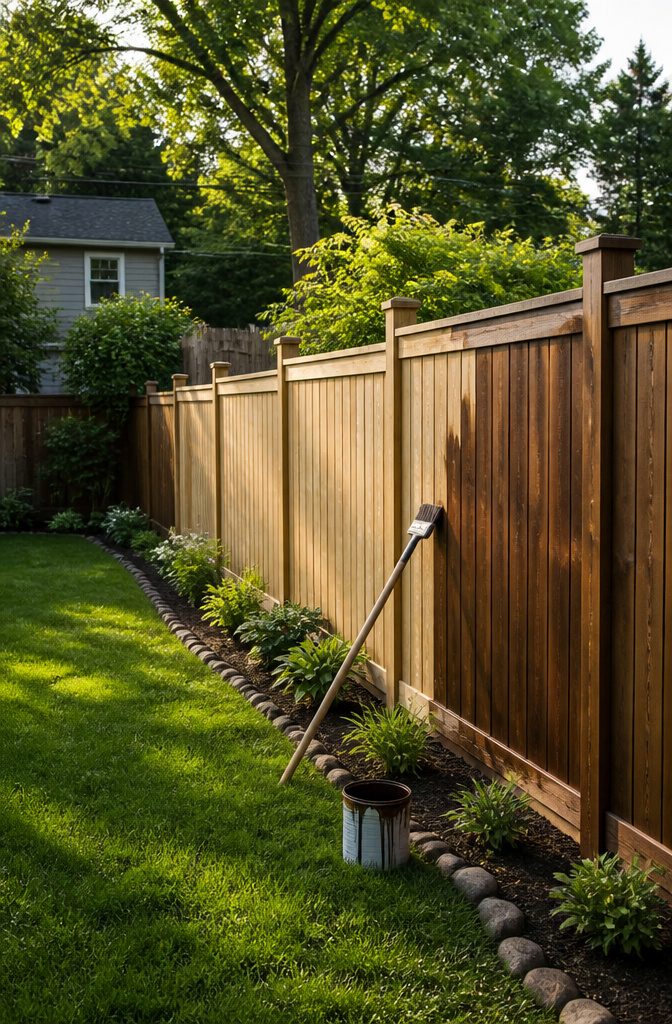
Raw wood left to the weather turns gray in about two seasons where I live, and the grain starts checking soon after.
A finish buys you time. For a backyard fence, semi-transparent or solid stain holds up better than clear sealers against sun and rain, which is why most builders I read skip the bare-wood look entirely.
Spray application covers the pickets fast, especially if you are working alone on a Saturday; a wide pad or brush works fine for the rails and posts where overspray drifts.
Paint is the other route, though on rough-sawn treated lumber it tends to film and peel where moisture moves through the boards.
The treated 2x4s and 1×6 pickets common to this kind of project take stain more readily, and the color evens out the greenish cast fresh pressure-treated lumber carries for the first few months.
Either way, the fasteners have to match the treatment: outdoor-rated screws rated for use in treated wood, not standard interior-grade, or the chemistry eats them.
Staples save a step on picket attachment but they are not structural; I would not trust them where wind load matters.

Upgrade iCover Privacy Screen For Fence: Our privacy screen is made of heavy-duty knitted net, measuring 6 ft high by 50 ft long. It is suitable for fences with a height of 6 ft or slightly higher. Please accurately measure your fence before purchase

STYLISH NATURAL WOOD: This FSC certified wood screen is made with real wood meaning no two boards have the same grain color, finish, or wood knots differing it from vinyl outdoor privacy fence screen panels.

Natural Cedar Wood: This wood screen is made with thickened cedar wood and will never fade, differing it from vinyl fence screen panels which can not provide you a natural screen experience.
Fence Materials Compared
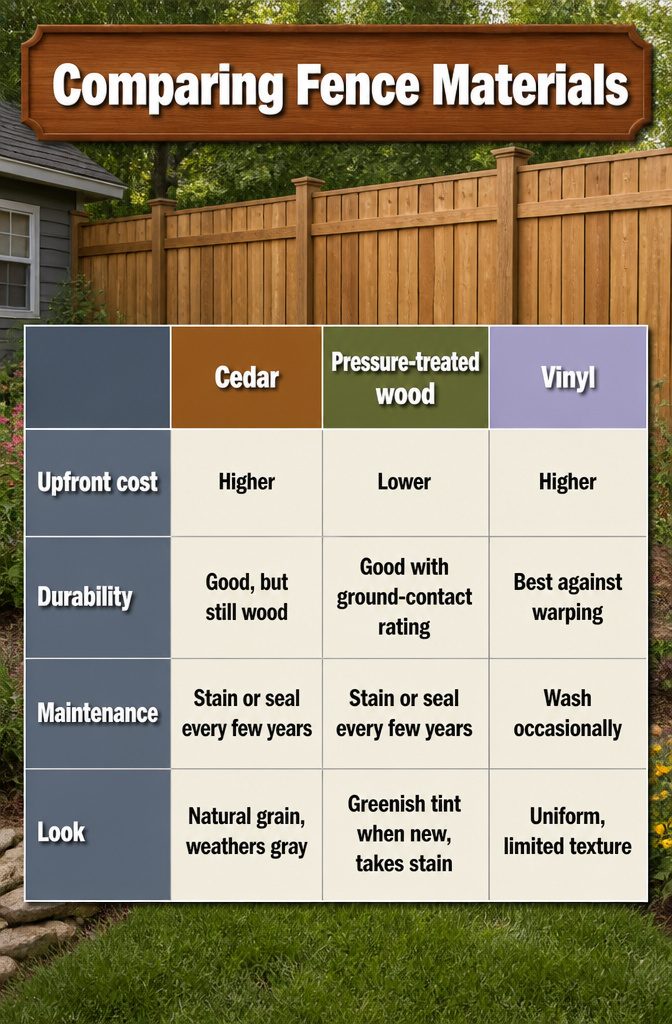
Cedar and pressure-treated wood are the two materials most often recommended for a backyard fence that has to survive actual weather.
Cedar brings that warm, natural look some people want from an "all cedar" build, while pressure-treated 4x4s and 2x4s are the practical default for posts and rails.
Treated wood is far less expensive than cedar, which matters when you are covering sixty-plus feet of yard.
Wood warps.
It cracks, twists, and splits as temperatures swing, and no stain stops that entirely. Vinyl sidesteps the problem, but the tradeoff is upfront cost and a less forgiving look if your house style runs traditional.
| Cedar | Pressure-treated wood | Vinyl | |
|---|---|---|---|
| Upfront cost | Higher | Lower | Higher |
| Durability | Good, but still wood | Good with ground-contact rating | Best against warping |
| Maintenance | Stain or seal every few years | Stain or seal every few years | Wash occasionally |
| Look | Natural grain, weathers gray | Greenish tint when new, takes stain | Uniform, limited texture |
For a weekend project on a real budget, pressure-treated ground-contact lumber is the starting point.
Cedar is the upgrade you pick when the look justifies the hit to your wallet, not when you are trying to keep the total under a few hundred dollars.

FAST-START CUT TIP FOR EFFICIENT INSTALLATION – The sharp notched point helps this #14 carbon steel structural wood screw bite quickly into lumber, reducing drilling in many softwoods. Aggressive threads pull the fastener into wood for secure assembly of posts, beams, landscape timbers, fences, barns and pergolas. Dense hardwood, end-grain work or positions near board edges may still require a correctly sized pilot hole to reduce splitting and excessive driving torque.

MEASURE POST Before ordering These post tops are designed to fit standard 4x4 pressure treated fence posts, these post caps fit 3.5"x 3.5 inch up to 3.75" x 3.75-inch posts and are perfect for any outdoor fence or deck project. They slide down the post 1.5 inches; their widest outside dimension is 5.5 inches. They will install on wood, composite, metal, and vinyl posts

End-Grain Capillary Lock: Penetrates deeply into vertical cut wood fibers, blocking open timber end-grain from drawing rainwater down into structural deck posts.
Tools You Actually Need
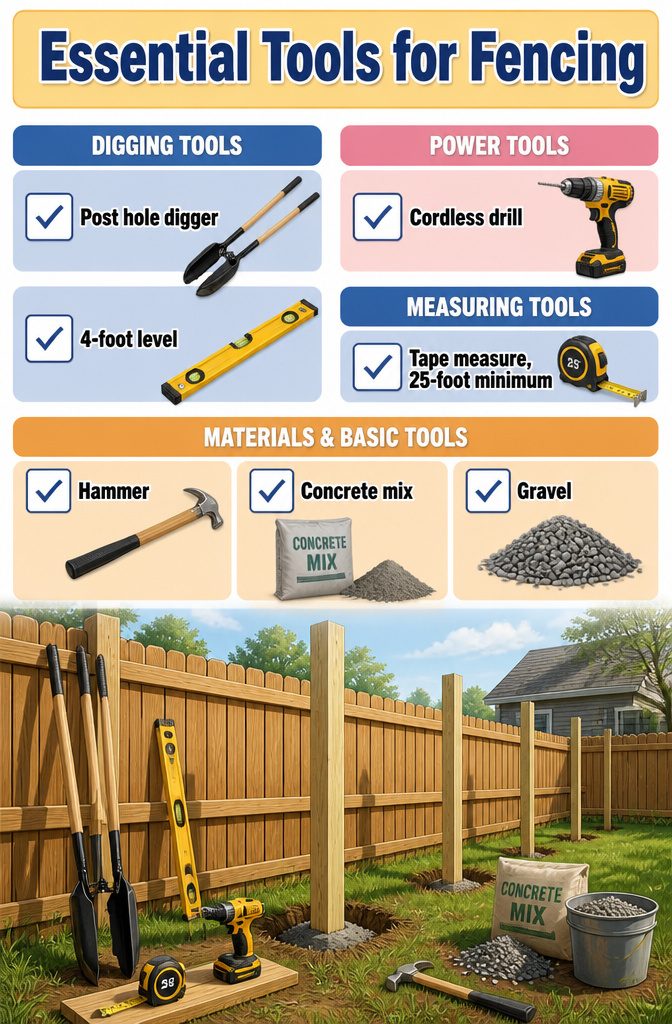
A post hole digger is the one tool you cannot fake with a shovel and patience.
The clamshell style runs about thirty dollars to buy and is worth owning if your yard has any slope, because you will use it again for mailbox posts or a small retaining wall.
The auger style rents for half a day at most hardware stores and saves your shoulders on anything longer than six posts.
The rest of the list is shorter than the rental counter wants it to be:
- 4-foot level. Checking that each post stands plumb while the concrete is still wet keeps the whole fence line from drifting off square by the third post. A 2-foot level works in a pinch laid across the top rail, but the longer body catches twist you would otherwise miss.
- Cordless drill with a driver bit. Fence panels attach faster with screws than nails, and a drill lets you back one out when the board warps next summer. Any 18-volt kit you already own for household jobs is enough.
- Tape measure, 25-foot minimum. Post spacing at 6 to 8 feet sounds forgiving until you are stretching a panel that was cut exactly 96 inches and your holes sit at 102. Measure every hole center before you dig.
The hammer, concrete mix, and gravel matter more as materials than as tool decisions.
Borrow the level if you must, rent the digger if the fence runs past ten posts, and buy the drill only if you do not already own one.
Post Depth and Spacing Numbers
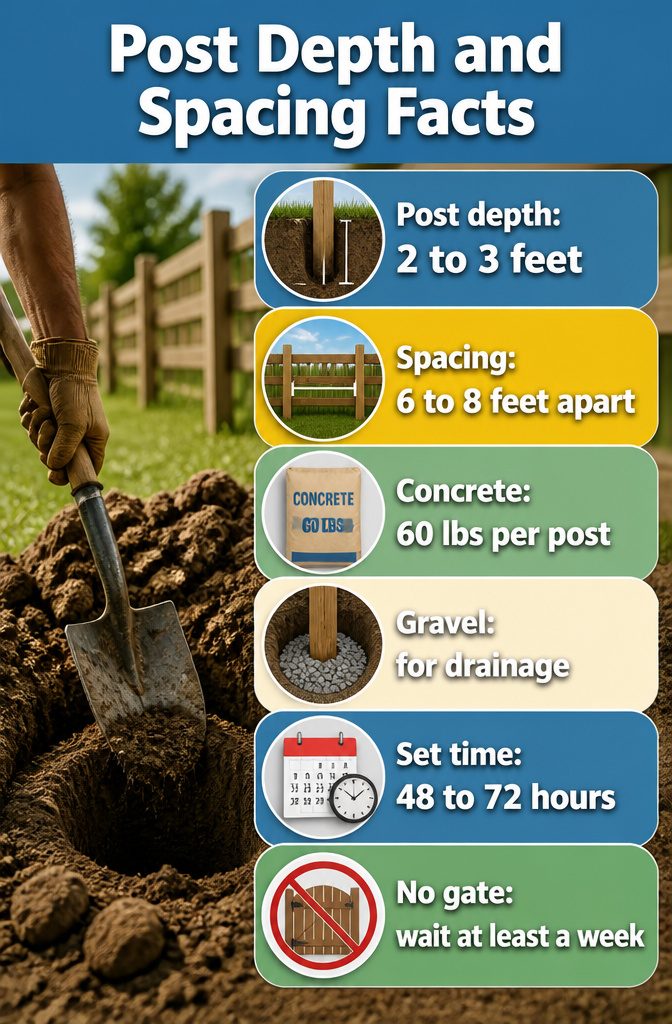
A 6-foot post needs to sit 2 to 3 feet deep in the ground, which is roughly a third of its total height above grade.
That depth is what keeps the fence from leaning the first time someone leans against it or the soil gets wet and soft.
The posts themselves go 6 to 8 feet apart along the line, measured center to center, and keeping that spacing consistent matters more than chasing an exact number.
Wider gaps let the rails bow; tighter ones waste material and labor for no real gain.
Each hole gets a few inches of gravel at the bottom for drainage, then 60 lbs of concrete per post, which is one standard bag.
The gravel keeps the concrete base from sitting in standing water, and the full bag per hole is enough mass to anchor the post without overfilling and creating a bell shape that actually loosens when the ground freezes.
In most conditions that concrete sets hard enough to continue work in 48 to 72 hours, though I would not hang a gate off it for at least a week.
What I Got Wrong the First Time
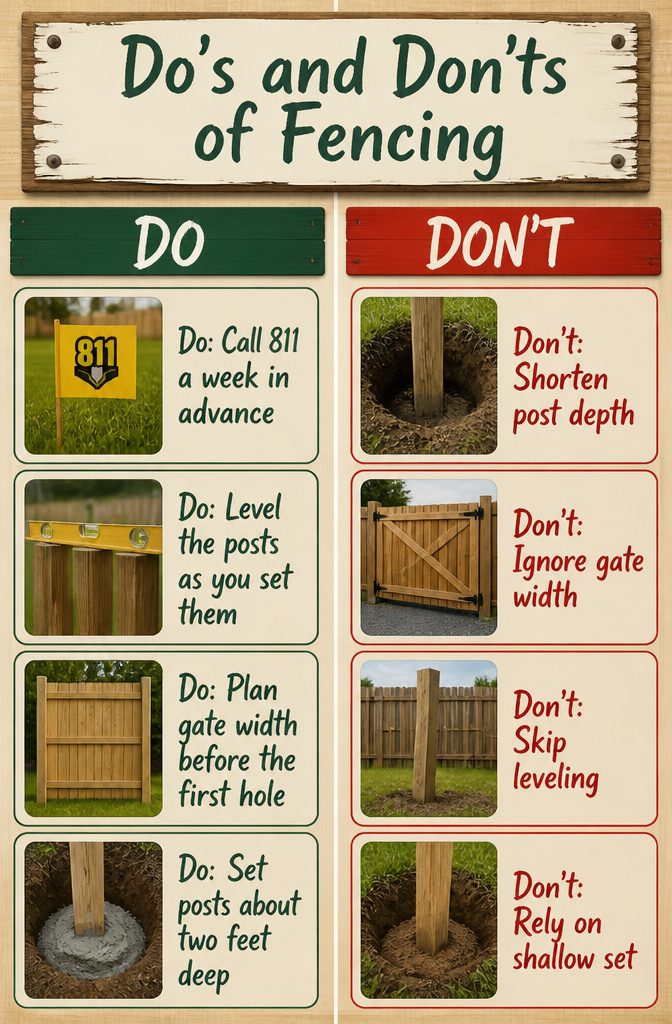
My first fence taught me that enthusiasm does not replace measurement. A few of the errors stuck hard enough that I still check for them on every job.
- Call 811 a full week out, not the morning you rent the auger. Utility marking takes three to four days, and starting without it risks gas lines, water mains, and a legal headache. I figured I could eyeball where lines ran. I could not.
- Post depth is where weekend projects sink or tilt. Sources vary on whether to cement, but they agree on depth: about two feet for standard garden posts. I stopped at sixteen inches because the clay was tough. By fall the wind had done the rest.
- Gate width wants planning before the first hole. A swinging wood gate loads heavy; four to five feet is the practical limit for a single panel unless you switch to a metal frame. My six-footer dragged and twisted within a season.
- Level the posts as you set them, not after the concrete cures. Lay a 2×4 across the tops and check it. I told myself I would shim later. Later never came, and the pickets followed every lean.
Frequently Asked Questions
What type of wood is best for a fence?
Cedar and pressure-treated wood are the two materials most often recommended for a backyard fence that has to survive actual weather.
Cedar brings a warm, natural look, while pressure-treated 4x4s and 2x4s are the practical default for posts and rails. Treated wood is far less expensive than cedar, which matters when you are covering sixty-plus feet of yard.
How deep should fence posts be?
A 6-foot post needs to sit 2 to 3 feet deep in the ground, which is roughly a third of its total height above grade.
That depth is what keeps the fence from leaning the first time someone leans against it or the soil gets wet and soft.
Each hole also gets a few inches of gravel at the bottom for drainage before the concrete goes in.
How long does it take for concrete to set?
Concrete needs a few days to set, not the afternoon you wish it did. One builder learned this on a Saturday job where he started hanging rails Sunday morning and the posts leaned like tired sentries by Tuesday.
Now he digs on Thursday, sets Friday, and builds the following weekend; the concrete sets hard enough to continue work in 48 to 72 hours in most conditions.
What tools do I need to build a fence?
The non-negotiables are a post hole digger, a level, a power drill, and a tape measure.
The digger saves your back on anything over three posts, and the level keeps the line true when concrete starts setting faster than you expect.
A 4-foot level is ideal for checking that each post stands plumb while the concrete is still wet.
How do I install a gate?
A swinging single gate needs 4 to 5 feet of width to move easily without warping the frame.
Two heavy-duty hinges, one set a few inches from the top and another the same distance from the bottom, carry the load without letting the gate sag.
For a wood build, a steel gate kit from the hardware store adds the cross-bracing that keeps the rectangle true, and predrilling every hole before driving a single screw will keep you from splitting a rail at four o’clock on a Sunday.