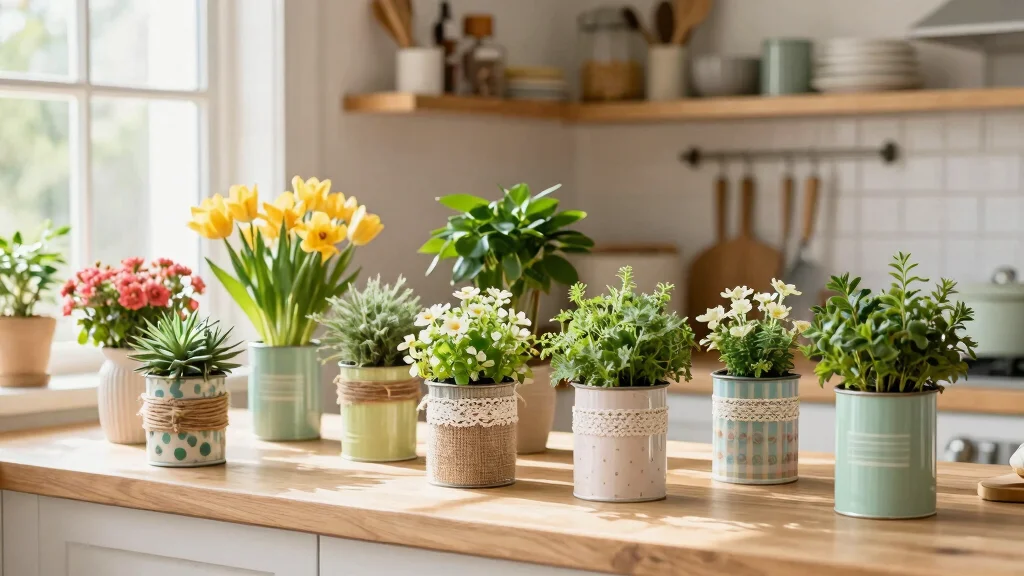
Coffee can planters are not just a fun way to bring greenery into your home; they also represent a fantastic opportunity to upcycle and add a personal touch to your decor. If you’re like me, you’ve probably been sipping your morning brew and staring at those empty coffee cans, wondering what to do with them. This post is for anyone who loves DIY home decor and wants to create something beautiful with minimal expense. Whether you’re a seasoned gardener or just starting your indoor gardening journey, these coffee can planter ideas will inspire you to turn those cans into something special.
You’ll discover 16 creative planters that can transform your space while keeping sustainability in mind. From herb gardens to whimsical fairy gardens, these ideas cater to all tastes and skill levels. Each project is designed to be simple yet striking, offering a charming way to incorporate plants into your home. You’ll find practical tips, imaginative designs, and even suggestions for using these planters as delightful gifts, ensuring that there’s something for everyone. Get ready to unleash your creativity and let your coffee cans take on a new life!
Key Takeaways
– Repurpose with Style: Coffee can planters allow you to upcycle items you already have, turning waste into charming decor pieces.
– Diverse Options: From herb gardens to whimsical fairy gardens, there’s a variety of creative planter ideas that fit different aesthetics and preferences.
– DIY Made Easy: Each project in this guide is simple to follow, making it perfect for beginners and experienced DIYers alike.
– Sustainable Decor: Using upcycled coffee cans supports eco-friendly practices while adding personal flair to your indoor gardening efforts.
– Gifts and More: These planters can serve as unique gifts and fun projects for kids, enhancing your home with a touch of creativity and love.
1. Herb Garden Delight

Start your indoor gardening journey with a delightful herb garden made from old coffee cans.
These planters not only save space but also provide fresh flavors for your cooking. Each can can hold a different herb, like basil, rosemary, and thyme. You can personalize them by painting each can with the name of the herb, making it easy to identify while adding a splash of color to your kitchen.
Why it works: The sturdy material of coffee cans is perfect for herbs that prefer well-draining soil. The cans can easily be lined up on a windowsill for maximum sunlight exposure.
Tips: Make sure to punch drainage holes at the bottom of the cans. Water your herbs regularly but be cautious of overwatering to keep the roots healthy.
Ingredients List: Coffee cans, spray paint, potting soil, herb seeds or seedlings.
Step-by-Step Instructions:
1. Clean and dry your coffee cans thoroughly.
2. Spray paint them in your chosen colors, allowing them to dry completely.
3. Punch holes in the bottom for drainage.
4. Fill with potting soil and plant your herbs.
5. Place them on a sunny windowsill and watch them grow!
Frequently Asked Questions:
– Can I use larger coffee cans? Yes, they work great for larger herbs!
– How long does it take for herbs to grow? It varies, but most herbs can be ready in a few weeks.

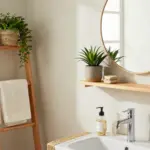
Indoor Herb Garden Planter with Tray - Add greenery to your space with this vintage metal windowsill planter. Herb planters for indoor plants with a farmhouse touch. Place the indoor herb planter on your kitchen counter or display the small herb planter as an apartment window planter.

2. Rustic Flower Arrangements

Embrace the charm of rustic decor with flower arrangements in coffee can planters that evoke a farmhouse aesthetic.
You can leave the cans in their original state for a vintage look or paint them in muted tones for a softer touch. Fill these planters with seasonal flowers, such as daisies, sunflowers, or wildflowers for a country feel. This decor works beautifully for weddings, parties, or simply sprucing up your home.
Why it works: The rustic vibe pairs perfectly with natural elements and brings life to any dull corner of your home.
Tips: Use floral foam at the bottom of the can to keep arrangements sturdy and hydrated. Experiment with different heights for a more dynamic look.
Ingredients List: Clean coffee cans, floral foam, fresh flowers, water.
Step-by-Step Instructions:
1. Prepare your coffee cans by removing labels and cleaning them.
2. If painting, apply a coat and let it dry.
3. Cut floral foam to fit snugly in the can.
4. Insert the foam and add water.
5. Arrange your flowers as desired.
Frequently Asked Questions:
– How often should I change the water? It’s best to change it every few days to keep flowers fresh.
– Can I use dried flowers? Absolutely! Just ensure the foam is dry.

【Indoor Herb Garden】Experience the joy of gardening with our specialized indoor herb planter. This set includes a planter with a tray but does not come with plants and seeds. Designed specifically for herb cultivation, these planters can be used both indoors and outdoors. Crafted from durable metal with a sleek, glossy white finish, they blend functionality with a farmhouse style to enhance your living space.
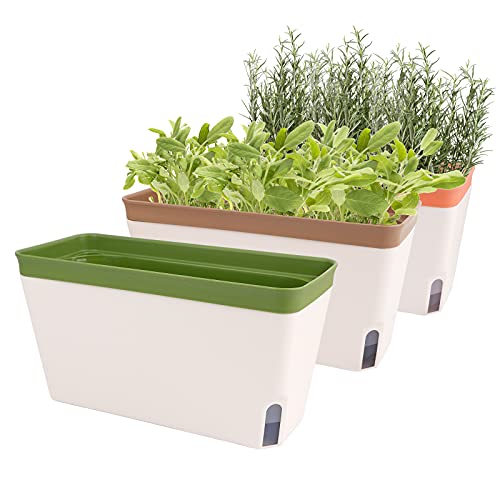
SELF-WATERING PRINCIPLE: Through two absorbent cotton ropes, the self watering pots provide water to the soil and keep the soil moist through the principle of osmosis, without having to water the plants regularly. Even if you leave home for a few days, it can help you take care of the plants and avoid plants die from water shortage.

EFFORTLESS WATERING SYSTEM: This self watering planter uses absorbent cotton wicks to automatically deliver water to plant roots through capillary action, keeping soil evenly moist for days. A perfect solution for busy plant lovers who want healthier growth without daily watering
3. Whimsical Fairy Garden

Unleash your creativity with a whimsical fairy garden using coffee can planters.
Transform the cans into magical miniature worlds where fairies might reside. Paint them in bright colors and add tiny decorations like pebbles, small figurines, or even moss. This idea is perfect for kids or those who want a playful twist to their gardening.
Why it works: It encourages imagination and provides an interactive gardening experience.
Tips: Use clear sealant to protect the paint from weather if placed outdoors. Keep the decorations simple to avoid overcrowding the design.
Ingredients List: Coffee cans, acrylic paint, small decorations (figurines, pebbles), moss, potting soil, small plants.
Step-by-Step Instructions:
1. Clean and dry the coffee cans.
2. Apply a base coat of paint and let dry.
3. Arrange small decorations inside the can.
4. Add potting soil and plant small flowers or succulents.
5. Place the can in a sunny spot.
Frequently Asked Questions:
– What plants work best? Succulents are low-maintenance and fit well in a fairy garden.
Fun fact: Transforming a coffee can planter into a whimsical fairy garden keeps kids engaged twice as long outdoors and sparks tiny worlds in minutes. Paint bright colors, add moss and tiny figurines, and watch imagination bloom with every sunny moment.
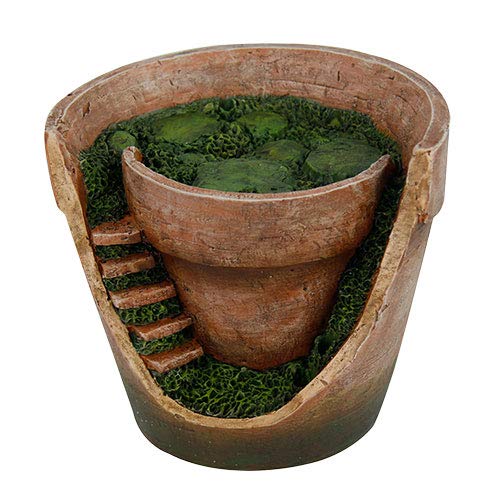
Measures approximately 6.5"W x 6.25"D x 7.5"H
Made with Recycled Materials: A blend of recycled plastic, stone powder, and wood dust, PSW Pots are eye-catching and long-lasting for mindful gardening.

FOR PLANTS WITH SHALLOW ROOTS: This bowl is ideal for plants that don’t have deep roots, including various bulbs, succulents, herbs, bamboo, bonsai, microgreens, and more.
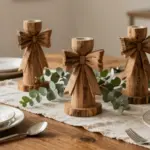
4. Upcycled Candle Holders

Transform your coffee cans into eco-friendly candle holders that add a cozy ambiance to your home.
By simply cutting holes into the sides of the cans, you can create beautiful light patterns when the candles are lit. You can decorate the cans with paint, twine, or lace for an added touch of elegance. This DIY project not only looks stunning but is also a great way to repurpose items you already have.
Why it works: The warm glow of candles paired with the rustic charm of coffee cans creates a lovely atmosphere for evenings.
Tips: Ensure the candles are secure within the cans to prevent tipping over. Choose LED candles for a safer option, especially if you have kids or pets.
Ingredients List: Coffee cans, candles (or LED candles), spray paint, decorative embellishments (twine, lace).
Step-by-Step Instructions:
1. Clean and remove any labels from the coffee cans.
2. Use a hammer and nail to punch holes in desired patterns.
3. Paint the outside of the cans if desired and let dry.
4. Place candles securely inside the cans.
5. Light them up for a cozy atmosphere.
Frequently Asked Questions:
– Can I use real candles? Yes, but make sure the cans are non-flammable and stable.
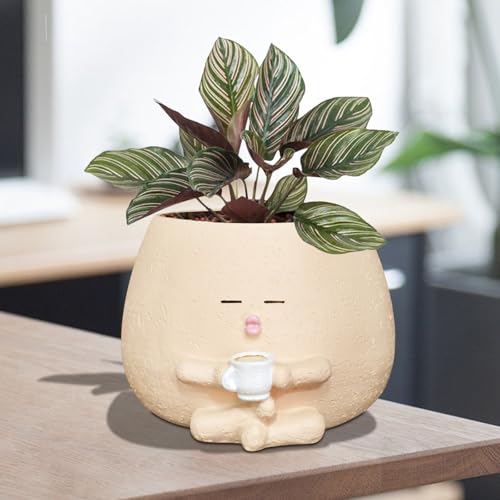
Unique Planter with Coffee Cup: Crafted from high-quality resin, they can be used both indoors and outdoors without cracking or fading due to sun or rain, ensuring enduring beauty in various environments, make your home or garden full of life.

Smiley Face Planter Pot: Experience the joy of gardening with our unique coffee rocking chair planter! Crafted from high-quality resin, this adorable planter sits atop a retro rocking chair, bringing a leisure touch to your patio, room, tabletop, or garden.

5. Playful Pencil Holders

Brighten up your workspace with colorful coffee can pencil holders that add a splash of creativity to your desk.
Painting the cans in bright hues and patterns can elevate your organizational game while keeping your stationery in check. This DIY project is perfect for kids’ rooms, home offices, or crafting corners, making organization fun and stylish.
Why it works: It’s a simple and effective way to declutter your desk while showcasing your personality.
Tips: Use a clear coat after painting to protect the design and extend its life. You can also label each can for different stationery items.
Ingredients List: Clean coffee cans, acrylic paint, paintbrushes, clear sealant.
Step-by-Step Instructions:
1. Clean and dry the coffee cans thoroughly.
2. Paint the cans in your favorite colors and designs.
3. Allow the paint to dry before applying a clear sealant.
4. Organize your pencils, pens, and other items inside.
5. Place them on your desk for an instant style upgrade.
Frequently Asked Questions:
– Can I use them for other items? Absolutely! They’re great for holding brushes, scissors, or any small items.

Complete 3-Pot Set: Includes 3 planters (4.7" diameter) + 1 drip tray (13.8" length) - everything you need in one package
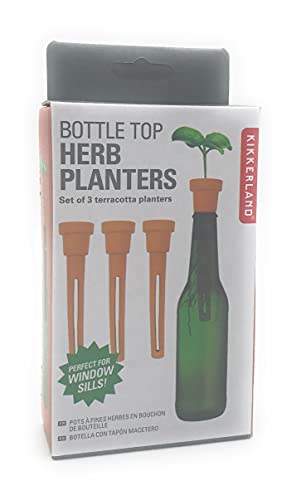
Fill with soil seeds|Growing herbs was never easier|Set of 3 terracotta planters|Perfect for window sills|Product: dia. 3 x 15 cm

Package include: available in 10 styles, size: around 2.5"*2.7"*2.7", opening diameter: around 1.6", packed in fit box to arrive at your hands securely.(Plants not included)
6. Garden Tool Storage

Keep your gardening tools organized and easily accessible with upcycled coffee can storage.
Attach several painted cans to a wooden board or directly onto a wall in your gardening shed or potting area. Each can can hold different tools like trowels, pruners, and gloves, turning your gardening space into a functional work of art.
Why it works: It maximizes vertical space and keeps everything you need within arm’s reach while adding a decorative element to your gardening area.
Tips: Label each can for easy identification. Secure them well to prevent any falls.
Ingredients List: Coffee cans, wood board or wall brackets, screws, paint.
Step-by-Step Instructions:
1. Clean the coffee cans and paint them as desired.
2. Choose a sturdy board or directly mark where to attach cans on the wall.
3. Screw the cans onto the board or wall securely.
4. Fill them with tools and accessories.
5. Enjoy your organized gardening space!
Frequently Asked Questions:
– Will it rust if I use metal cans outside? Not if properly painted and sealed!

Drain Holes Design -- Window planter box design with many small drain holes,prevent excessive watering, maintain soil drainage and ventilation.

Indoor Herb Garden Planter with Tray - Add greenery to your home with this vintage metal windowsill planter. Herb planters for indoor plants with a farmhouse touch. Place the indoor herb planter on your kitchen counter or display the small herb planter as an apartment window planter.

Dimensions: Set of three herb pots and tray. Each herb box is 4” W x 4.5” H. Tray: 12” L x 4.5” W x 1.2” H, great size for planting herbs, vegetables and cactus etc.
7. Vintage Planter Collection

Create a stunning display with a collection of vintage-styled coffee can planters.
These cans can be painted in muted colors, distressed for that rustic charm, and filled with a variety of plants for a cohesive look. Arrange them on a shelf, fireplace mantle, or even in your garden for a nostalgic touch that sparks conversation.
Why it works: The combination of plants and vintage aesthetics adds character to any room or outdoor area.
Tips: Vary the heights and designs of the cans for a more dynamic display. Consider using trailing plants for added interest.
Ingredients List: Coffee cans, chalk paint, plants, potting soil.
Step-by-Step Instructions:
1. Clean and dry the coffee cans.
2. Apply chalk paint and distress as desired.
3. Fill with potting soil and plants.
4. Arrange on shelves or in your garden.
5. Enjoy your vintage-inspired greenery!
Frequently Asked Questions:
– Can I leave it outside? Yes, as long as they are well-painted and sealed.
Did you know that a vintage coffee can planter collection can boost room charm by up to 50%? Painted cans in muted tones and varying heights create a focal point that sparks conversation and makes any shelf feel nostalgic.

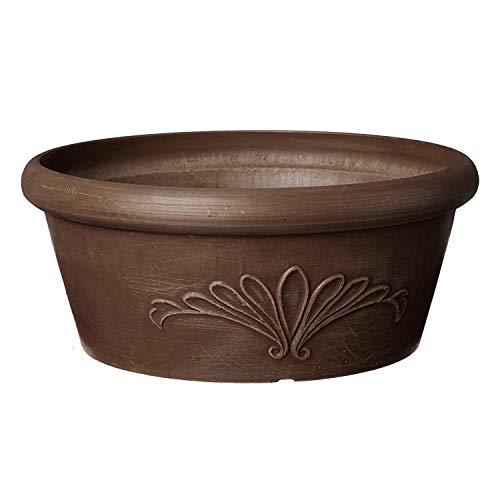
Measures approximately 10.25"W x 11.25"D x 3.25"H

Measures approximately 7 1/2" x 6 1/8" x 4 1/2"
Made with Recycled Materials: A blend of recycled plastic, stone powder, and wood dust, PSW Pots are eye-catching and long-lasting for mindful gardening.
8. Colorful Snack Containers

Turn your coffee cans into colorful snack containers that brighten up your kitchen while keeping things tidy.
By painting the cans in fun colors or patterns, you can organize your snacks like nuts, chips, and dried fruits in style. This project is perfect for families with kids, making snack time exciting and visually appealing.
Why it works: Colorful containers make it easy to identify snacks and keep your pantry looking organized.
Tips: Use a clear label maker for labeling snacks if you want extra clarity. Choose food-safe paint if they’re going to be in direct contact with food.
Ingredients List: Coffee cans, food-safe paint, clear labels, snacks.
Step-by-Step Instructions:
1. Clean the coffee cans.
2. Paint them in fun colors or patterns and allow to dry.
3. Fill each can with your favorite snacks.
4. Label if desired.
5. Store in your pantry for a colorful, organized look!
Frequently Asked Questions:
– Are the cans safe for food use? Yes, if painted with food-safe paint.

Compact Gift Option: At 2.5 inches tall and 3.15 inches wide, with a 2.0-inch internal depth, this planter is sized for small plants and easy gifting. A suitable choice for coworkers, friends, or family who enjoy greenery.

Smiley Face Planter Pot: Experience the joy of gardening with our unique coffee rocking chair planter! Crafted from high-quality resin, this adorable planter sits atop a retro rocking chair, bringing a leisure touch to your patio, room, tabletop, or garden.

Size: 3.5″(L) x 2.3″(W) x 7″(H). Head planter can be used for small sized plants such as vines, aloe vera, succulents and more.
9. Seasonal Decor Planters

Create seasonal decor planters using coffee cans that reflect the essence of each holiday.
From painted pumpkins for Halloween to pastel colors for Easter, these planters can enhance your home’s festive spirit. Fill them with seasonal flowers or decorations that fit the theme, making your home a cozy and inviting place.
Why it works: This project allows for creativity while celebrating different seasons and holidays wholeheartedly.
Tips: Change the decorations regularly to stay in tune with the season. Utilize leaves, twigs, or flowers that represent the season of choice.
Ingredients List: Coffee cans, seasonal paint colors, decorations (flowers, leaves).
Step-by-Step Instructions:
1. Clean and dry the coffee cans.
2. Paint them in seasonal colors and let dry completely.
3. Fill with flowers or seasonal decorations.
4. Display them prominently in your home.
5. Change decorations according to the season.
Frequently Asked Questions:
– How often can I switch the decor? Whenever the season changes!
Seasonal decor planters turn ordinary spaces into festive nooks—just swap colors and accents in your coffee can planter for Halloween, Easter, or any holiday. Add seasonal flowers or decorative touches to keep it fresh all season.

HERB PLANTER INDOOR - Create your own indoor herb garden for your windowsill or counter. These spacious square herb planters are the perfect size for your herbs and spices.
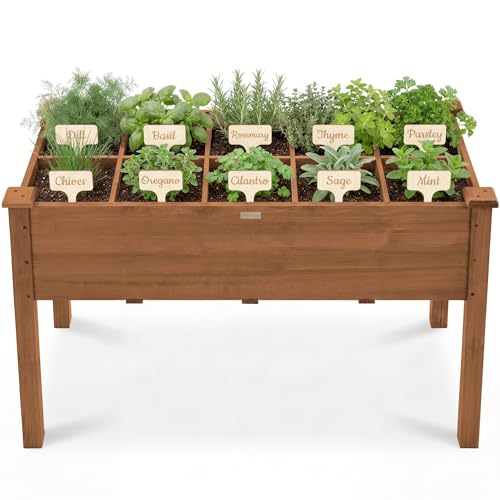
ORGANIZED 10 GRID PLANTING: Modular raised garden bed planter with 10 individual growing compartments keeps herbs vegetables flowers separated for easier crop rotation gardening includes plant markers liners ideal for patio balcony backyard herb garden

ELEGANT DESIGN: These ceramic planters for indoor plants feature a timeless look that complements any décor, making them perfect flower pots for indoor plants.
How To Choose The Right Coffee Can Planter
Choosing the perfect coffee can planter can be a fun and creative process. You want to ensure that your planter not only looks good but also suits your gardening needs. Here are some key points to consider when making your selection:
1. Size Matters
The size of your coffee can planter is crucial. If you’re planning to grow herbs or small flowers, a standard coffee can should suffice. However, if you want to grow larger plants or multiple plants together, consider using larger containers. Check the dimensions of the cans and ensure they can accommodate the root systems of the plants you choose. Aim for at least 6-8 inches in depth for most plants to thrive.
2. Material Quality
Most coffee cans are made of metal, which is sturdy but can rust over time. If you prefer a more durable option, look for cans made from stainless steel or choose to paint plastic coffee containers. Metal cans need proper drainage, so be sure to poke holes in the bottom if they don’t have any. This prevents water from pooling and helps maintain healthy plant roots.
3. Drainage Options
Good drainage is essential for healthy plants. Make sure your coffee can has holes at the bottom for excess water to escape. If your chosen can doesn’t have drainage holes, you can easily create them using a hammer and a nail. Alternatively, you could place small stones at the bottom of the can to promote drainage and prevent soil from clogging the holes.
4. Aesthetic Appeal
Your coffee can planter should look attractive in your home or garden. Consider painting or decorating the can to match your decor style. You can use spray paint, washi tape, or even decoupage with fabric or paper. Remember, the design is up to you! Get creative with colors and patterns to make your planter a standout piece.
5. Type of Plants
Different plants have different needs. If you’re choosing herbs for your kitchen, look for fast-growing varieties like basil or mint. For flowers, consider low-maintenance options like marigolds or pansies. Assess the lighting conditions of your space. Some plants prefer bright light, while others thrive in shade. Choose your plants based on how much sunlight they will receive in their new home.
6. Budget-Friendly Options
Coffee can planters are a cost-effective way to garden. Since you’re upcycling, you can save money while being environmentally friendly. If you’re feeling crafty, consider mixing different styles of cans for a unique look that doesn’t break the bank. Keep an eye out for old coffee cans at thrift stores or garage sales for an extra budget-friendly option.
Pro Tip: Before planting, it’s a good idea to rinse your coffee cans thoroughly to remove any leftover coffee residue. This prevents any unwanted odors and ensures a fresh start for your plants!
With these tips in mind, you’re well on your way to selecting the perfect coffee can planter. Get ready to enjoy your DIY home decor project while adding some greenery to your space!

Oliz indoor herb planters: Our herb planter is a great solution for creating an indoor herb garden. It is a planter set with 6 pots, 6 trays, and 6 plant labels, but it does not include plants or seeds. These planters are designed specifically for herbs and are suitable for indoor or outdoor use.

An indoor herb garden:Our herb planter is the perfect solution for creating an indoor herb garden. It is a planter set with a tray, and it does not include plants and seeds. These planters are designed specifically for herbs and are suitable for indoor or outdoor use. Made of durable metal with a glossy white finish, they are not only functional but also add a farmhouse touch of style to your space.
10. Personalized Gifts

Delight friends and family with personalized coffee can planters as unique gifts.
Fill these customized cans with flowers, succulents, or homemade treats to create a thoughtful present. You can paint the recipients’ names or add meaningful quotes to make each gift special. This idea is perfect for birthdays, housewarming parties, or any occasion where you want to show you care.
Why it works: Personalized gifts have a lasting impression, showing thoughtfulness and creativity.
Tips: Use non-toxic paint for safe gifting. Consider adding small gardening tools if you gift a plant.
Ingredients List: Coffee cans, paint, plants or treats, ribbon.
Step-by-Step Instructions:
1. Clean and dry the coffee cans.
2. Personalize with paint or labels.
3. Fill with flowers, plants, or treats.
4. Add a decorative ribbon for flair.
5. Gift it with love!
Frequently Asked Questions:
– Can I use these for edible gifts? Yes, just ensure the can is clean and safe for food!
11. Kids’ Art Projects

Encourage children’s creativity with coffee can planters they can decorate for their bedroom or playroom.
Let them paint, glue, and embellish the cans with stickers and art supplies, fostering creativity and personal expression. These fun projects not only enhance their space but also become a source of pride when they see their art come to life.
Why it works: It promotes fine motor skills and creativity in a fun and engaging way.
Tips: Use non-toxic supplies to ensure safety. Display their masterpieces in a prominent place to boost confidence.
Ingredients List: Coffee cans, paint, craft supplies (stickers, glue).
Step-by-Step Instructions:
1. Clean and dry the coffee cans.
2. Set out paint and craft supplies.
3. Let kids decorate the cans to their heart’s content.
4. Allow to dry completely.
5. Use them for plants, storage, or as art pieces.
Frequently Asked Questions:
– How can I preserve their art? Use a clear sealant to protect their designs.
12. Minimalist Desk Organizers

For a modern touch, create minimalist desk organizers using unpainted coffee cans.
Leave the cans as they are for a clean, industrial look that pairs well with contemporary decor. Use them to hold pens, paper clips, or even small potted plants for a super chic workspace.
Why it works: The natural metal appearance adds a sleek aesthetic to any workspace while keeping it organized.
Tips: Arrange multiple cans at different heights for an interesting layout. You can add labels for a more organized look.
Ingredients List: Clean coffee cans, decorative elements (labels, plants).
Step-by-Step Instructions:
1. Clean the coffee cans thoroughly.
2. Arrange them as desired on your desk.
3. Fill with your office supplies or potted plants.
4. Add labels if you want to enhance organization.
5. Enjoy your stylish workspace!
Frequently Asked Questions:
– Can I paint them later? Yes, you can always add paint or other decor later on!
13. Succulent Display

Show off your favorite succulents in stylish coffee can planters.
The unique aspect of using coffee cans is their varied sizes, which allows you to create a stunning arrangement of succulents. Use a mix of colors and types to create an eye-catching display that will thrive indoors.
Why it works: Succulents are low-maintenance and perfect for those new to gardening. Plus, coffee cans provide adequate drainage when holes are punched.
Tips: Ensure that the cans are lined with rocks at the bottom for drainage. Take care with sunlight exposure; most succulents prefer indirect light.
Ingredients List: Coffee cans, small succulents, potting soil, rocks for drainage.
Step-by-Step Instructions:
1. Clean the coffee cans and punch holes in the bottom.
2. Layer rocks at the bottom for drainage.
3. Add potting soil, then plant the succulents.
4. Water lightly and place in an appropriate spot.
5. Enjoy your stylish succulent display!
Frequently Asked Questions:
– Can I use any type of coffee can? Yes, as long as they are clean and have drainage holes.
14. Unique Wall Art

Think outside the box and use coffee cans to create unique wall art.
By arranging painted cans in a creative pattern or design, you can form eye-catching wall decorations that serve as planters simultaneously. Use a variety of sizes and colors to make the display pop and add depth to any wall space.
Why it works: This project combines art and gardening, allowing you to showcase your unique style while adding greenery to your decor.
Tips: Plan your design on paper first to get a sense of how it will look on the wall. Securely attach each can to prevent any accidents.
Ingredients List: Coffee cans, paint, wall brackets or screws, plants.
Step-by-Step Instructions:
1. Clean and paint the coffee cans in your chosen colors.
2. Sketch your design on paper to visualize the arrangement.
3. Attach the cans to the wall using brackets or screws.
4. Fill with plants or decorations.
5. Enjoy your incredible wall art!
Frequently Asked Questions:
– Will it damage my wall? If securely fastened, it won’t cause damage.
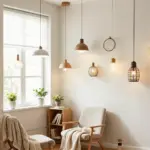
15. Fairy Lights Planters

Combine the charm of plants with the sparkle of fairy lights in coffee can planters for a magical effect.
Fill the cans with plants and string lights, creating an enchanting ambiance for evenings. Whether indoors or outdoors, these sparkling planters will surely impress your guests at any gathering.
Why it works: The combination of greenery and soft lights adds a warm, inviting atmosphere that is perfect for relaxing.
Tips: Use battery-operated lights for safety, especially indoors. Thermal paste can be used to secure lights if needed.
Ingredients List: Coffee cans, fairy lights, small plants, potting soil.
Step-by-Step Instructions:
1. Clean and dry the coffee cans thoroughly.
2. Fill with potting soil and plants as desired.
3. Carefully arrange fairy lights around the plants.
4. Secure the lights to prevent them from falling.
5. Enjoy the magical effect they create!
Frequently Asked Questions:
– Can I use these outdoors? Yes, as long as the lights are battery-operated.
16. Pet-Friendly Planters

Create pet-friendly planters using coffee cans to house safe plants for your furry companions. Fill them with non-toxic plants like spider plants, Boston ferns, or cat grass, ensuring a safe environment for your pets. Decorating the cans in bright colors enhances their appeal and adds a cheerful touch to your home.
This idea beautifully combines your love for pets with your passion for gardening, creating a space where both can thrive.
To ensure safety and success, keep these tips in mind:
– Research plant toxicity to ensure they are safe for pets.
– Arrange planters in locations where pets cannot easily topple them.
Gather these materials to create your pet-friendly planters:
– Coffee cans to serve as your planters.
– Non-toxic plants that are safe for pets.
– Potting soil to support plant growth.
This thoughtful project allows you to enjoy the beauty of plants while ensuring the safety of your beloved pets, creating a harmonious living space.
Conclusion

Repurposing coffee cans into planters not only contributes to sustainable living but also brings a unique flair to your home decor.
From vibrant herb gardens to whimsical fairy gardens, there’s a project for everyone that encourages creativity and a greener lifestyle. Not only will your home look beautiful, but you’ll also be doing your part in reducing waste. Embrace these ideas and let your gardening adventures begin!
Note: We aim to provide accurate product links, but some may occasionally expire or become unavailable. If this happens, please search directly on Amazon for the product or a suitable alternative.
This post contains Amazon affiliate links, meaning we may earn a small commission if you purchase through our links, at no extra cost to you.
Frequently Asked Questions
What is a coffee can planter and how can I make one from upcycled cans?
A coffee can planter is a decorative container crafted from an empty coffee can that houses soil and a plant. It’s a sustainable decor project that blends upcycled coffee cans with DIY home decor.
Here’s a simple way to make one: start with a clean can and remove the lid, then smooth any sharp edges.
1) drill a small drainage hole and line the inside with a shallow tray or fabric to protect surfaces.
2) apply a primer and your chosen paint or wrap for a style you love.
3) seal with a non toxic finish to protect the surface.
4) fill with potting mix, plant, and place on a protective saucer. Pro tip: choose herbs or small succulents that fit the can’s size and your space.
What materials do I need to create creative planters from coffee cans?
To turn a coffee can into a stylish coffee can planter, gather supplies for creative planters and DIY home decor: empty coffee cans or tins, non toxic primer, paint or decorative wrap, a sealant, a liner or tray, a drill or nail for drainage holes, decorative paper or fabric, twine or handles, soil, and plants.
Optional extras: chalk paint for a vintage look, stencil for lettering, or plant saucers to catch excess water. For sustainable decor, choose water-based paints and low-VOC finishes.
How can I use coffee can planters indoors for indoor gardening ideas?
Indoor coffee can planters are perfect for small spaces. Place them on sunny windowsills or a sturdy shelf to maximize light for indoor gardening ideas.
Group several cans for a living wall effect, or use them as herb jars in the kitchen. Use a shallow tray or liner to protect surfaces from moisture, and rotate plants every few weeks for even growth.
Opt for compact plants like herbs, pothos, spider plants, or succulents that tolerate indoor light levels.
Which design ideas work best for different home decor styles with coffee can planters?
Coffee can planters can match many styles with simple tweaks. For a rustic or farmhouse vibe, use chalk paint, burlap, and twine. For a minimalist look, go with solid matte colors and clean lines in neutral tones. Vintage styles shine with distressed finishes and handwritten labels, while boho rooms love bright colors and patterned fabrics. For an industrial space, pair dark metal finishes with exposed rivets. All designs keep the focus on upcycled coffee cans and sustainable decor.
How can I keep my DIY coffee can planters durable and safe around kids and pets?
Safety first. Start by removing any sharp edges or smoothing them with sandpaper. Use a liner to keep soil off metal and a waterproof sealant that is non toxic for families. Choose non toxic, water-based paints and finishes to stay within DIY home decor safety guidelines. Place planters on stable surfaces or use wall mounted shelves to prevent tipping, and choose plants that are non toxic to pets and kids when possible. Finally, clean up spills promptly to protect floors and furniture.
Related Topics
home decor
upcycled decor
DIY projects
indoor gardening
creative planters
sustainable living
budget friendly
easy crafts
coffee can planter
kitchen upcycle
eco-friendly decor
beginner friendly